Connecting Your First TrueNAS System
4 minute read.
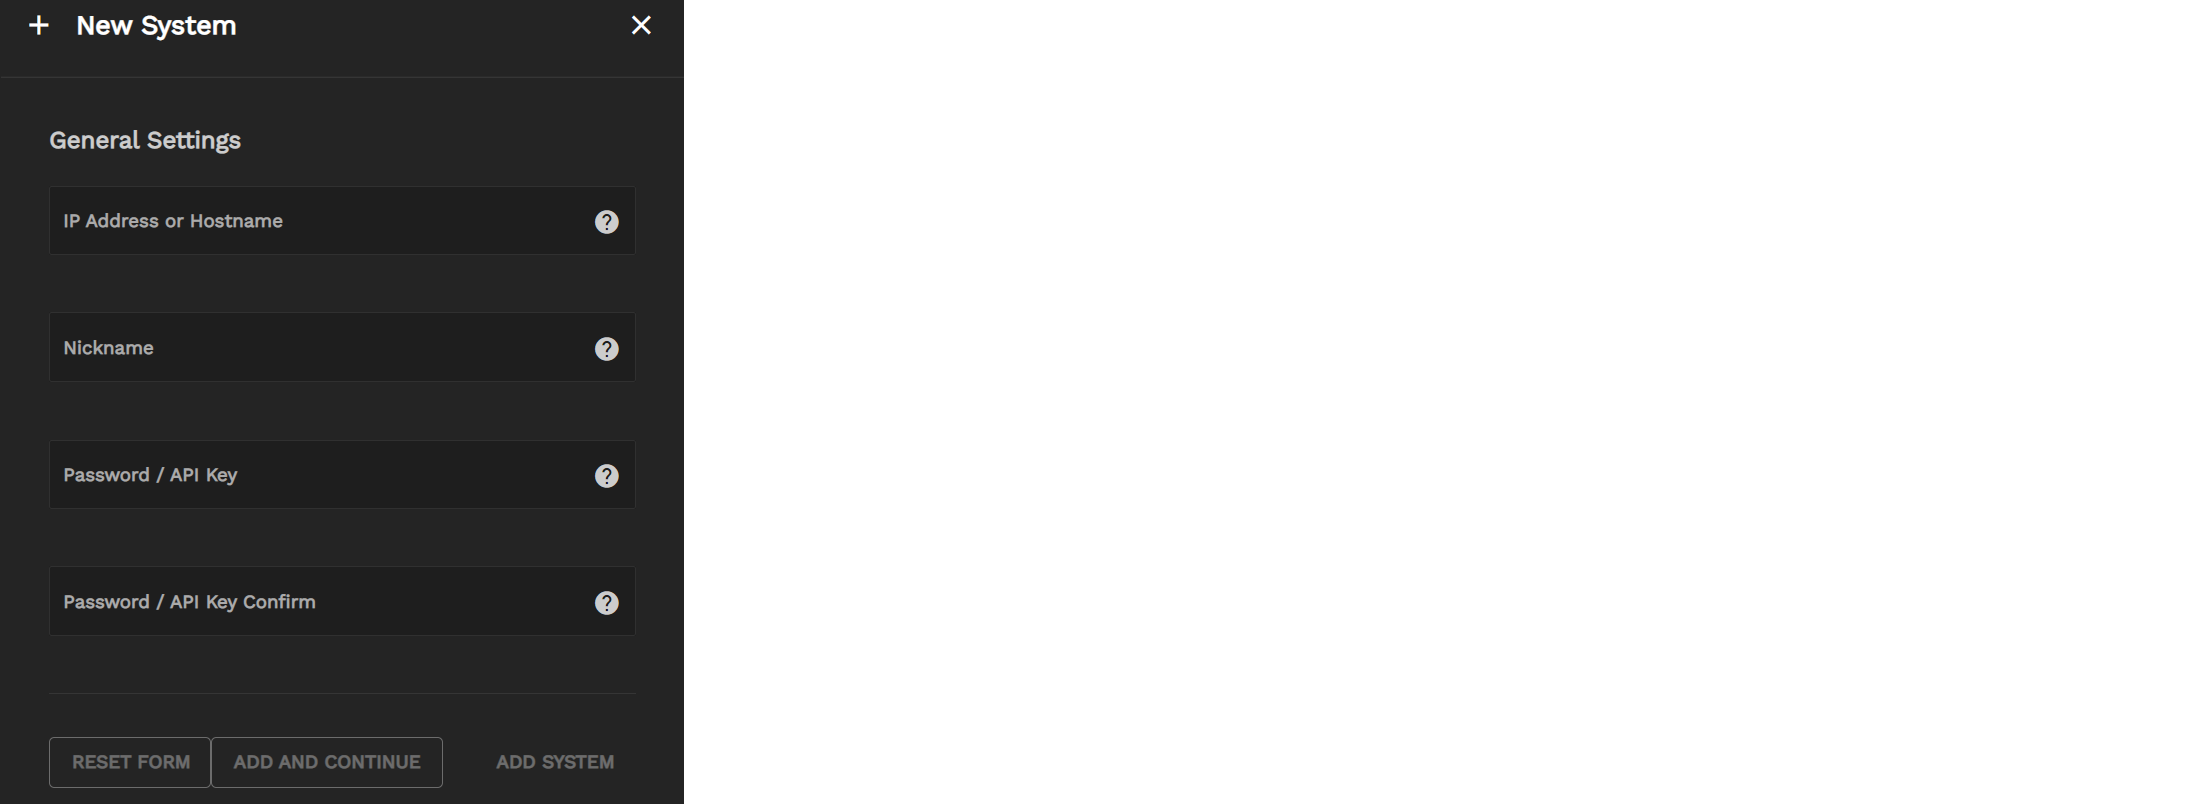
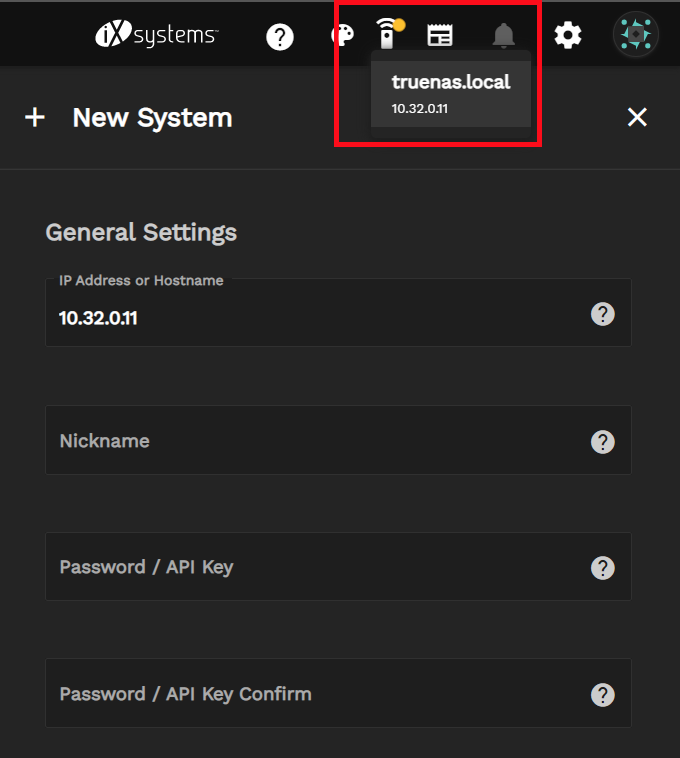
Last Modified 2022-11-14 08:09 -0500To add your first system to TrueCommand, click NEW SYSTEM on the dashboard.

Enter the system IP address or DNS host name, then enter a system nickname and password.

| Setting | Description |
|---|---|
| IP Address or Hostname | The system’s IP address or DNS host name. |
| Nickname | Required short-form identifier for this system. You cannot use system nicknames more than once. |
| Password / API Key | New password or API key. TrueCommand hides characters for security. |
| Password / API Key Confirm | Re-enter the password or API key. |
Click RESET FORM to clear the fields and reset the form if you make a mistake. Click ADD SYSTEM to add the new system. Click ADD AND CONTINUE to add this system and then continue to add more systems.
To display the list of systems in TrueCommand, click the icon and select either System Inventory or Systems.
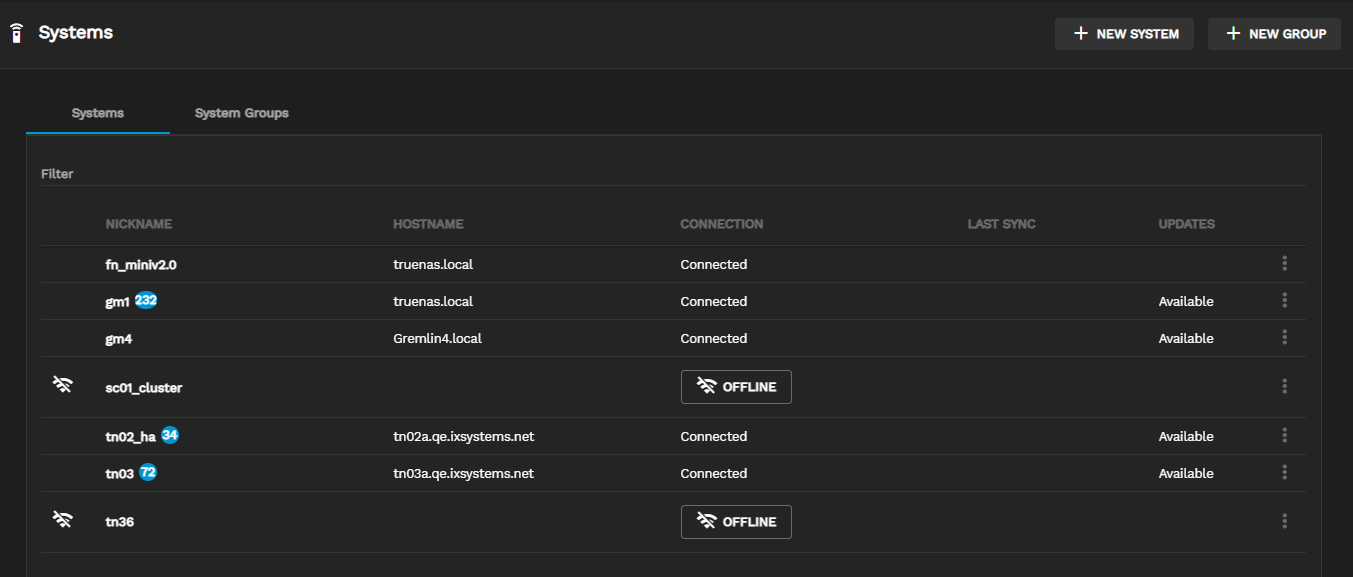
The Systems menu has two tabs: Systems and System Groups. These tabs contain all the options to connect and organize systems in TrueCommand. TrueCommand lists all added systems and their connection statuses in the Systems tab.
To connect a new system, click + NEW SYSTEM. Enter the system IP address or DNS host name, then enter a system nickname and password. Click RESET FORM to clear the fields and reset the form if you make a mistake.
Clicking the more details icon allows you to enter new connection details for a system in the list.

Misconfigured systems (such as one created with an incorrect password) appear offline on both the TrueCommand Dashboard and Systems list.
To enter new connection details for a system in the list, click the more details icon . Click RESET FORM to clear the fields and reset the form if you make a mistake. To remove a system from TrueCommand monitoring, click Delete.
TrueCommand administrators can organize systems into collections called groups. Grouping systems enables efficient system permissions and reporting management.
Open the System Groups tab to view the list of created groups and the systems they contain. Create a group by clicking Configure settings > Systems > + NEW GROUP. Enter a name for the new group and click ADD SYSTEM to add a system to the group. After you add all the desired systems to the group, click SAVE GROUP.

Editing a group allows you to update the group name or change which systems are members of that group.
To delete a system group, click Delete delete. Click Yes to confirm the deletion.


