Basic VM Management
4 minute read.
Last Modified 2022-12-05 14:46 -0500This feature is generally available in TrueNAS CORE and supported by the TrueNAS Community. iXsystems customers with TrueNAS Enterprise hardware and an iXsystems Support contract can contact Support about accessing these features.
A Virtual Machine (VM) is an environment on a host computer that can be used as if it were a separate physical computer. VMs can be used to run multiple operating systems simultaneously on a single computer. Operating systems running inside a VM see emulated virtual hardware rather than the actual hardware of the host computer. This provides more isolation than Jails, but a VM consumes more system resources.
Before creating the virtual machine, you need an installer
To create a new VM, go to Virtual Machines and click Add. Configure each category of the VM according to your specifications, starting with the Operating System.

For information on the Wizard screens and settings see Virtual Machines
Additional notes:
- The Grub boot method is not supported by Windows as the guest operating systems.
- Compare the recommended specifications for your guest operating system with the available host system resources when allocating values in Virtual CPUs, Cores, Threads, and Memory Size.
- Avoid allocating too much memory to a VM. Activating a VM that has all available memory allocated to it can slow the host system or prevent other VMs from starting.
- AHCI is the recommended disk type for Windows VMs.
- VirtIO as network interface requires that the chosen guest operating system support VirtIO paravirtualized network drivers.
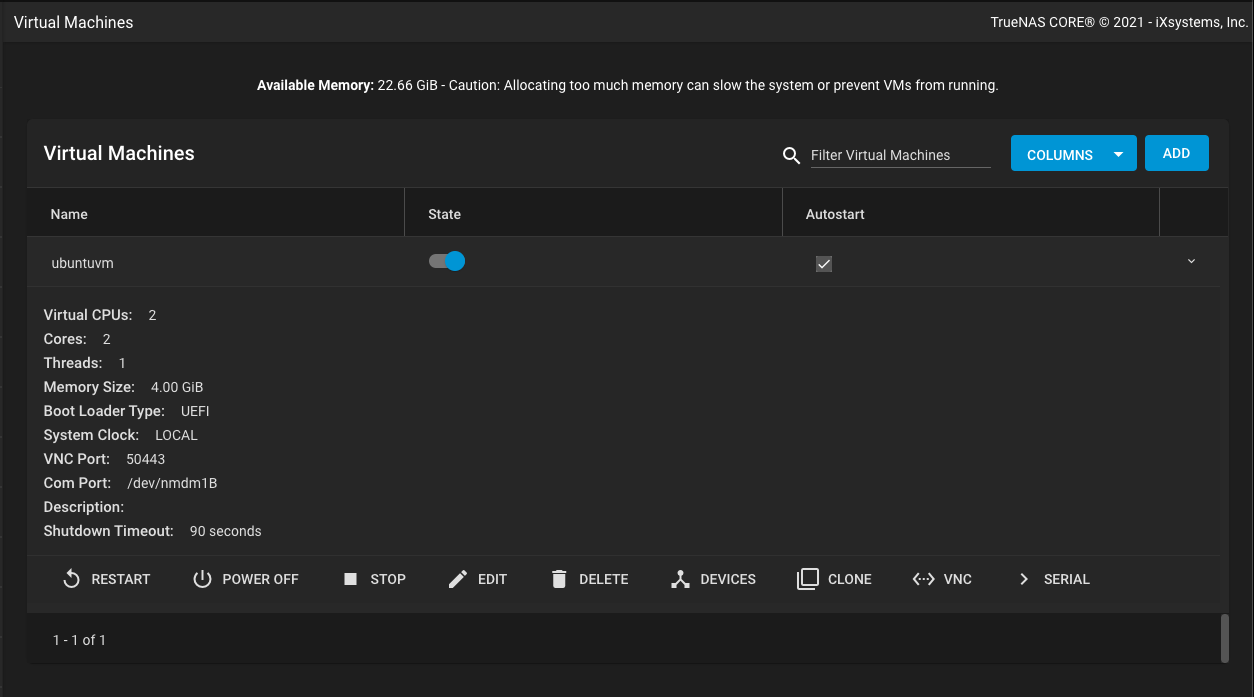
After creating the VM, you can add and remove virtual devices by expanding the VM entry in Virtual Machines and clicking the device_hub Devices option.

Device notes:
- The virtual machine attempts to boot from devices according to the the Device Order setting, starting with 1000, then ascending.
- The CD-ROM device option allows booting a VM from a CD-ROM image like an installation CD. The CD image must be available in the system storage.
After creating the VM and configuring any devices for it, manage the VM by expanding its entry in Virtual Machines.

Options for settings_ethernet or keyboard_arrow_right connections are available after activating the VM. If the VNC connection screen appears garbled, try adjusting the VNC device resolution.
Using the State toggle or clicking stop follows a standard shut down procedure to do a clean shut down the running VM. Clicking power_settings_new immediately halts and deactivates the VM, similar to unplugging a computer.
If the VM you created has no guest OS installed, the VM State toggle and stop button might not function as expected. These buttons try to send an ACPI power-down command to the VM operating system, but since no OS is installed, the commands time out. Use the POWER OFF button instead.

