Configuring Failover (HA)
3 minute read.
Last Modified 2022-09-21 13:10 -0400Warning: To avoid the potential for data loss, contact iXsystems before replacing a controller or upgrading to High Availability.
Power on both system controllers and log in to the web interface for one of them. For first-time logins, TrueNAS prompts you to upload the TrueNAS Enterprise License. Otherwise, go to System > Support and update the license.

Paste the HA license received from iXsystems and save it. The license contains the serial numbers for both units in the chassis. Activating an HA license adds the System > Failover screen and modifies fields throughout the UI so that you can configure hostnames and IP addresses for both controllers.
After configuring HA, an icon displays when HA is active or unavailable. When the system administrator disables HA, the status icon changes to show HA is unavailable. If the standby TrueNAS controller is not available because it is powered off, still starting up, disconnected from the network, or does not have failover configured, the status icon changes to show HA is unavailable. HA also becomes unavailable if the controllers have different numbers of disks.
If both TrueNAS controllers reboot simultaneously, you must enter the passphrase for an encrypted pool at the web interface login screen.
To ensure system networking is configured for HA, go to Network > Global Configuration.

You can set the host names for both controllers and a virtual host name that reaches whichever controller is currently active.
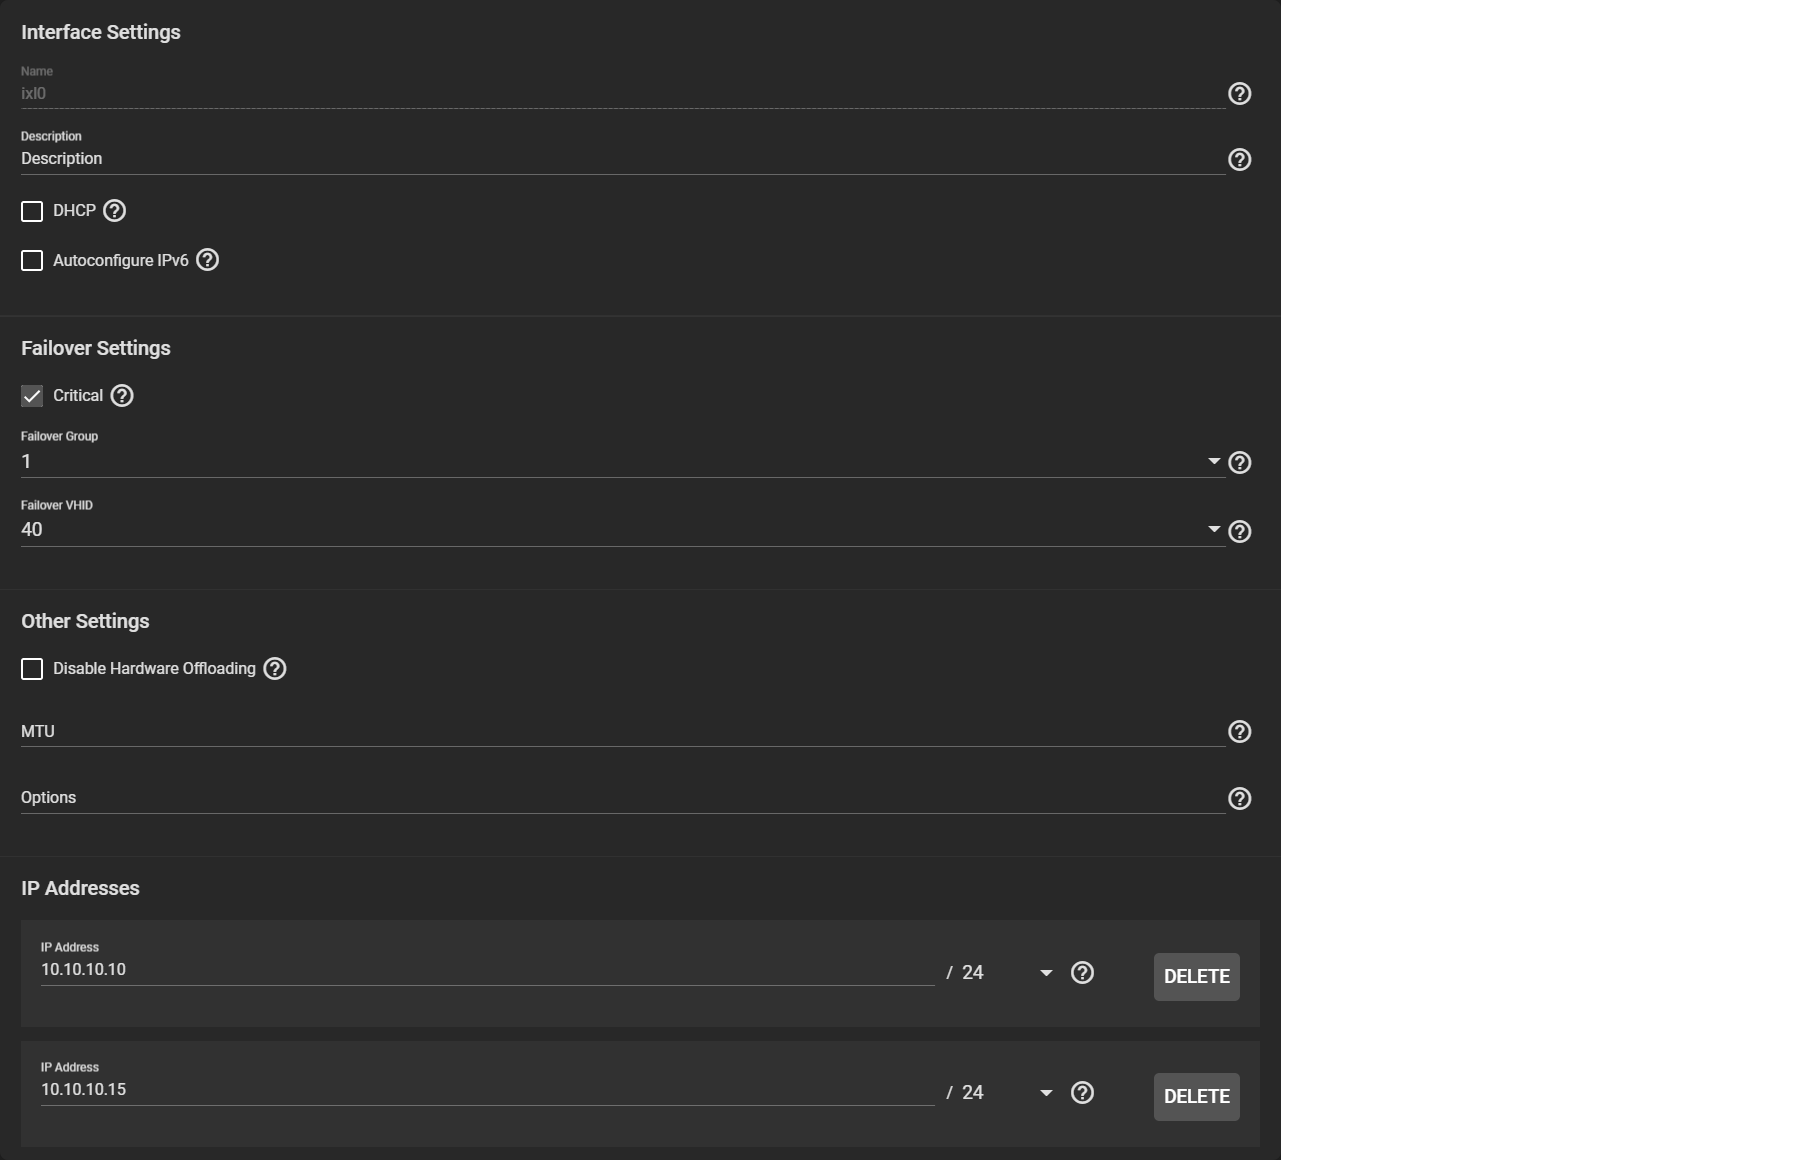
Next, go to Network > Interfaces and edit the primary interface.
Editing interfaces is disabled when HA is active. To disable HA, go to System > Failover and disable failover. Edit the interface, then reactivate failover immediately. TrueNAS automatically synchronizes the configuration changes to the standby controller

You can designate the interface as critical for failover and combine multiple interfaces into a failover group. There are also options to configure IP addresses for each controller and a virtual IP address with virtual host ID for administrative access.
After the network configuration is complete, log out and log back in using the virtual IP address. You can now configure pools and shares as usual, and configuration automatically synchronizes between the active and standby TrueNAS controllers.
All subsequent logins should use the virtual IP address. Connecting directly to the standby TrueNAS controller with a browser does not allow web interface logins.
When troubleshooting HA networking, the ifconfig command adds two additional fields to the output to help with failover troubleshooting: CriticalGroup and Interlink.
To make general changes to the Failover settings, go to System > Failover

You can manually disable failover on this screen.
Make sure to set one of the controllers as the default so that it becomes active when both boot simultaneously. Booting an HA pair with failover disabled causes both TrueNAS controllers to come up in standby mode. In this situation, the web interface shows an option to force a TrueNAS controller to activate.
To have the system wait to failover during a network timeout, replace 0 with a new number of seconds.
Do not sync the TrueNAS configuration unless directed by an iXsystems Support Engineer! TrueNAS automatically synchronizes the system configuration. The manual sync options are only for dangerous or high-risk troubleshooting situations.

