Get a Quote     (408) 943-4100               TrueNAS Discord      VendOp_Icon_15x15px   Commercial Support Toggle between Light and Dark mode

Clusters Screen

  9 minute read.

Last Modified 2022-12-09 15:05 -0500

TrueCommand 2.2, in conjunction with TrueNAS SCALE, can create and manage clusters, cluster volumes, and cluster volume shares.

Clusters are an experimental feature in TrueCommand 2.2. Before using such features, please back up all your data. Do not rely on this for critical data.

Clusters

The Clusters screen contains all options related to the cluster feature. To see this screen, log in to TrueCommand and click the Clusters icon in the upper left.

ClustersScreen

If you have not created a cluster, there is a single option on this screen:

Setting Description
CREATE CLUSTER Click button to open the form to create a new cluster.

Create Cluster

The cluster creation options split into two pages: Systems and Confirmation.

Systems

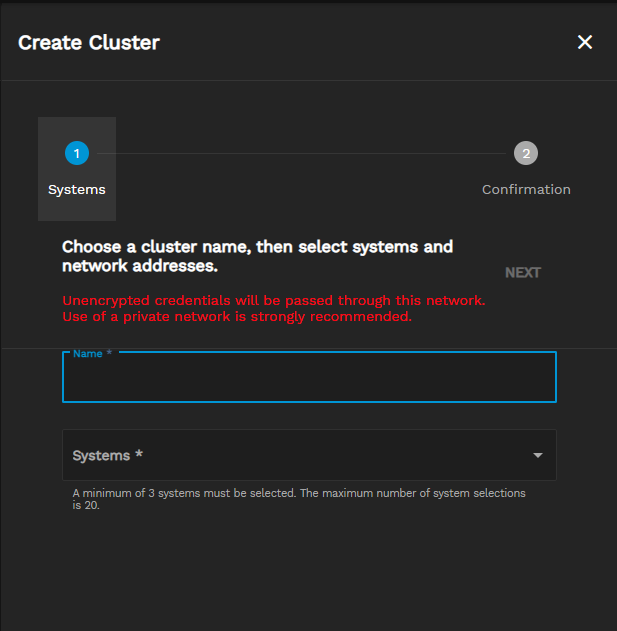
The initial form has two fields:

CreateClusterSystems

Setting Description
Name Enter a string to identify the cluster.
Systems Dropdown list shows all connected TrueNAS SCALE systems available for this cluster. Clusters can consist of between 3 and 20 individual SCALE systems.
Next Click button to advance the form to the next screen.

Making selections in the Systems field adds more options.
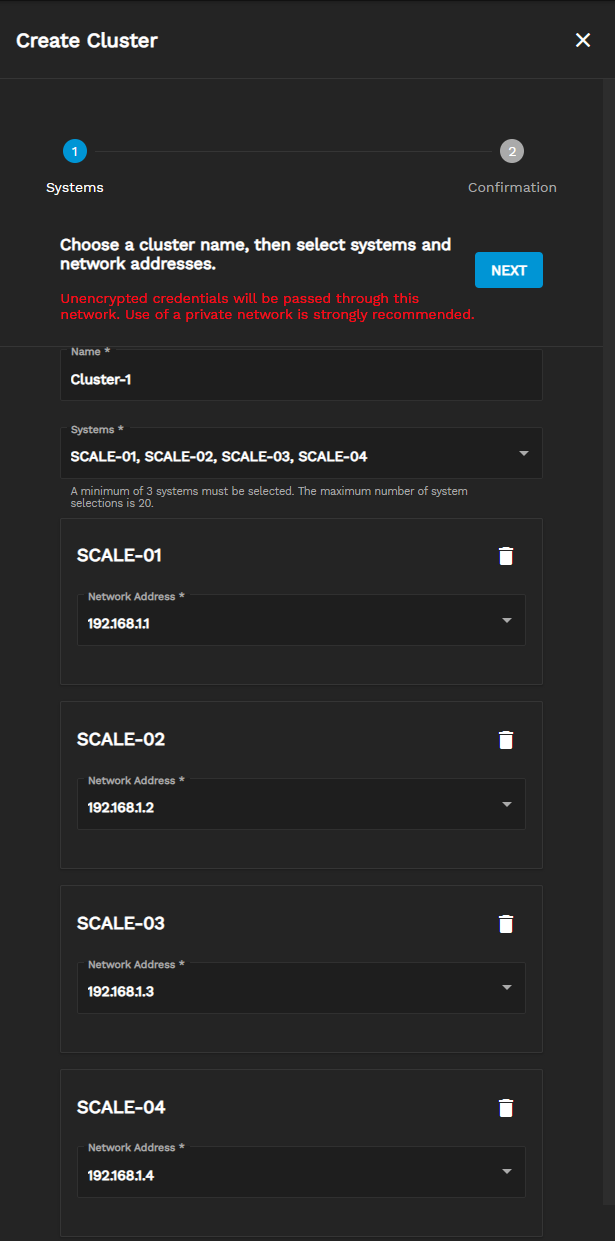
CreateClusterSystemsNetwork

Setting Description
Delete Clicking the Delete icon removes the system from the cluster.
Network Address Dropdown list shows available IP addresses to use for cluster traffic. Using private dedicated network addresses is recommended.

Confirmation

There is a single option on this page.
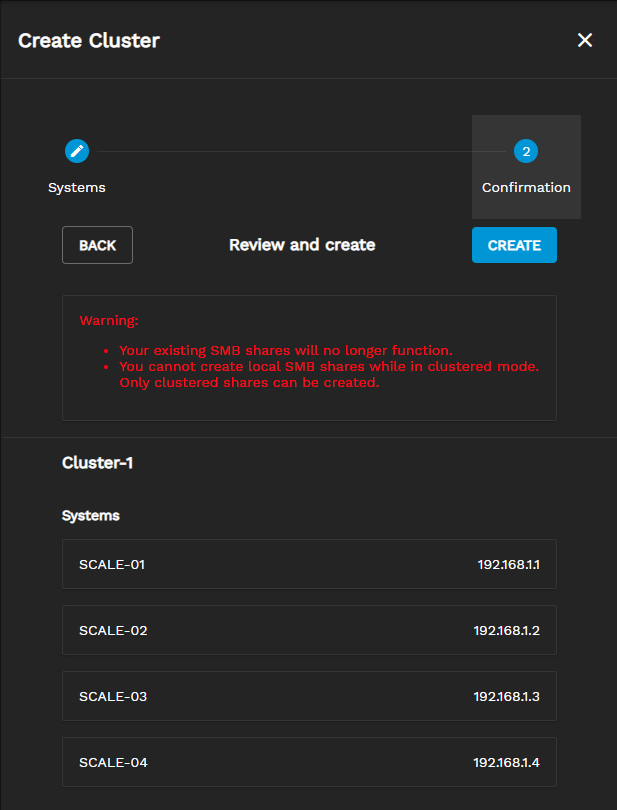
CreateClusterReview

Setting Description
CREATE Click button to begin the creation process for a cluster. This restricts the SMB functionality on the SCALE systems.

Configure Cluster

Successfully creating a cluster adds a cluster widget to the Clusters screen and opens options to configure the new cluster. These options split into three screens: SMB Network, Active Directory, and Confirmation.

SMB Network

The SMB Network page has options and fields added for each SCALE system in the cluster.
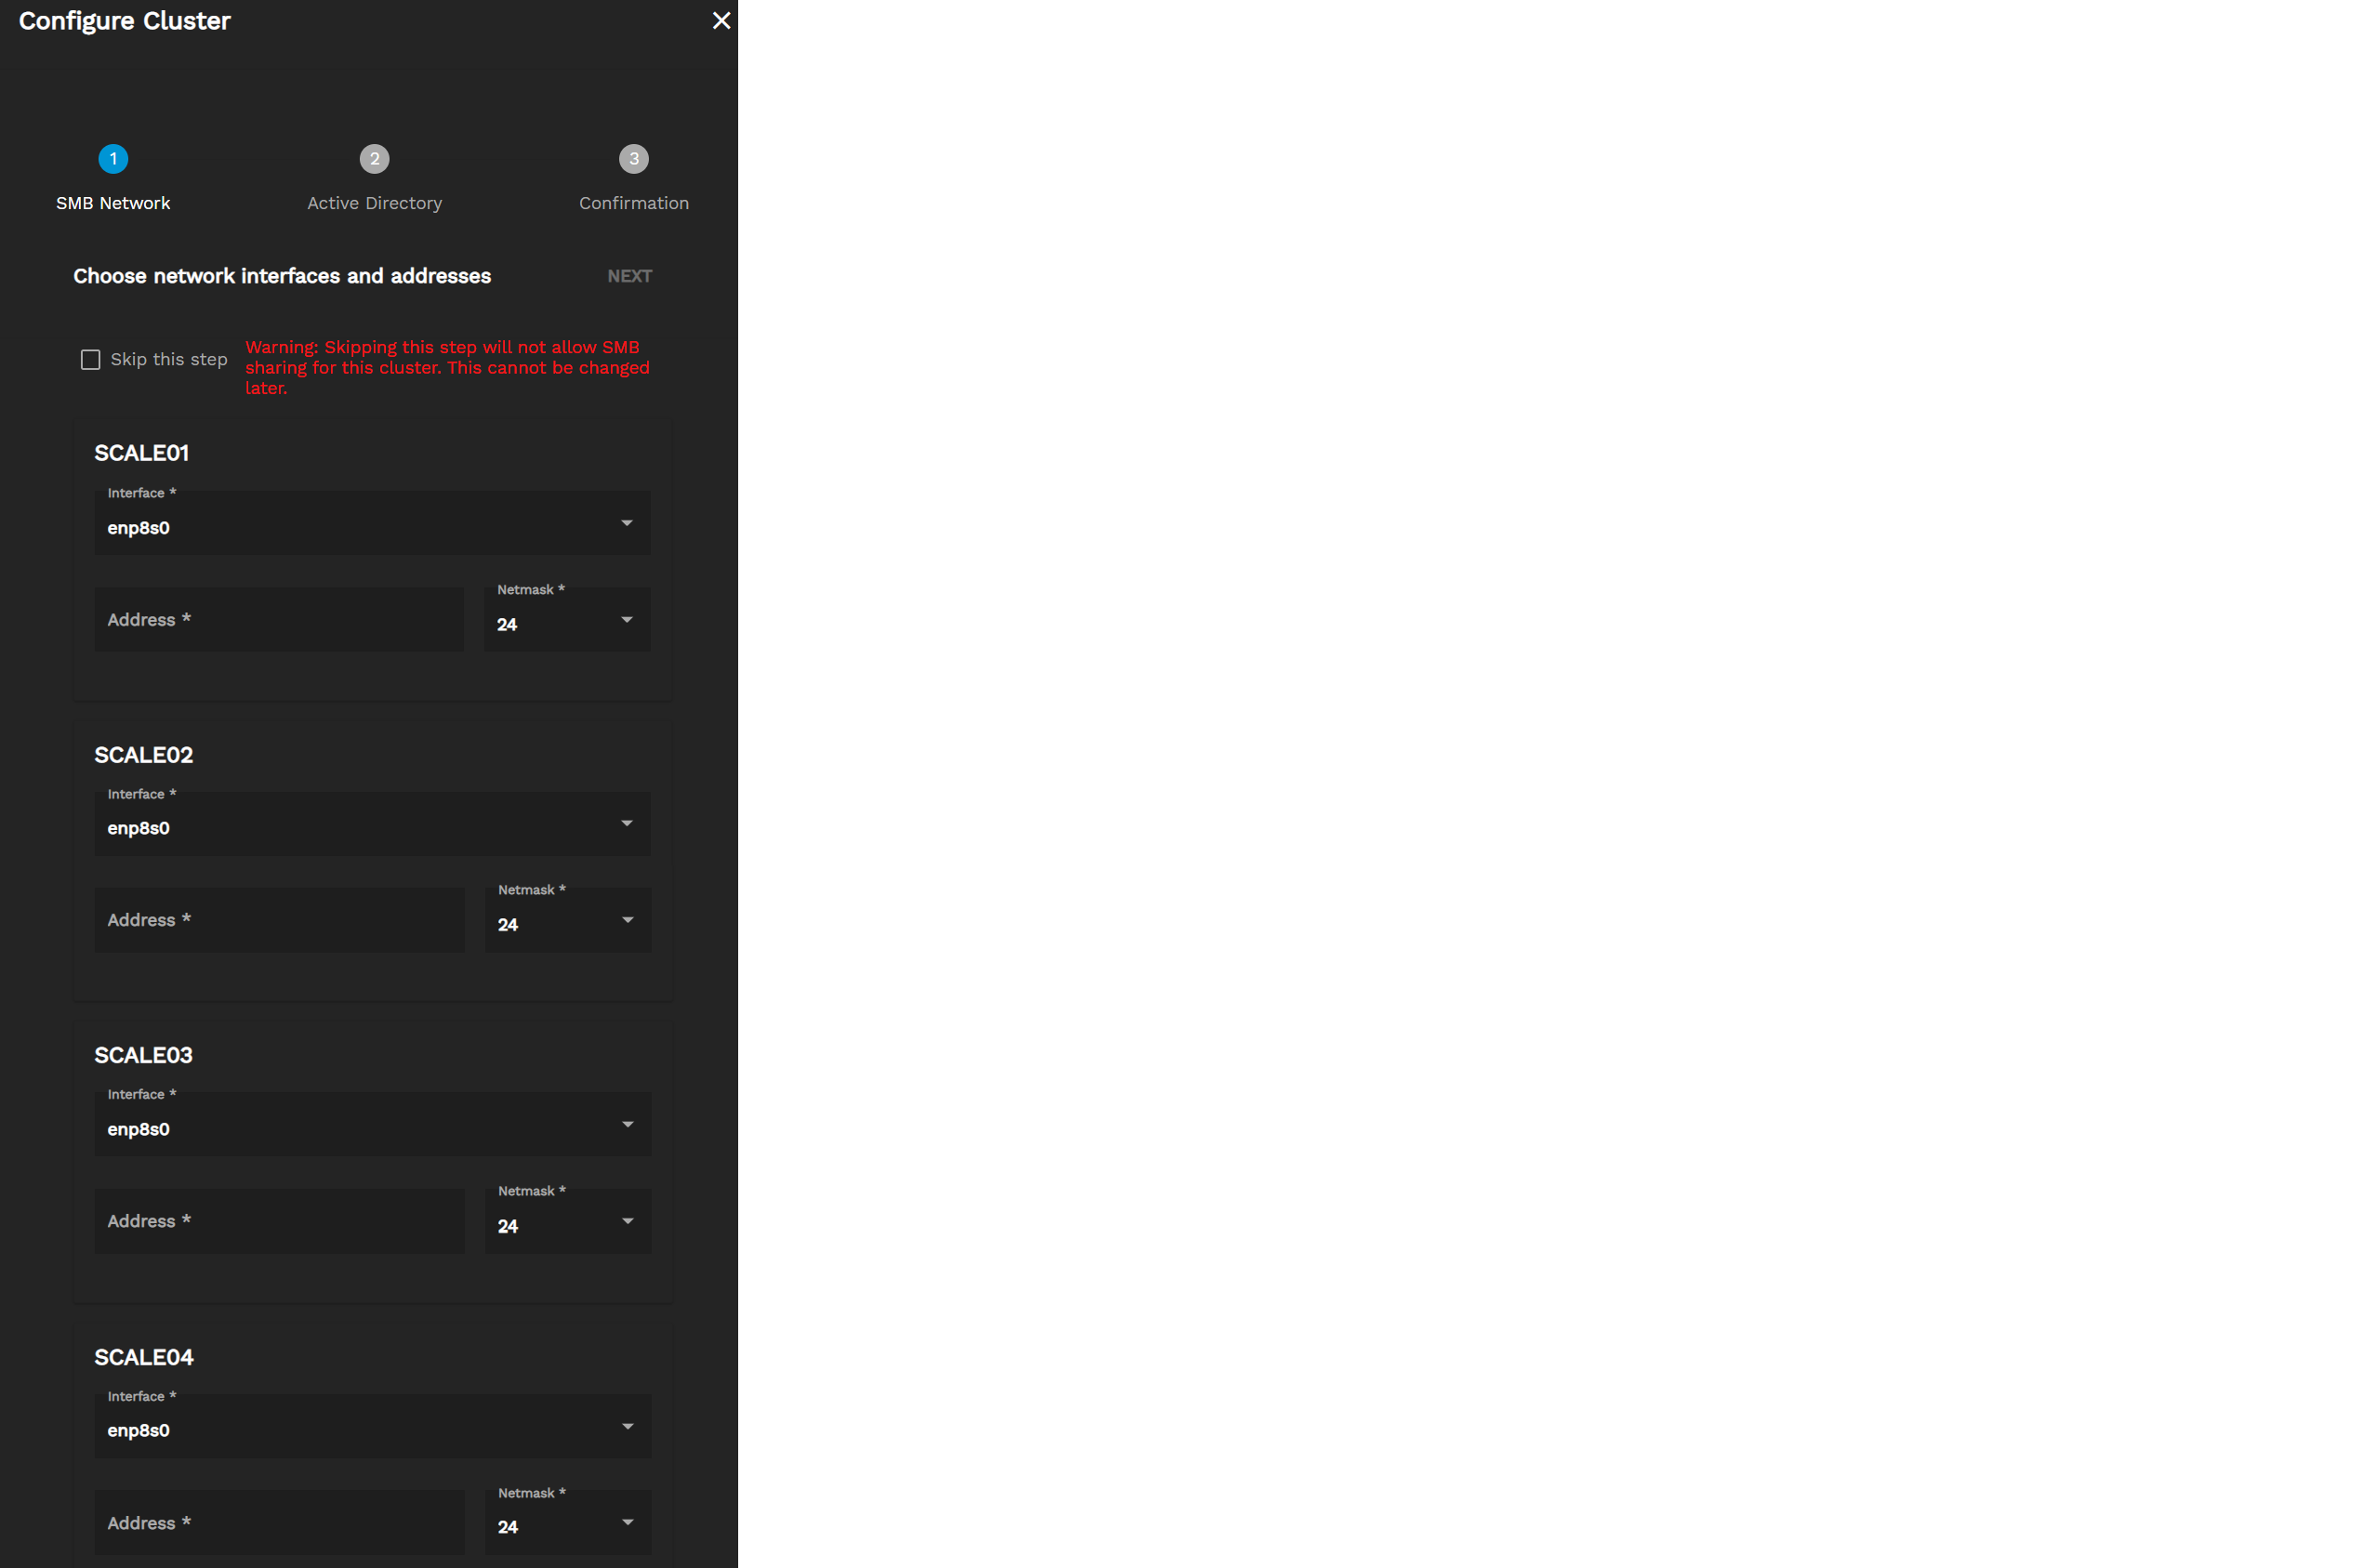
ConfigureClusterSMBNetwork

Setting Description
NEXT Click button to continue to the next page.
Skip this step Select checkbox to finalize the cluster configuration without registering a network to use for SMB sharing. Selecting this permanently removes the ability to share data stored in this cluster.
Interface Dropdown list shows SCALE system network interface to use for SMB traffic. For best functionality, choose an interface that can communicate between the individual SCALE systems, TrueCommand environment, Active Directory, and client systems that need to access data shared from this cluster.
Address Dropdown list shows IP address used for clients to access the SCALE system.
Netmask Dropdown list shows netmask for the IP address.

Active Directory

The options on this page let you establish a connection between an Active Directory environment, SCALE systems, and TrueCommand.
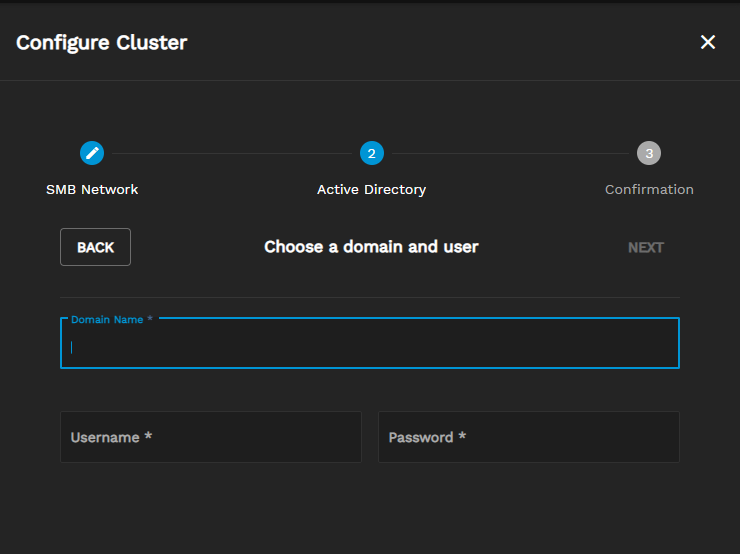
ConfigureClusterActiveDirectory

Setting Description
NEXT Click button to continue to the next page.
Domain Name Enter a string for the Microsoft Active Directory (AD) environment host name. Establishes a connection between the entered host and TrueCommand.
Username Enter a string for the account credential used to establish the AD connection. Requires an account with administrative access.
Password Enter a string for the account credential used to establish the AD connection. Requires an account with administrative access.

Confirmation

All chosen settings display here for you to confirm before being applied to the cluster.
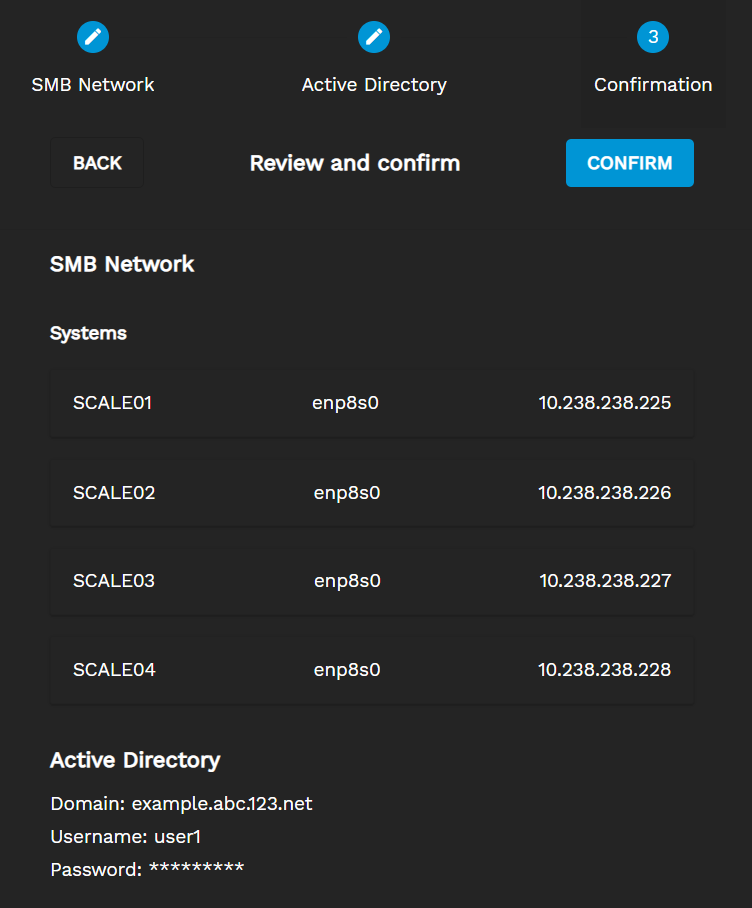
ConfigureClusterReview

Setting Description
CONFIRM Click the button to save the configuration settings and permanently apply them to the cluster.

Manage Clusters

Clusters display as standalone cards.
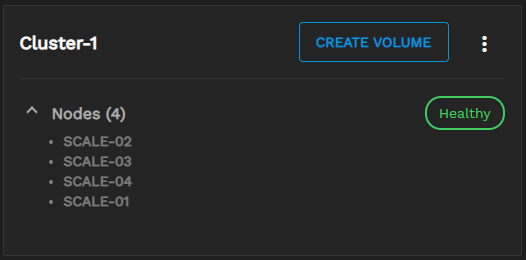
ClusterCard

The card displays the name of the cluster, the current state, and the names of the systems used in the cluster (Nodes). Click the Options icon to see management options for the cluster. Click the ^ or v icons to minimize or expand (respectively) the list of nodes.

Setting Description
CREATE VOLUME Click the button to open the form to create new clustered storage.
Rename Click the button to open the form to enter a new Cluster Name.
Delete Click the button to disconnect each SCALE system from the cluster and remove the card from TrueCommand. Shows a confirmation popup when clicked.

Cluster Volumes

Clicking CREATE VOLUME for an existing cluster shows options to configure new clustered storage. The options split into two pages: Details and Confirmation.
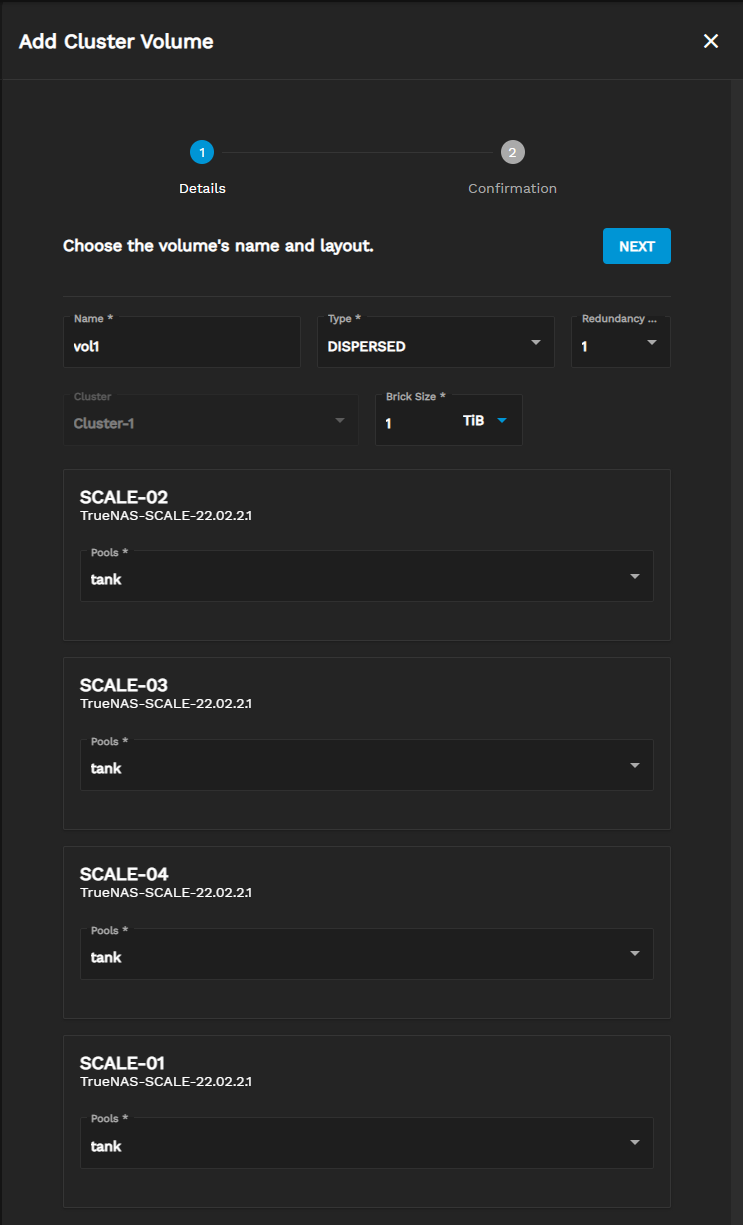
Details

ClustersCreateVolumeDetails

Setting Description
NEXT Click the button to continue to the next page.
Name Enter a string as an identifying label for this cluster volume.
Type Dropdown list. Select layout and behavior for the volume.
Cluster String (disabled). Shows the cluster that controls the new volume.
Brick Size Enter integer and select from dropdown list to define storage capacity. Accepts numeric values and selecting units of size.
Pools Dropdown list. Select storage pool on the individual SCALE system that provides capacity for the cluster volume.

The Type field has four options:

  • Replicated - Replicate files across bricks in the volume. You can use replicated volumes in environments where high availability and high reliability are critical.
  • Distributed Replicated - Distribute files across replicated bricks in the volume. You can use distributed replicated volumes in environments where you need to scale storage and high reliability is critical. Distributed replicated volumes also offer improved read performance in most environments. Requires setting an additional Replica Count
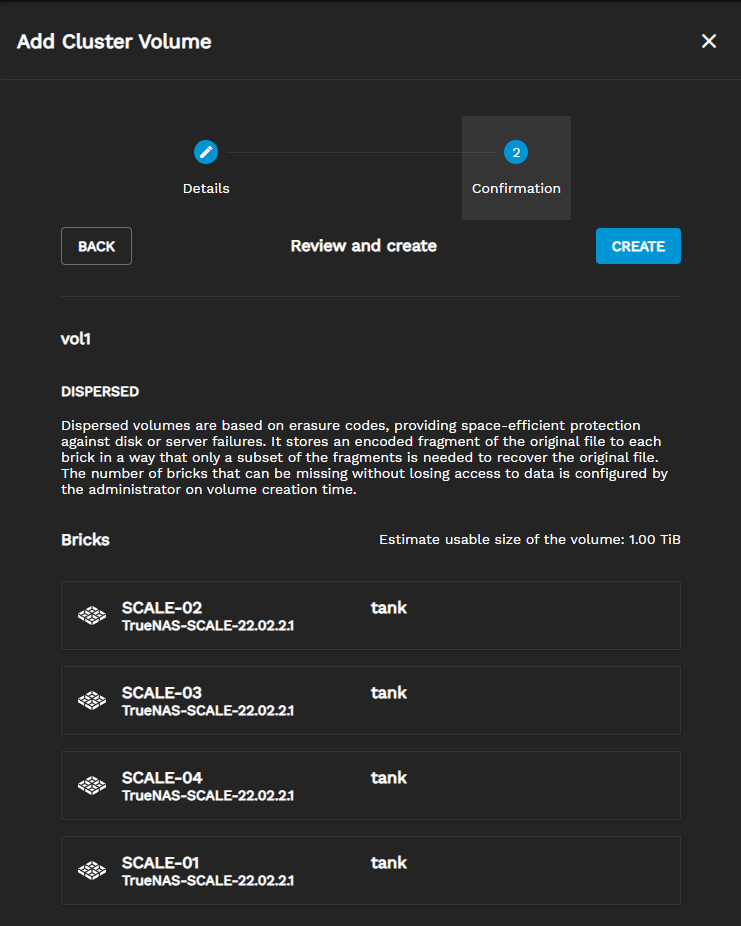
  • Dispersed - Dispersed volumes are based on erasure codes, providing space-efficient protection against disk or server failures. It stores an encoded fragment of the original file in each brick so that only a subset of the fragments are needed to recover the original file. When creating the volume, the administrator configures the number of bricks that can be missing without losing access to data. Choosing Dispersed requires setting an additional Redundancy Count.

Confirmation

The Confirmation page shows details for the chosen volume Type and storage makeup of the new clustered volume.
ClustersCreateVolumeConfirmation

Setting Description
BACK Click button to go to the previous configuration page.
CREATE Click button to save the configuration and build the clustered volume on each system in the cluster.

Managing Cluster Volumes

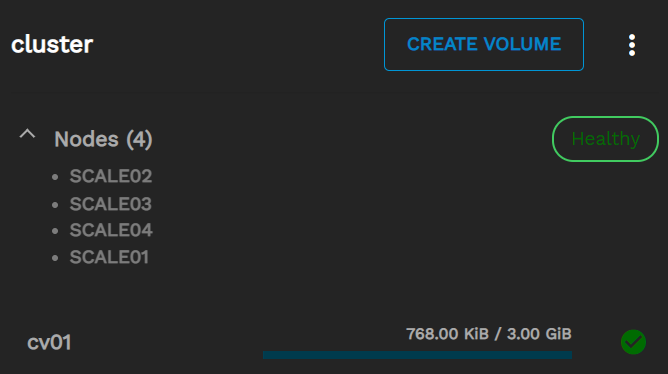
Created cluster volumes display in the related cluster card.
ClusterCardwithVolume

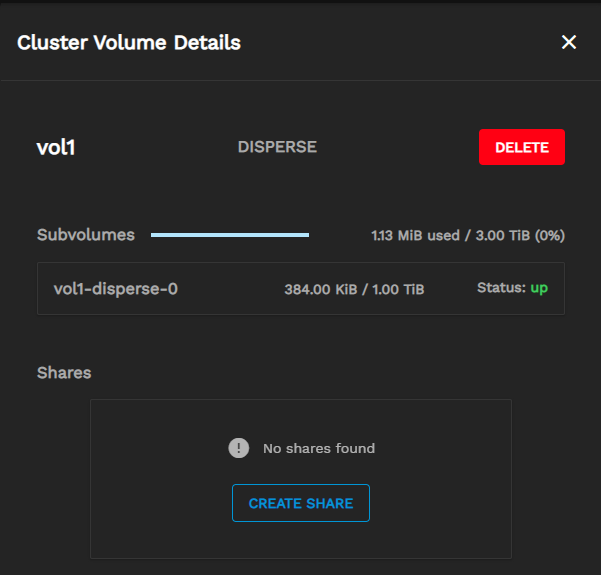
The card displays the name, used storage, and volume status. Click the volume name to expand the details and see more management options.
ClustersClusterVolumeExpanded

Setting Description
DELETE Click button to remove the volume from the cluster. This destroys any stored data.
CREATE SHARE Click button to open the form to configure a new SMB share. This allows remote access to this cluster volume.

Cluster Volume Sharing

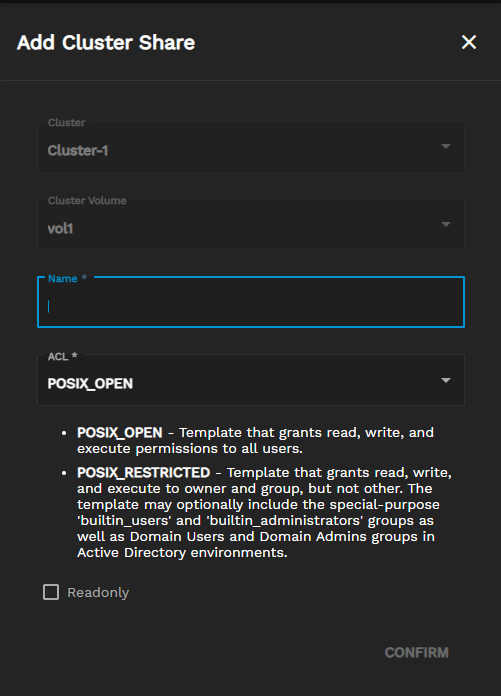
Adding a cluster share shows a few options.
ClustersClusterVolumeExpandedCreateShare

Setting Description
Cluster String (disabled). Shows the name of the cluster related to this share.
Cluster Volume String (disabled). Shows the name of the cluster volume to share.
Name Enter string to create label for this new cluster share.
ACL Dropdown list. Access Control List. Choose permissions for the share.
Readonly Checkbox disables or allows file management options for connected users. Select to disable.
CONFIRM Click button to save the settings, creates the share, and makes the cluster volume accessible to Active Directory user accounts.

ACL Options

  • POSIX_OPEN - Template that grants read, write, and execute permissions to all users.
  • POSIX_RESTRICTED - Template that grants read, write, and execute to owner and group, but not other. The template may optionally include the special-purpose ‘builtin_users’ and ‘builtin_administrators’ groups as well as Domain Users and Domain Admins groups in Active Directory environments.

Managing Cluster Volume Shares

Click the cluster volume name to open the Cluster Volume Details and see any shares.
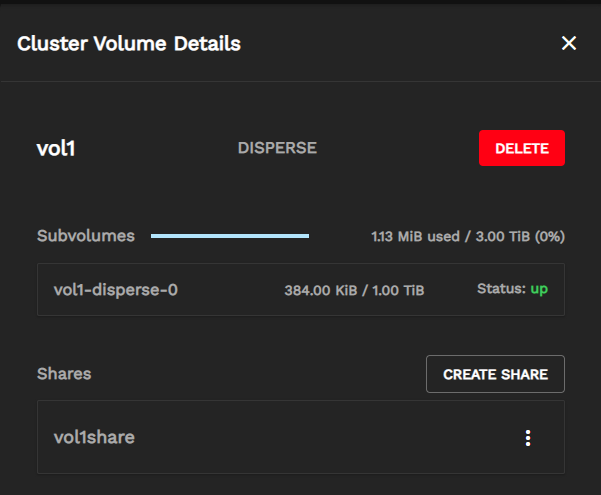
ClustersClusterVolumeExpandedShareOptions

Setting Description
DELETE Click button to remove the share from the Cluster Volume. No data is destroyed in this operation.
CREATE SHARE Click button to open the form to configure a new SMB share. This allows remote access to this cluster volume.

Replacing Cluster Nodes

Cluster node replacement only works if you are using TrueCommand 2.3 or later and SCALE 22.12.0 or later.

New replacement nodes must have the same hardware as the old node you are replacing. The old node must also have a configuration backup that is safe and accessible.

The method you use to replace a cluster node differs depending on whether or not the node has access to the data on the brick.

The Node Has Access to Brick Data

If the node you are replacing still has access to the data on the brick, you must first install the same SCALE version on the replacement system (node).

After installing SCALE on the new system, access the web UI and go to System Settings > General. Click Manage Configuration, then select Upload Config. Select the configuration file from the node you are replacing and click Upload.

After applying the configuration, the system reboots and uses the same configuration as the node you are replacing. The new system automatically joins the cluster and heals damaged data before returning to a healthy state.

The Node Does Not Have Access to Brick Data

If the node you are replacing does not have access to the data on the brick, you must first install the same SCALE version on the replacement system (node).

After installing SCALE on the new system, access the web UI and go to Storage. Create a pool with the same name as the pool on the node you are replacing.

Go to System Settings > Shell and enter midclt call gluster.peer.initiate_as_replacement <poolname> <clustervolumename>

poolname is the name of the pool you created. clustervolumename is the name of the cluster volume you are currently using.

After the command succeeds, go to System Settings > General. Click Manage Configuration, then select Upload Config. Select the configuration file from the node you are replacing and click Upload.

After applying the configuration, the system reboots and uses the same configuration as the node you are replacing. The new system automatically joins the cluster and heals damaged data before returning to a healthy state.

See Also