Clustering and Sharing SCALE Volumes with TrueCommand
9 minute read.
Last Modified 2022-12-13 12:31 -0500One unique capability of TrueNAS SCALE is it can cluster groups of systems together. These clusters can then create new volumes within the existing SCALE storage pools. Data stored in a clustered volume is shared between the clustered systems and can add additional redundancy or performance to the environment. Currently, data stored in a clustered volume is shareable using Active Directory (AD) and the SMB protocol.
Clustering is considered experimental and should not be used in a production environment or for handling critical data!
Clustering is a back-end feature in TrueNAS SCALE. You should only configure clustering using the TrueCommand web interface. Attempting to configure or manage clustering from within the TrueNAS SCALE UI or Shell can result in cluster failures and permanent data loss.
Using the clustering feature on a SCALE system adds some restrictions to that system:
- Any existing non-clustered SMB shares no longer function.
- You cannot create new SMB shares separately from the clustering settings.
- You cannot add the system to a different cluster.
- Removing single systems from one cluster and migrating to another is currently unsupported. Removing a system from a cluster requires deleting the entire cluster.
To set up clustering with TrueNAS SCALE, you need:
- 3-20 TrueNAS SCALE systems (version 22.02.2 or later) on the same network. Each SCALE system must have:
- Two network interfaces and subnets. The primary network interface and subnet are for client access to the SCALE system. The secondary interface and subnet are only for cluster traffic. This interface must use static IP addresses.
- Disks available or Storage pools already created and available for use.
- A TrueCommand 2.2 or later environment on the same network as the SCALE systems.
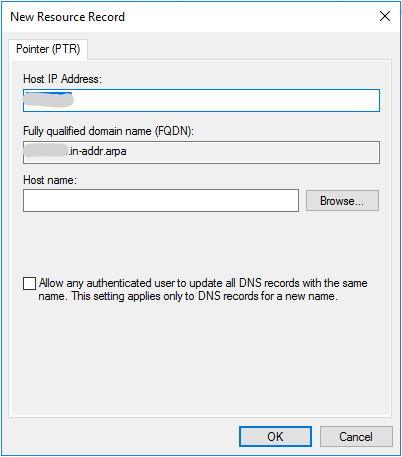
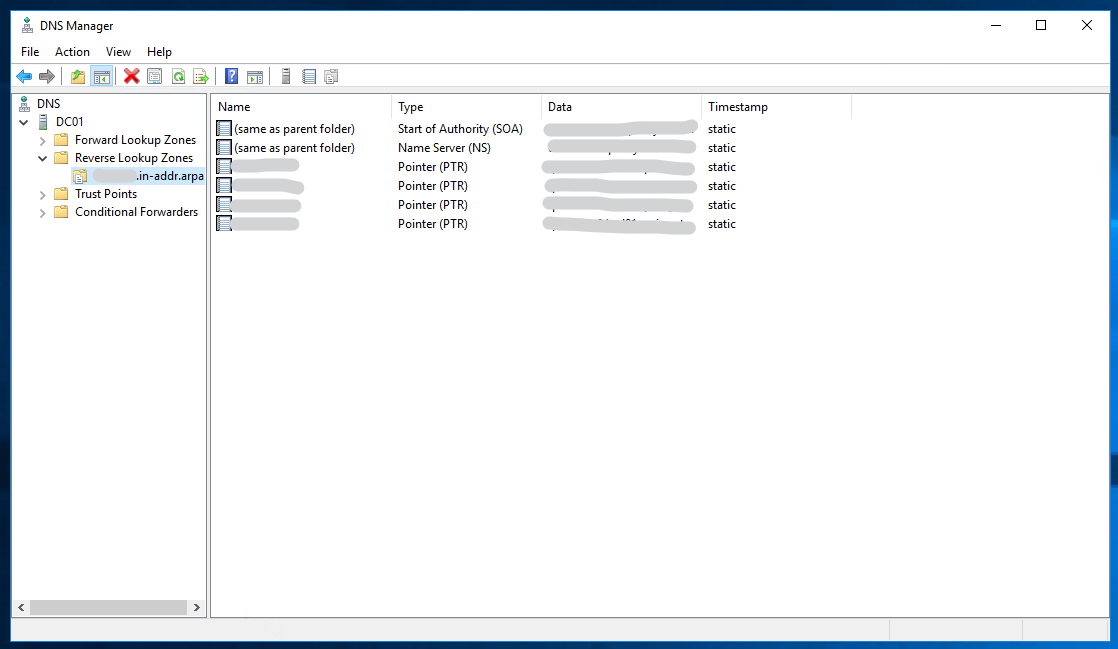
- A Microsoft Active Directory environment must be available and connected to the same network as the SCALE systems and TrueCommand environment. You must configure Reverse DNS to allow the SCALE cluster systems to communicate back and forth with the AD environment.
Configuring the cluster feature is a multi-step process that spans multiple systems.
When the SCALE, AD, and TrueCommand environments are ready, log in to TrueCommand to cluster the SCALE systems.
-
Click the Clusters icon in the upper left. Click NEW CLUSTER to see the cluster creation options.
-
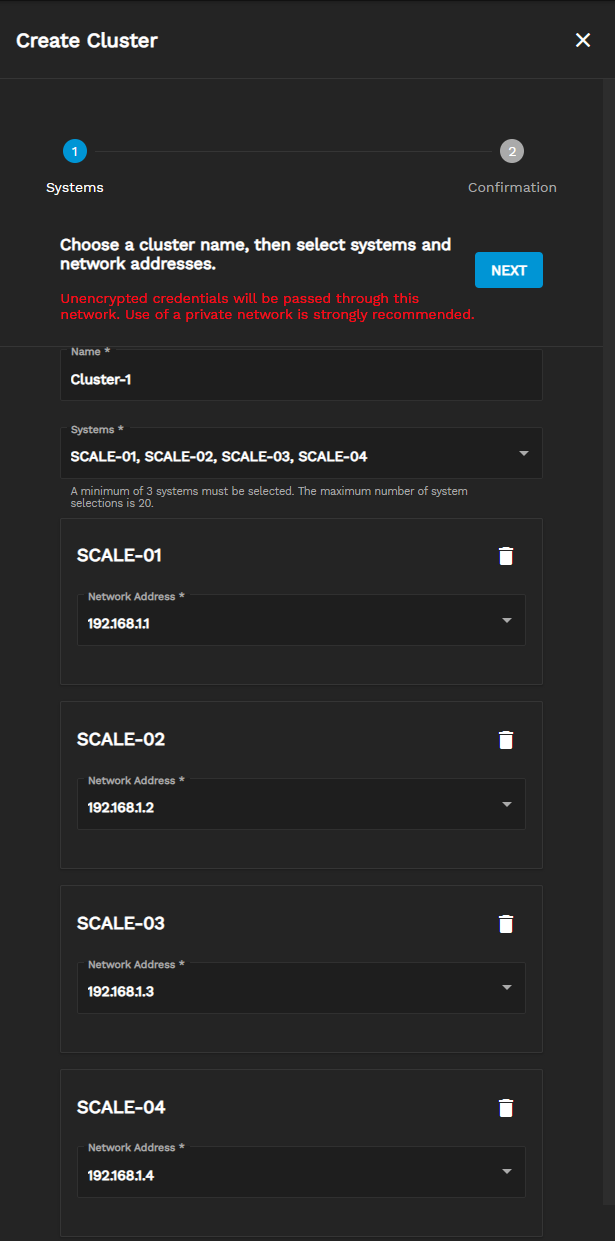
Enter a unique name for the cluster and open the dropdown to select the systems to include in the cluster.
-
When each SCALE system is listed, open the Network Address dropdown for each system and choose the static IP address from the previously configured subnet dedicated for cluster traffic.
-
Click NEXT, verify the settings, then click CREATE
It can take an extended amount of time to create the cluster.
After the initial creation step for the cluster, TrueCommand opens another sidebar to configure the new cluster for AD connectivity and SMB sharing:

Skipping this step is not recommended because there are no opportunities to reset the configuration after it is completed. To go back and add the AD and SMB connection details requires deleting and remaking the cluster.
- For each SCALE system, choose the IP address related to the primary subnet. This is typically the IP address used to connect the SCALE system to TrueCommand. Click NEXT.
- Enter the Microsoft Active Directory credentials and click NEXT.
- Verify the connection details are correct and click SUBMIT.
Creating a cluster has no visible effect on each SCALE web interface.
To verify the cluster is created and active, open the SCALE Shell and enter gluster peer status.
The command returns the list of SCALE IP addresses and current connection status.
-
In the TrueCommand Clusters screen, find the cluster to use and click CREATE VOLUME.
-
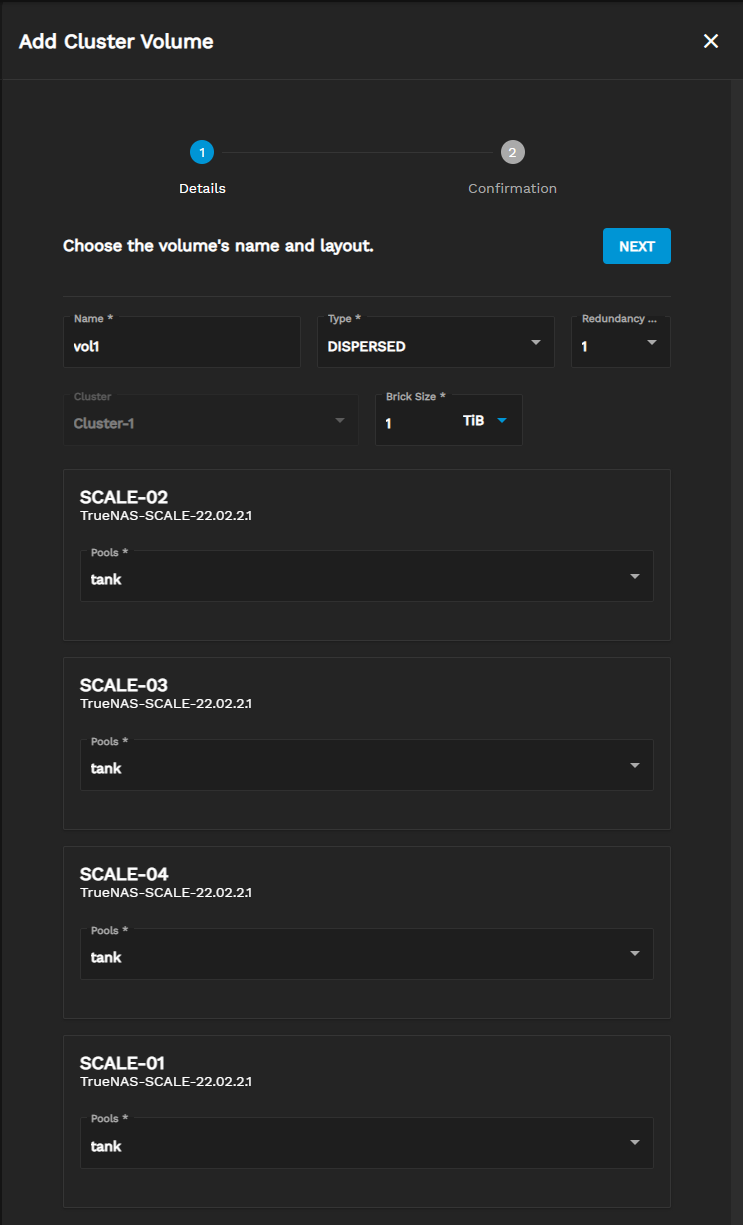
Enter a unique name for the cluster and select a Type.
Volume Types
- After configuring the Type, enter a Brick Size based on the available storage from the clustered pools and your storage requirements.
- Review the Pools for each SCALE system in the cluster and ensure that the desired pool is used for this cluster volume.
- Click NEXT.
- Review the settings for the new volume and click CREATE when ready.
New cluster volumes are added to the individual cluster cards on the TrueCommand Clusters screen.
The web interface for the individual SCALE systems does not show any datasets created for cluster volumes.
To verify the volume is created, go to the Shell and enter gluster volume info all.
Share a cluster volume by going to the TrueCommand Clusters screen, finding the cluster card, and clicking on the desired cluster volume. Click CREATE SHARE.
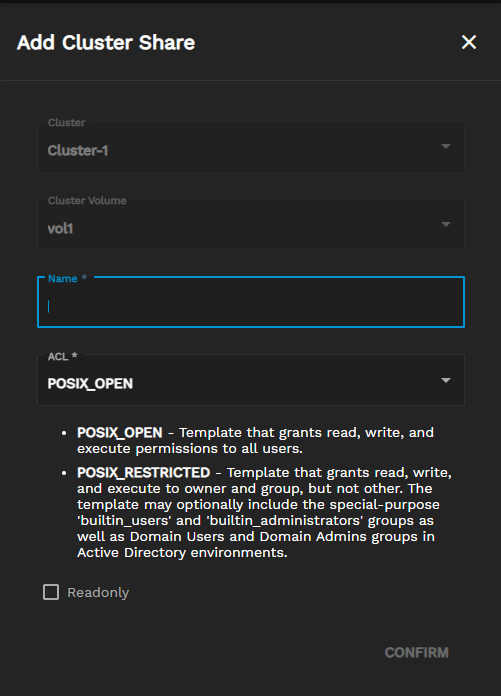
- Enter a unique Name for the share.
- Choose an ACL to apply to the share.
- Setting Readonly prevents users from making any changes to the cluster volume contents.
- Click CONFIRM to create the SMB share and make it immediately active.
The SMB share is added to the SCALE Shares > SMB section for each system in the cluster. Attempting to manage the share from the SCALE UI is not recommended.
There are many different ways to access an SMB share, but this article demonstrates using the Windows 10 File Explorer.
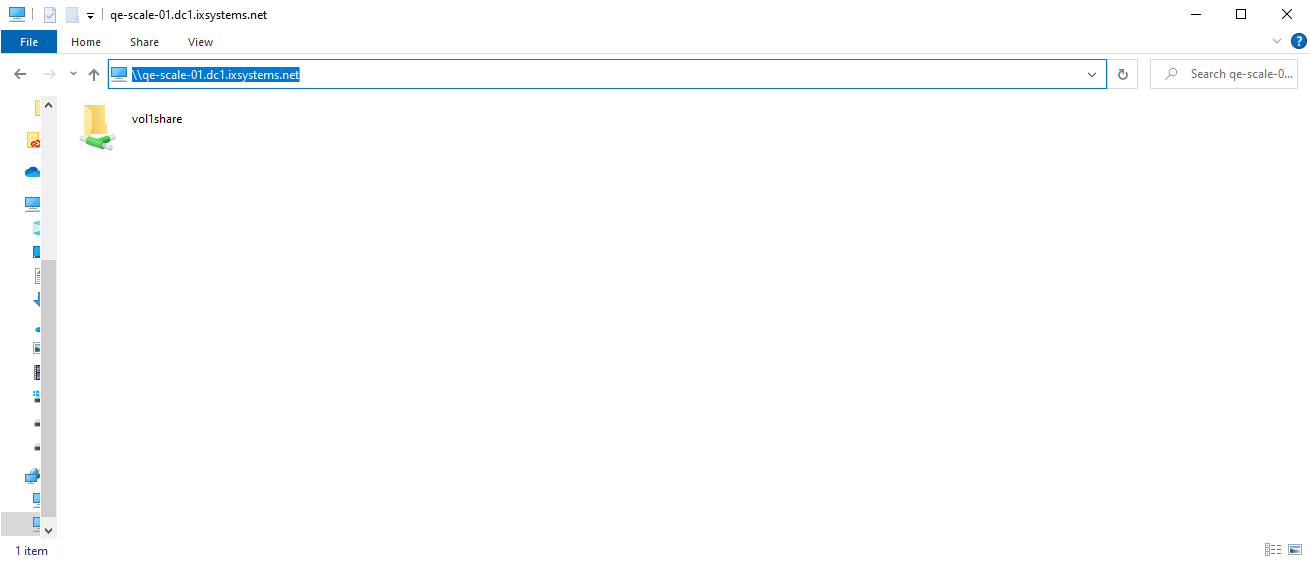
- From a Windows 10 system that is connected to the same network as the clustering environment, open File Explorer.
- In the Navigation bar, clear the contents and enter
\\followed by the IP address or host name of one of the clustered SCALE systems. Press Enter. - When prompted, enter user name and password for an Active Directory user account. Be sure to enter the Active Directory system name before the user account name (example:
AD01\sampuser). - Browse to the cluster volume folder to view or modify files.


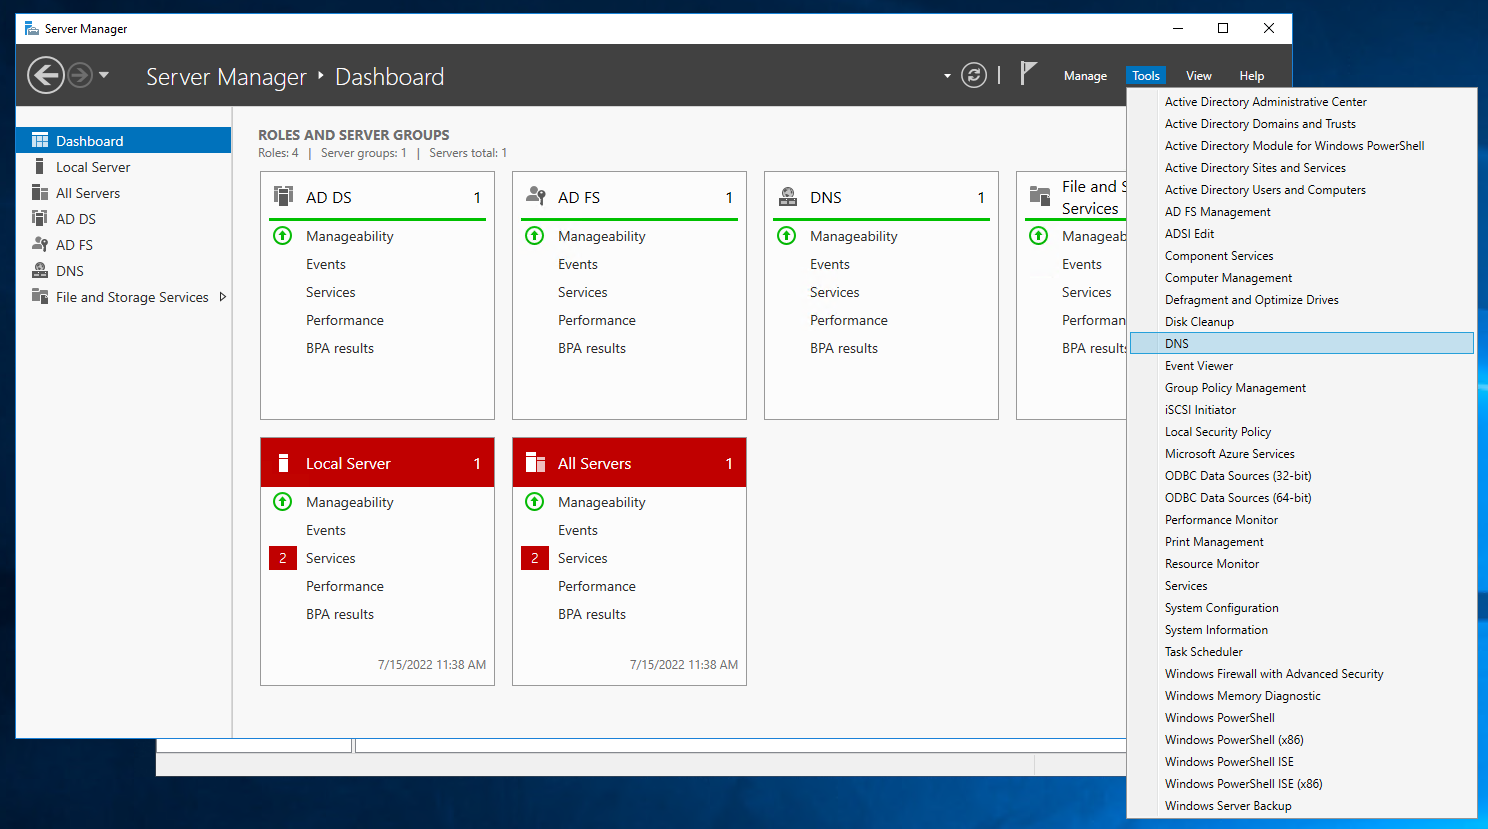
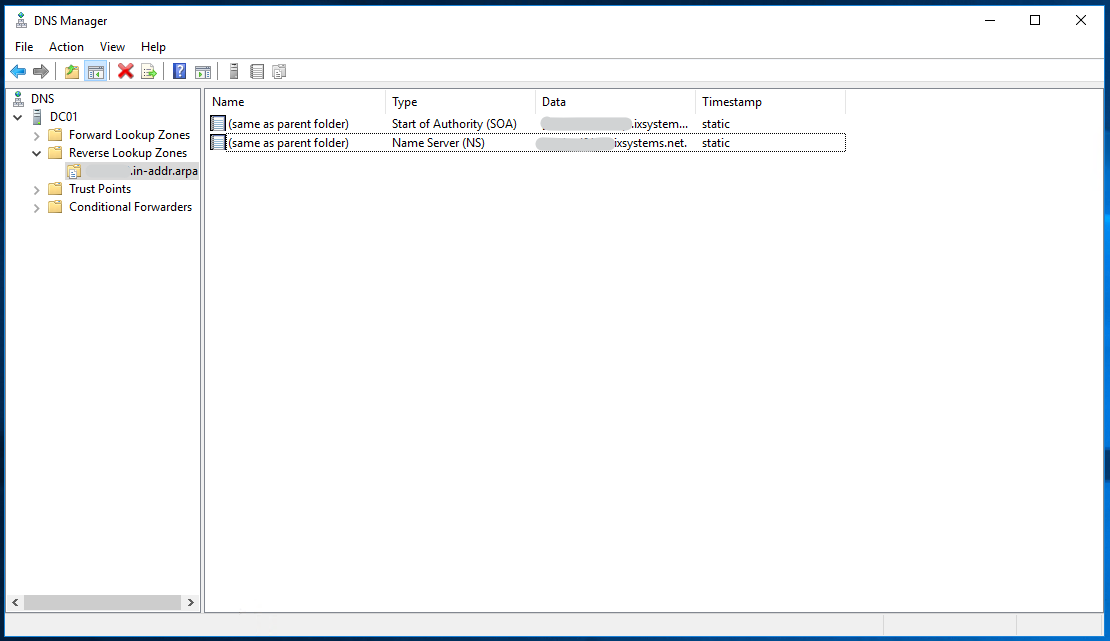 If no zone exists, see Microsoft’s guide for