Configuring TrueCommand SAML Service for Google Admin
3 minute read.
Last Modified 2022-07-20 13:18 -0400Security Assertion Markup Language (SAML) is a single sign-on (SSO) standard for logging users into applications that require authentication credentials (like GitHub, G-Mail, etc.). Single Sign-on (SSO) works by transferring a user’s known identity to another location that provides services to the user. SAML accomplishes the transfer by exchanging digitally-signed XML documents.
A SAML configuration requires an Identity Provider (IdP) and Service Provider (SP). Google Admin is an example of an IdP.
This article provides instructions for setting up SAML service in TrueCommand and then in Google Admin.
To configure Google Admin as the IdP, you must:
- Create a new App for SAML
- Configure the SAML app properties to act as the IdP service.
- Add the TrueCommand IP and port number as the ACS URL.
- Configure the SAML app LDAP attributes properties
After you configure SAML in Google Admin, you configure and start the TrueCommand SAML service.
-
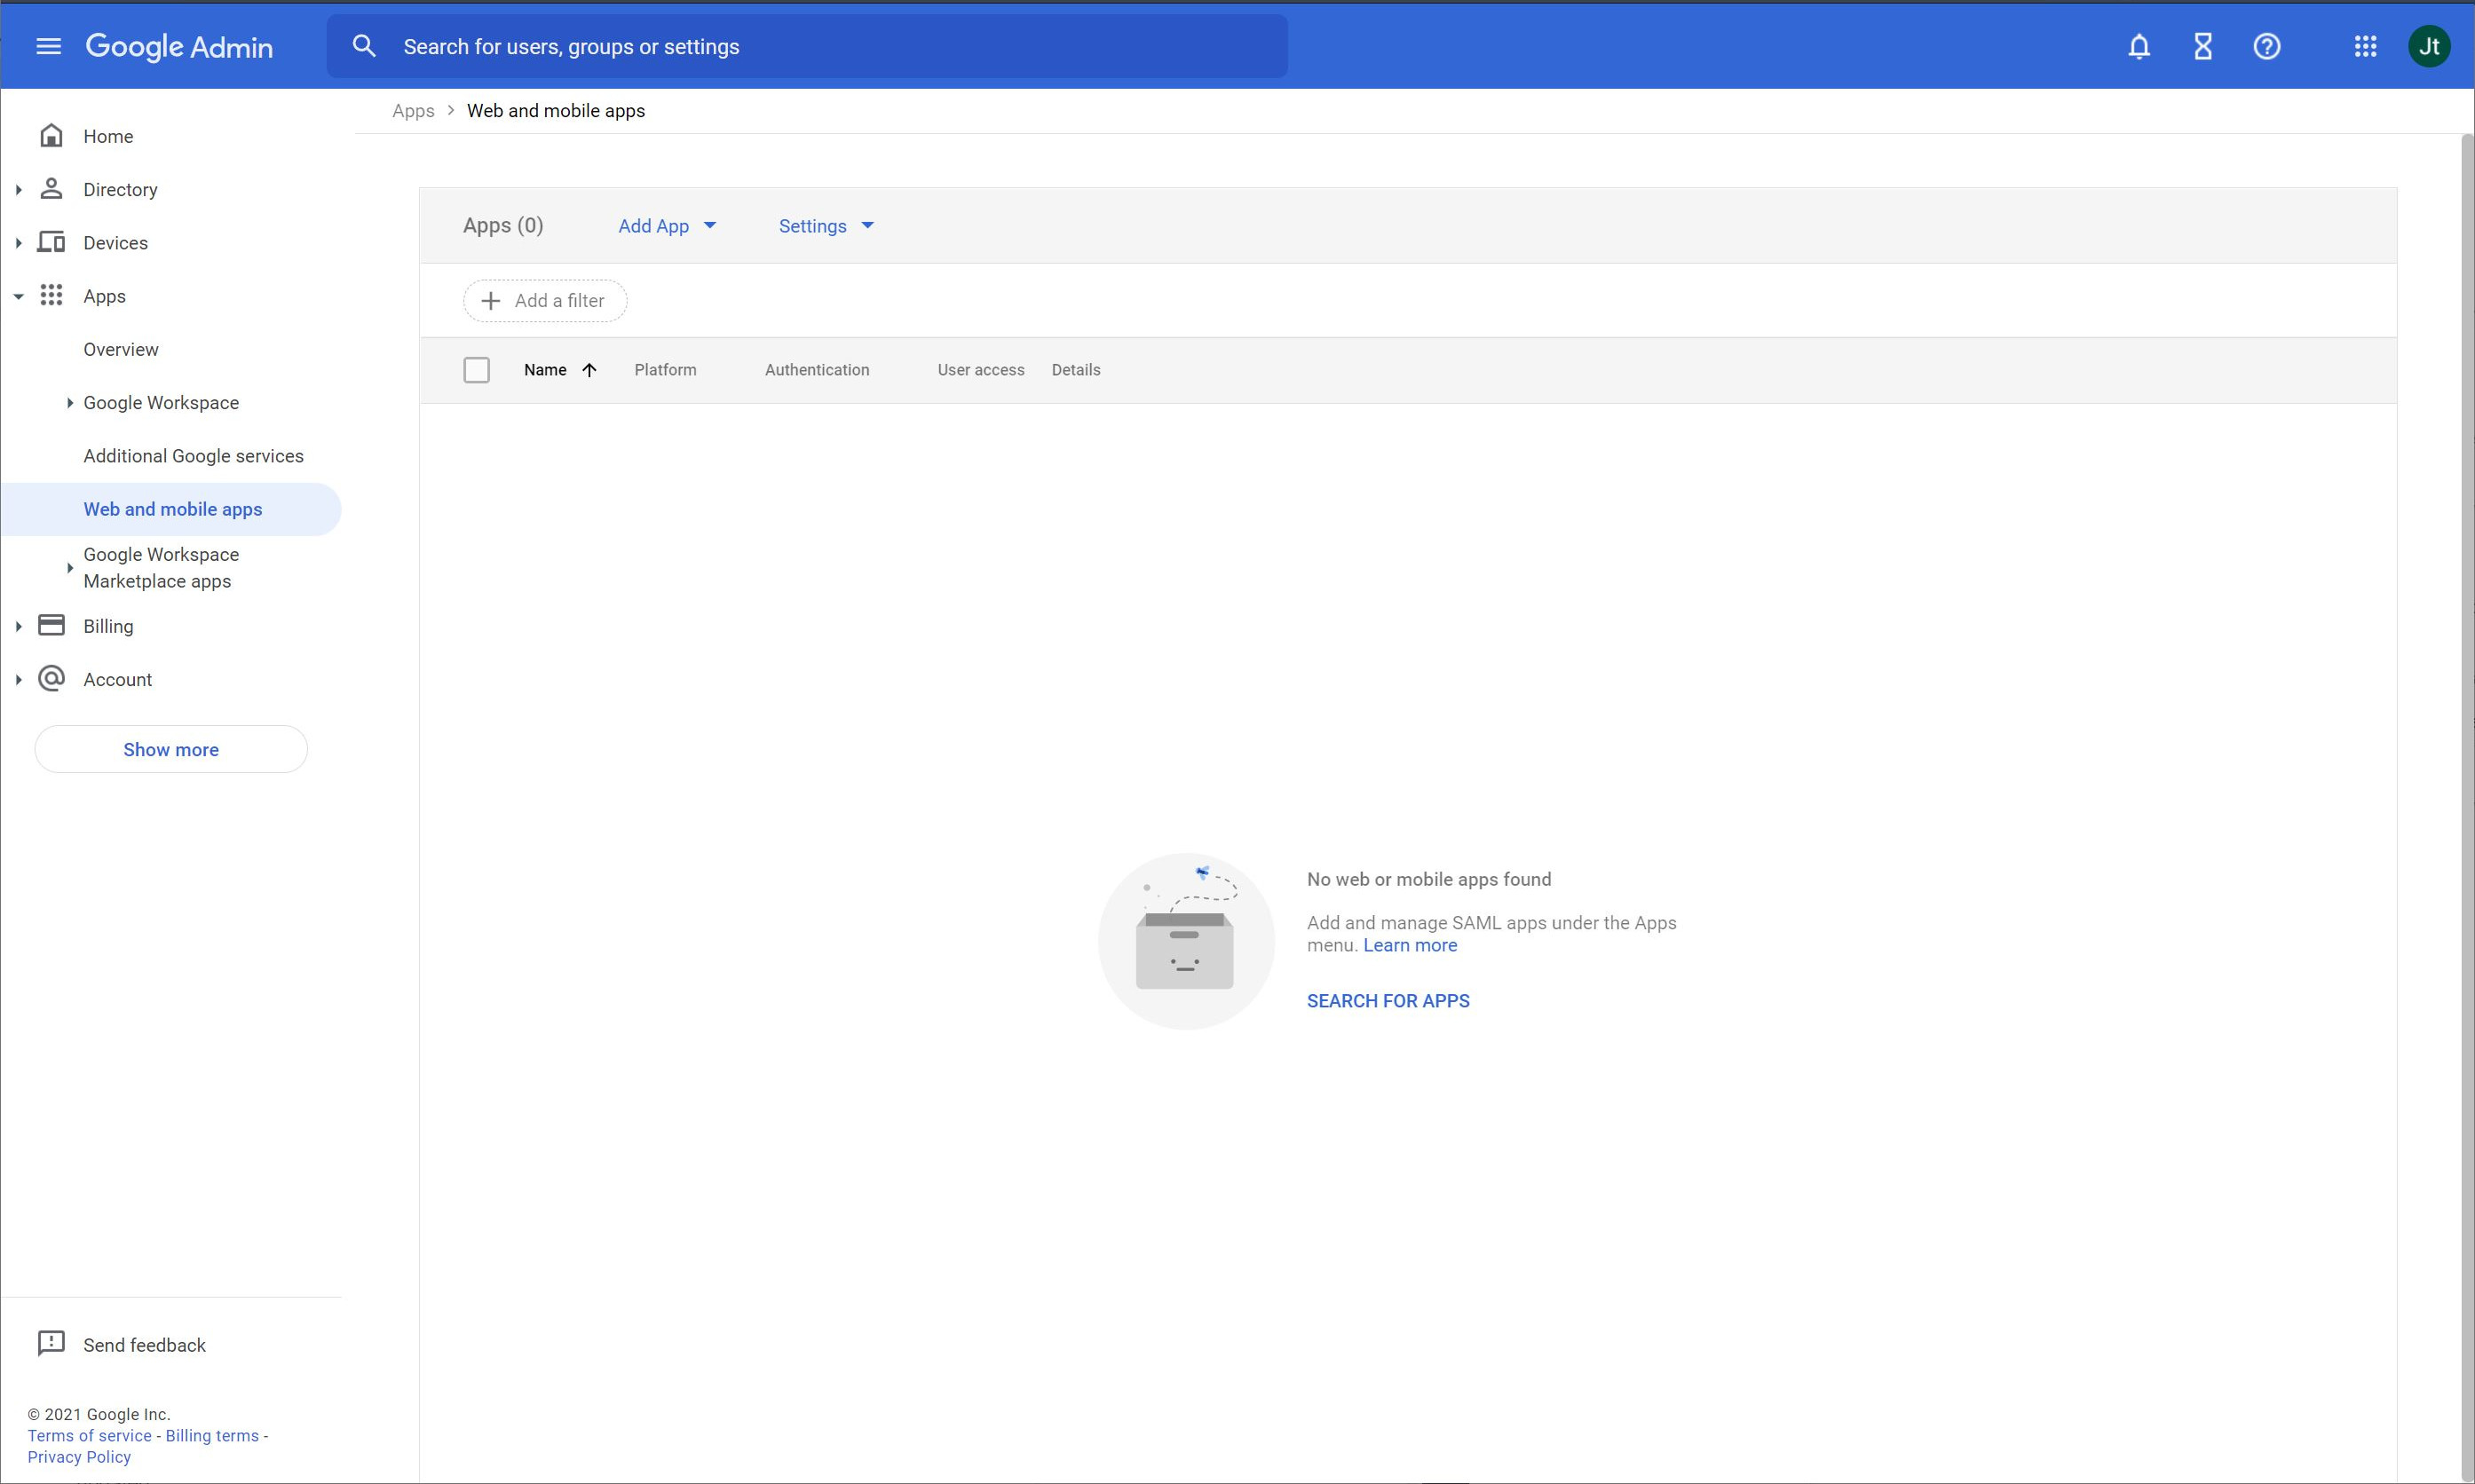
Open Google Admin and go to Apps > Web and mobile apps.
-
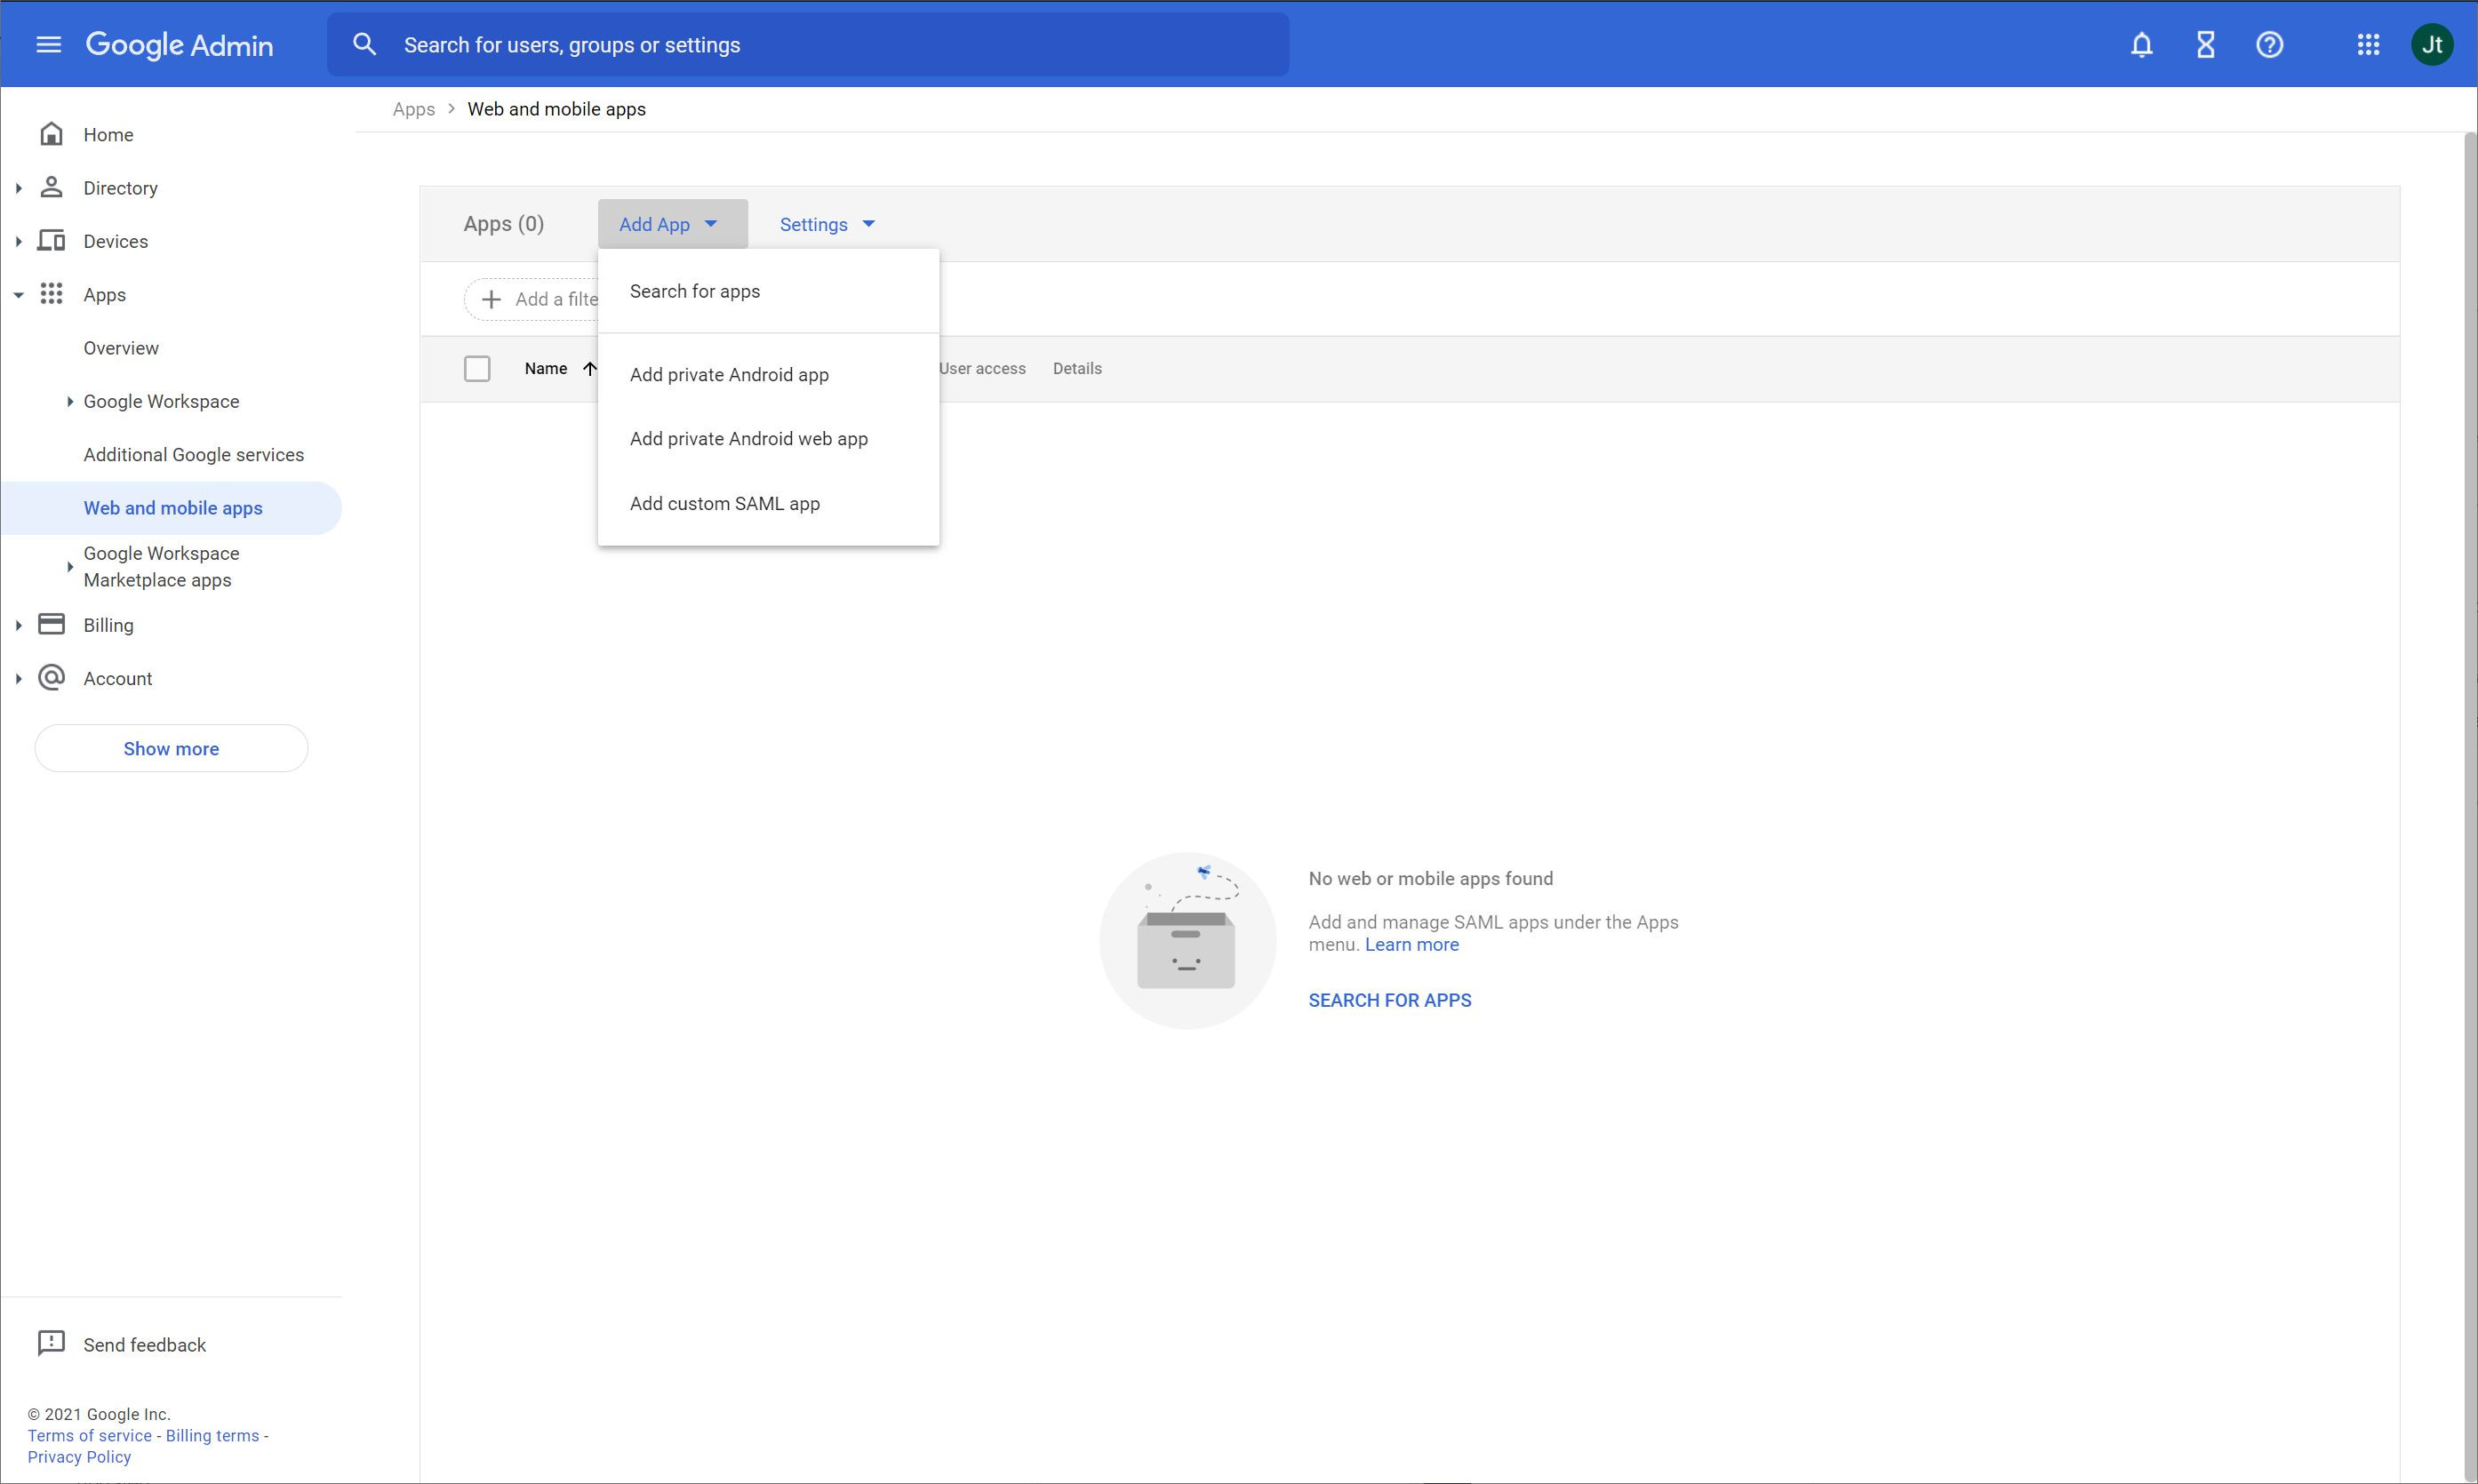
Click Add App, then select Add custom SAML app to open the App details screen.
-
Configure the SAML app details.
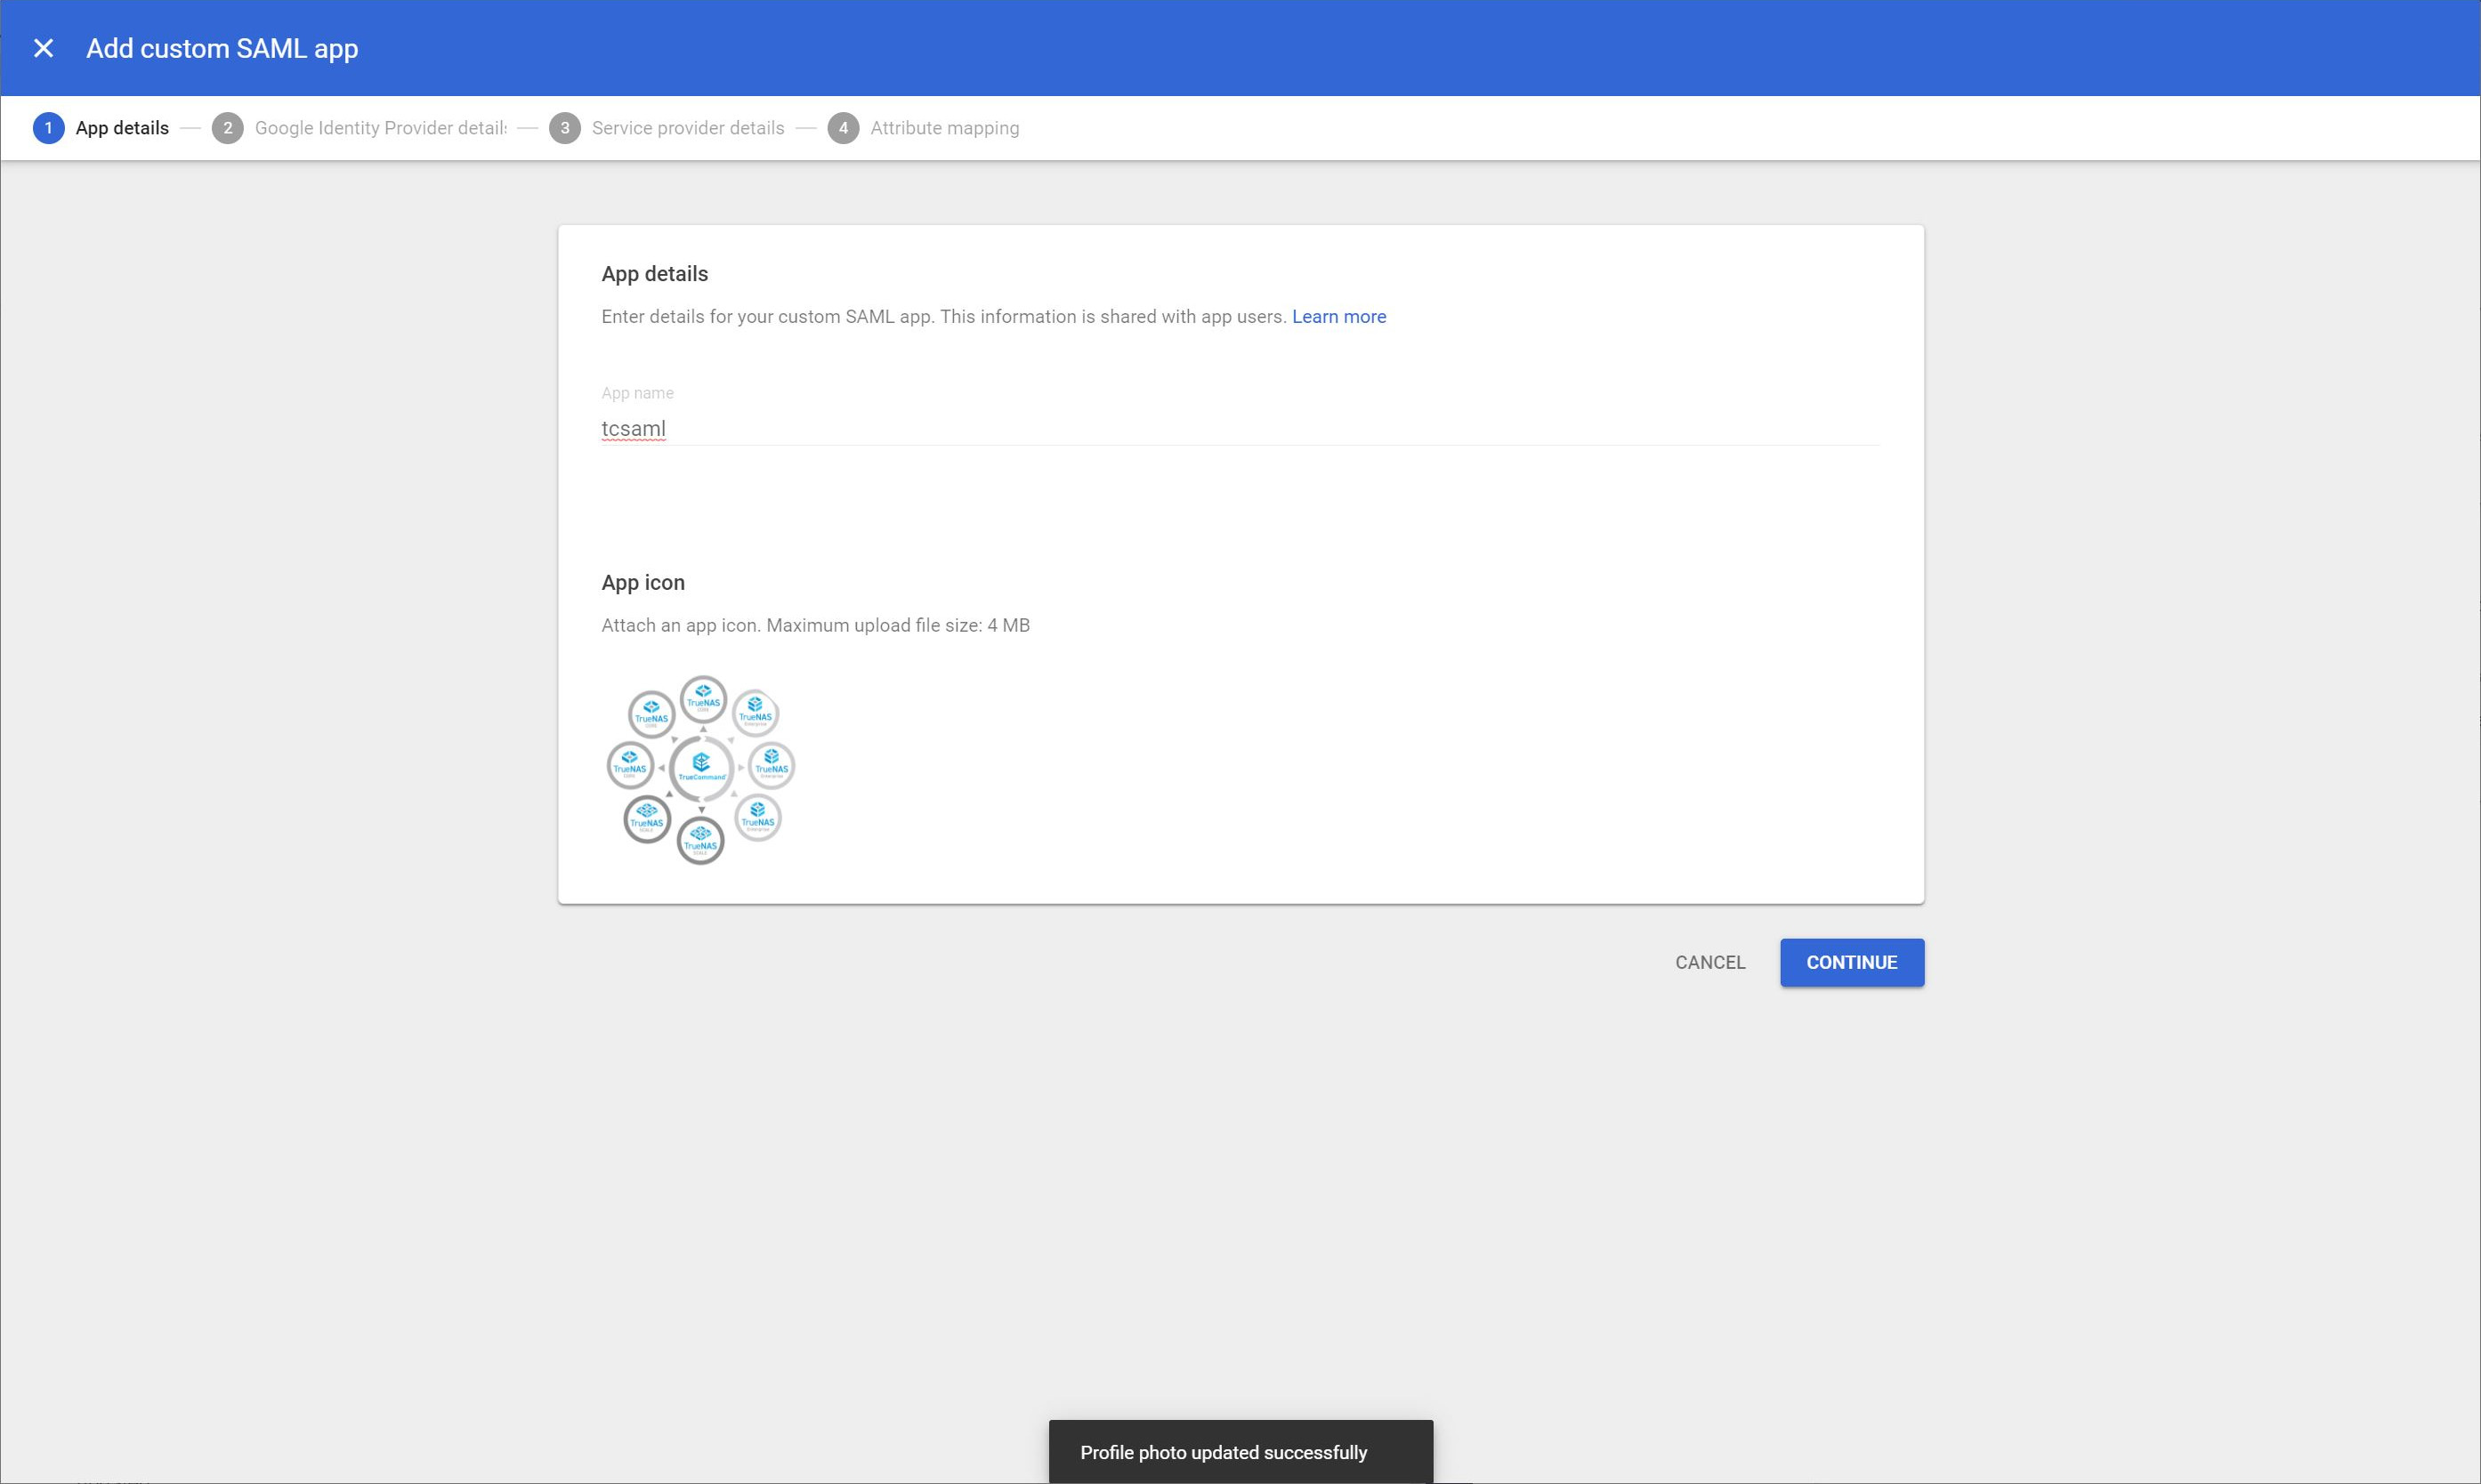
a. Type any name you want to use in the App Name field. This example uses tcsaml.
b. Upload any picture or avatar you want to use into the App icon area to identify the app in your Google Admin account.
c. Click CONTINUE. to view the Google Identity Provider screen.
d. Click CONTINUE again to view the Service Provider details screen.
-
Configure the service provider details.
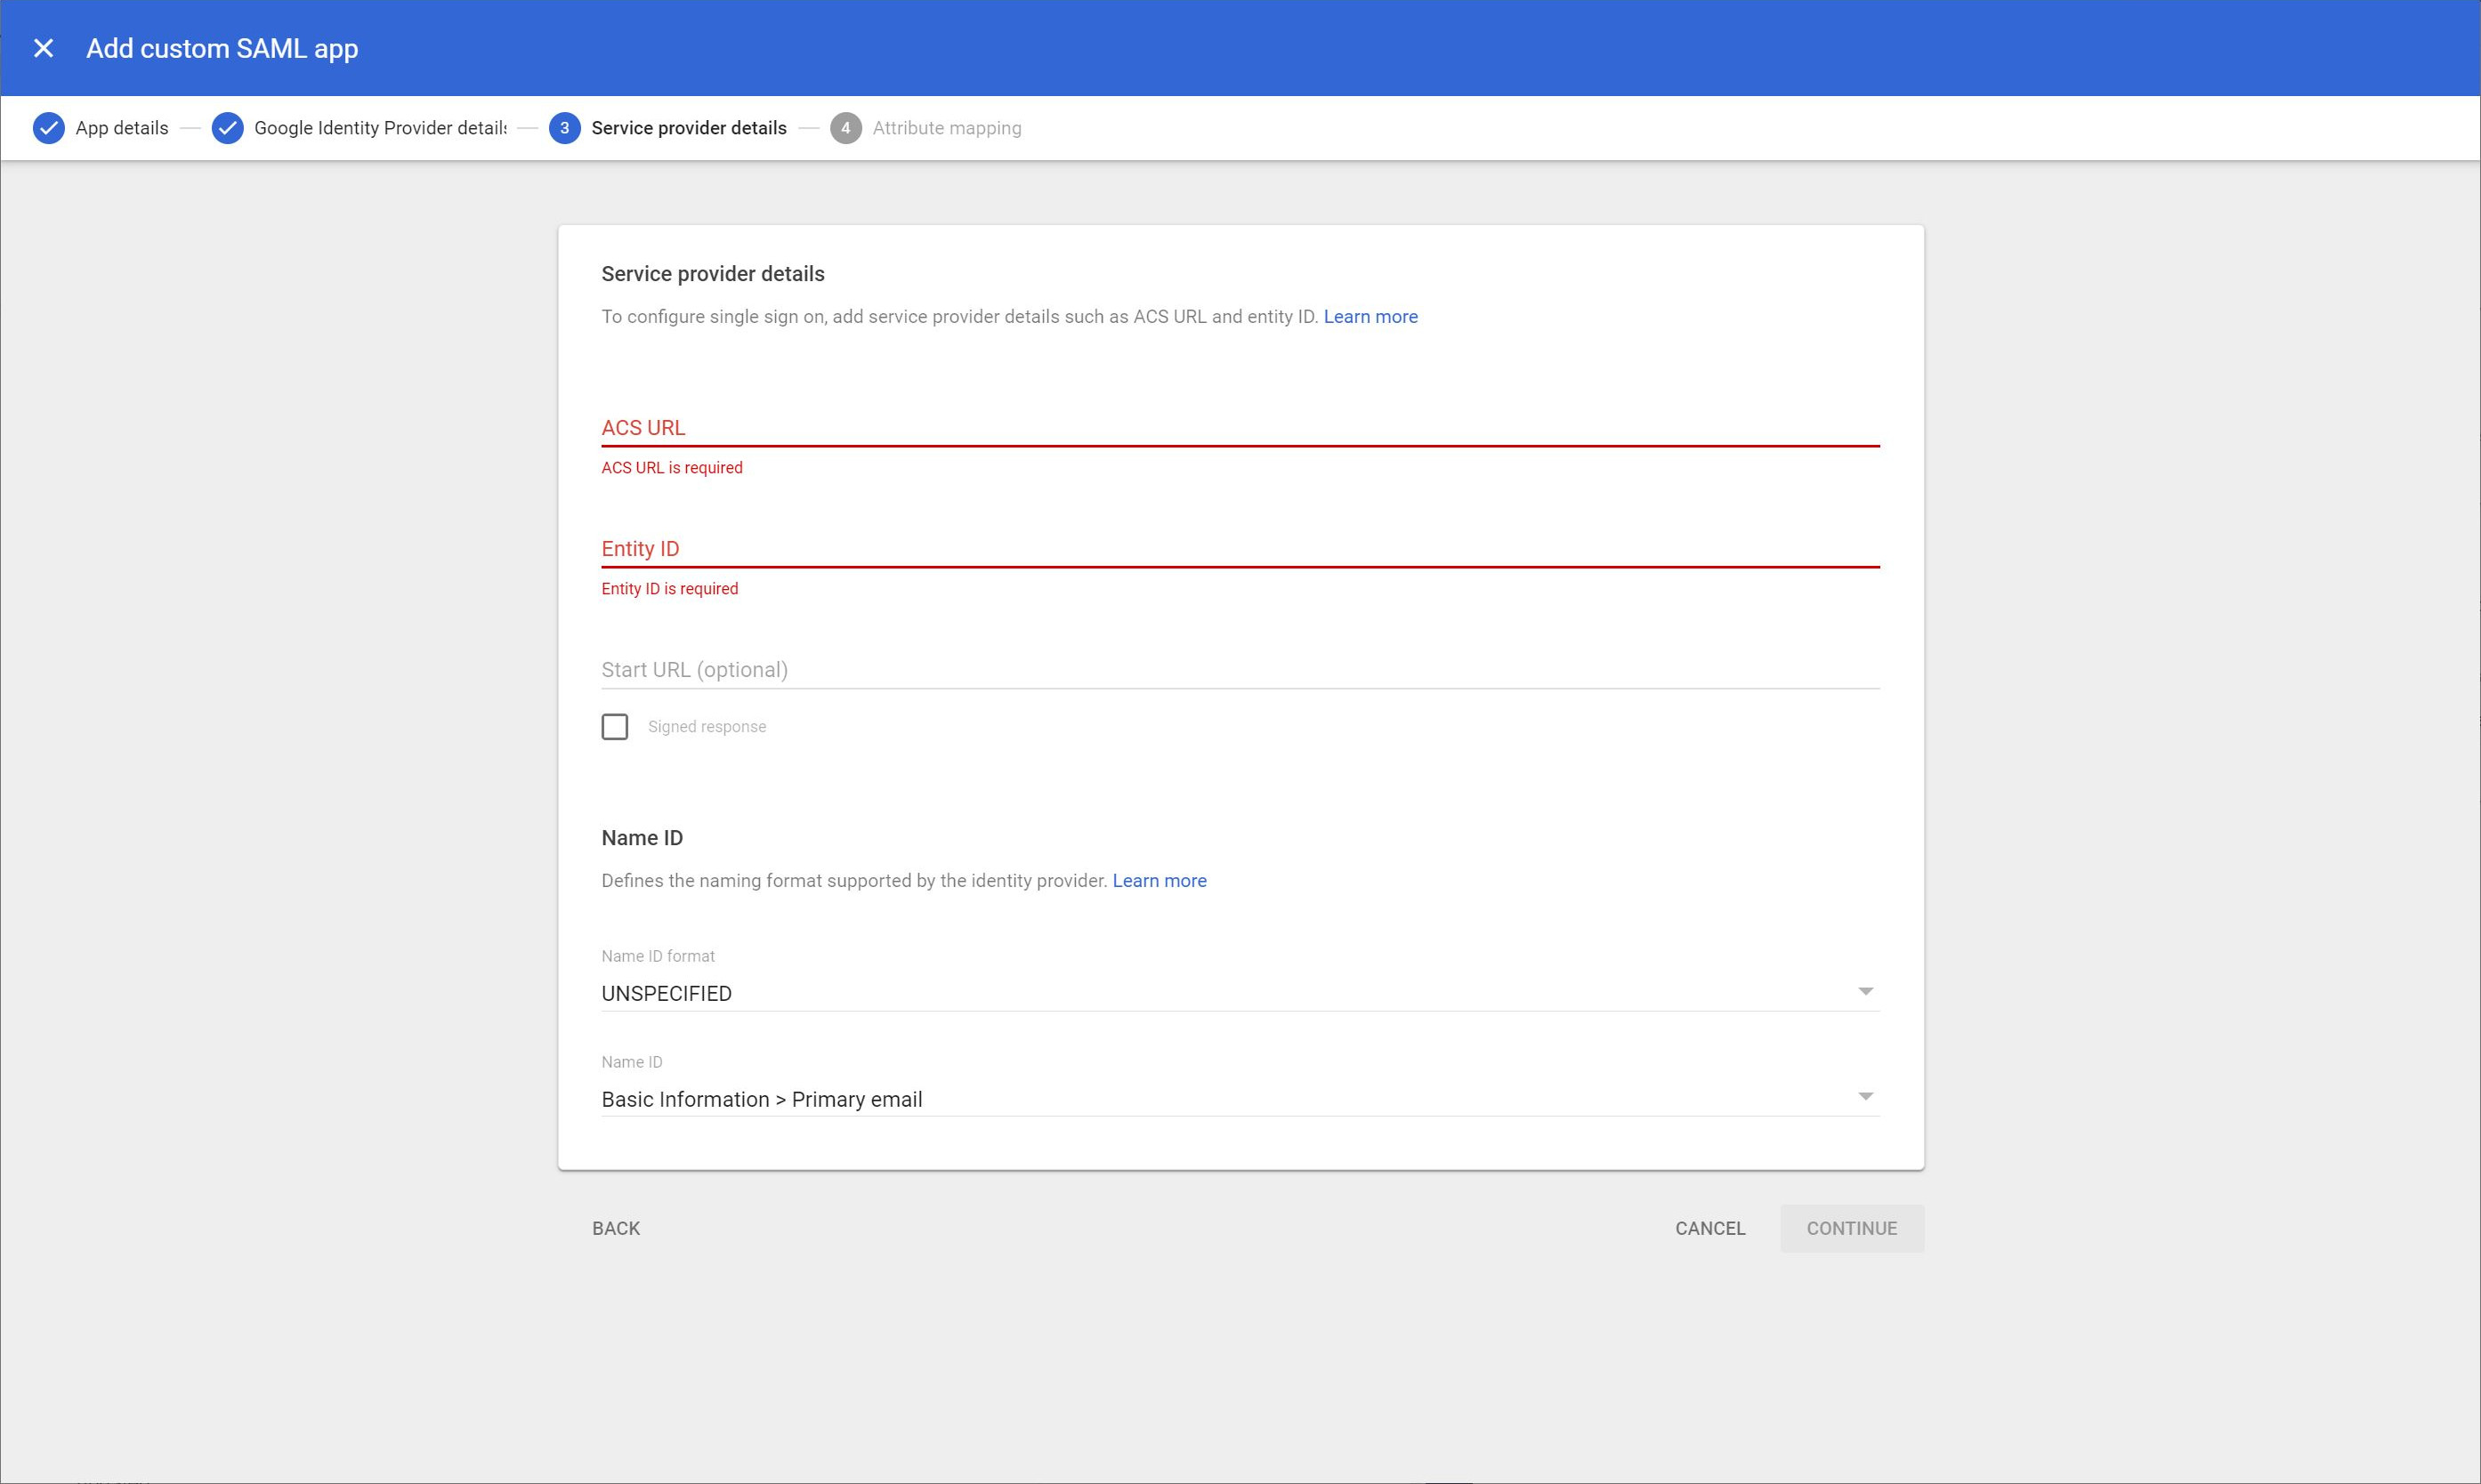
a. Enter the TrueCommand login URL http://IP:PORT/saml/acs in the ACS Url field. IP:PORT is your TrueCommand system IP and port address.
b. Type any name you want into the Entity ID field (ex. truecommand-saml).
c. Type the https://IP:PORT/saml/helloURL into the Start URL field. IP:PORT is your TrueCommand system IP and port address.
d. Set Name ID format to PERSISTENT.
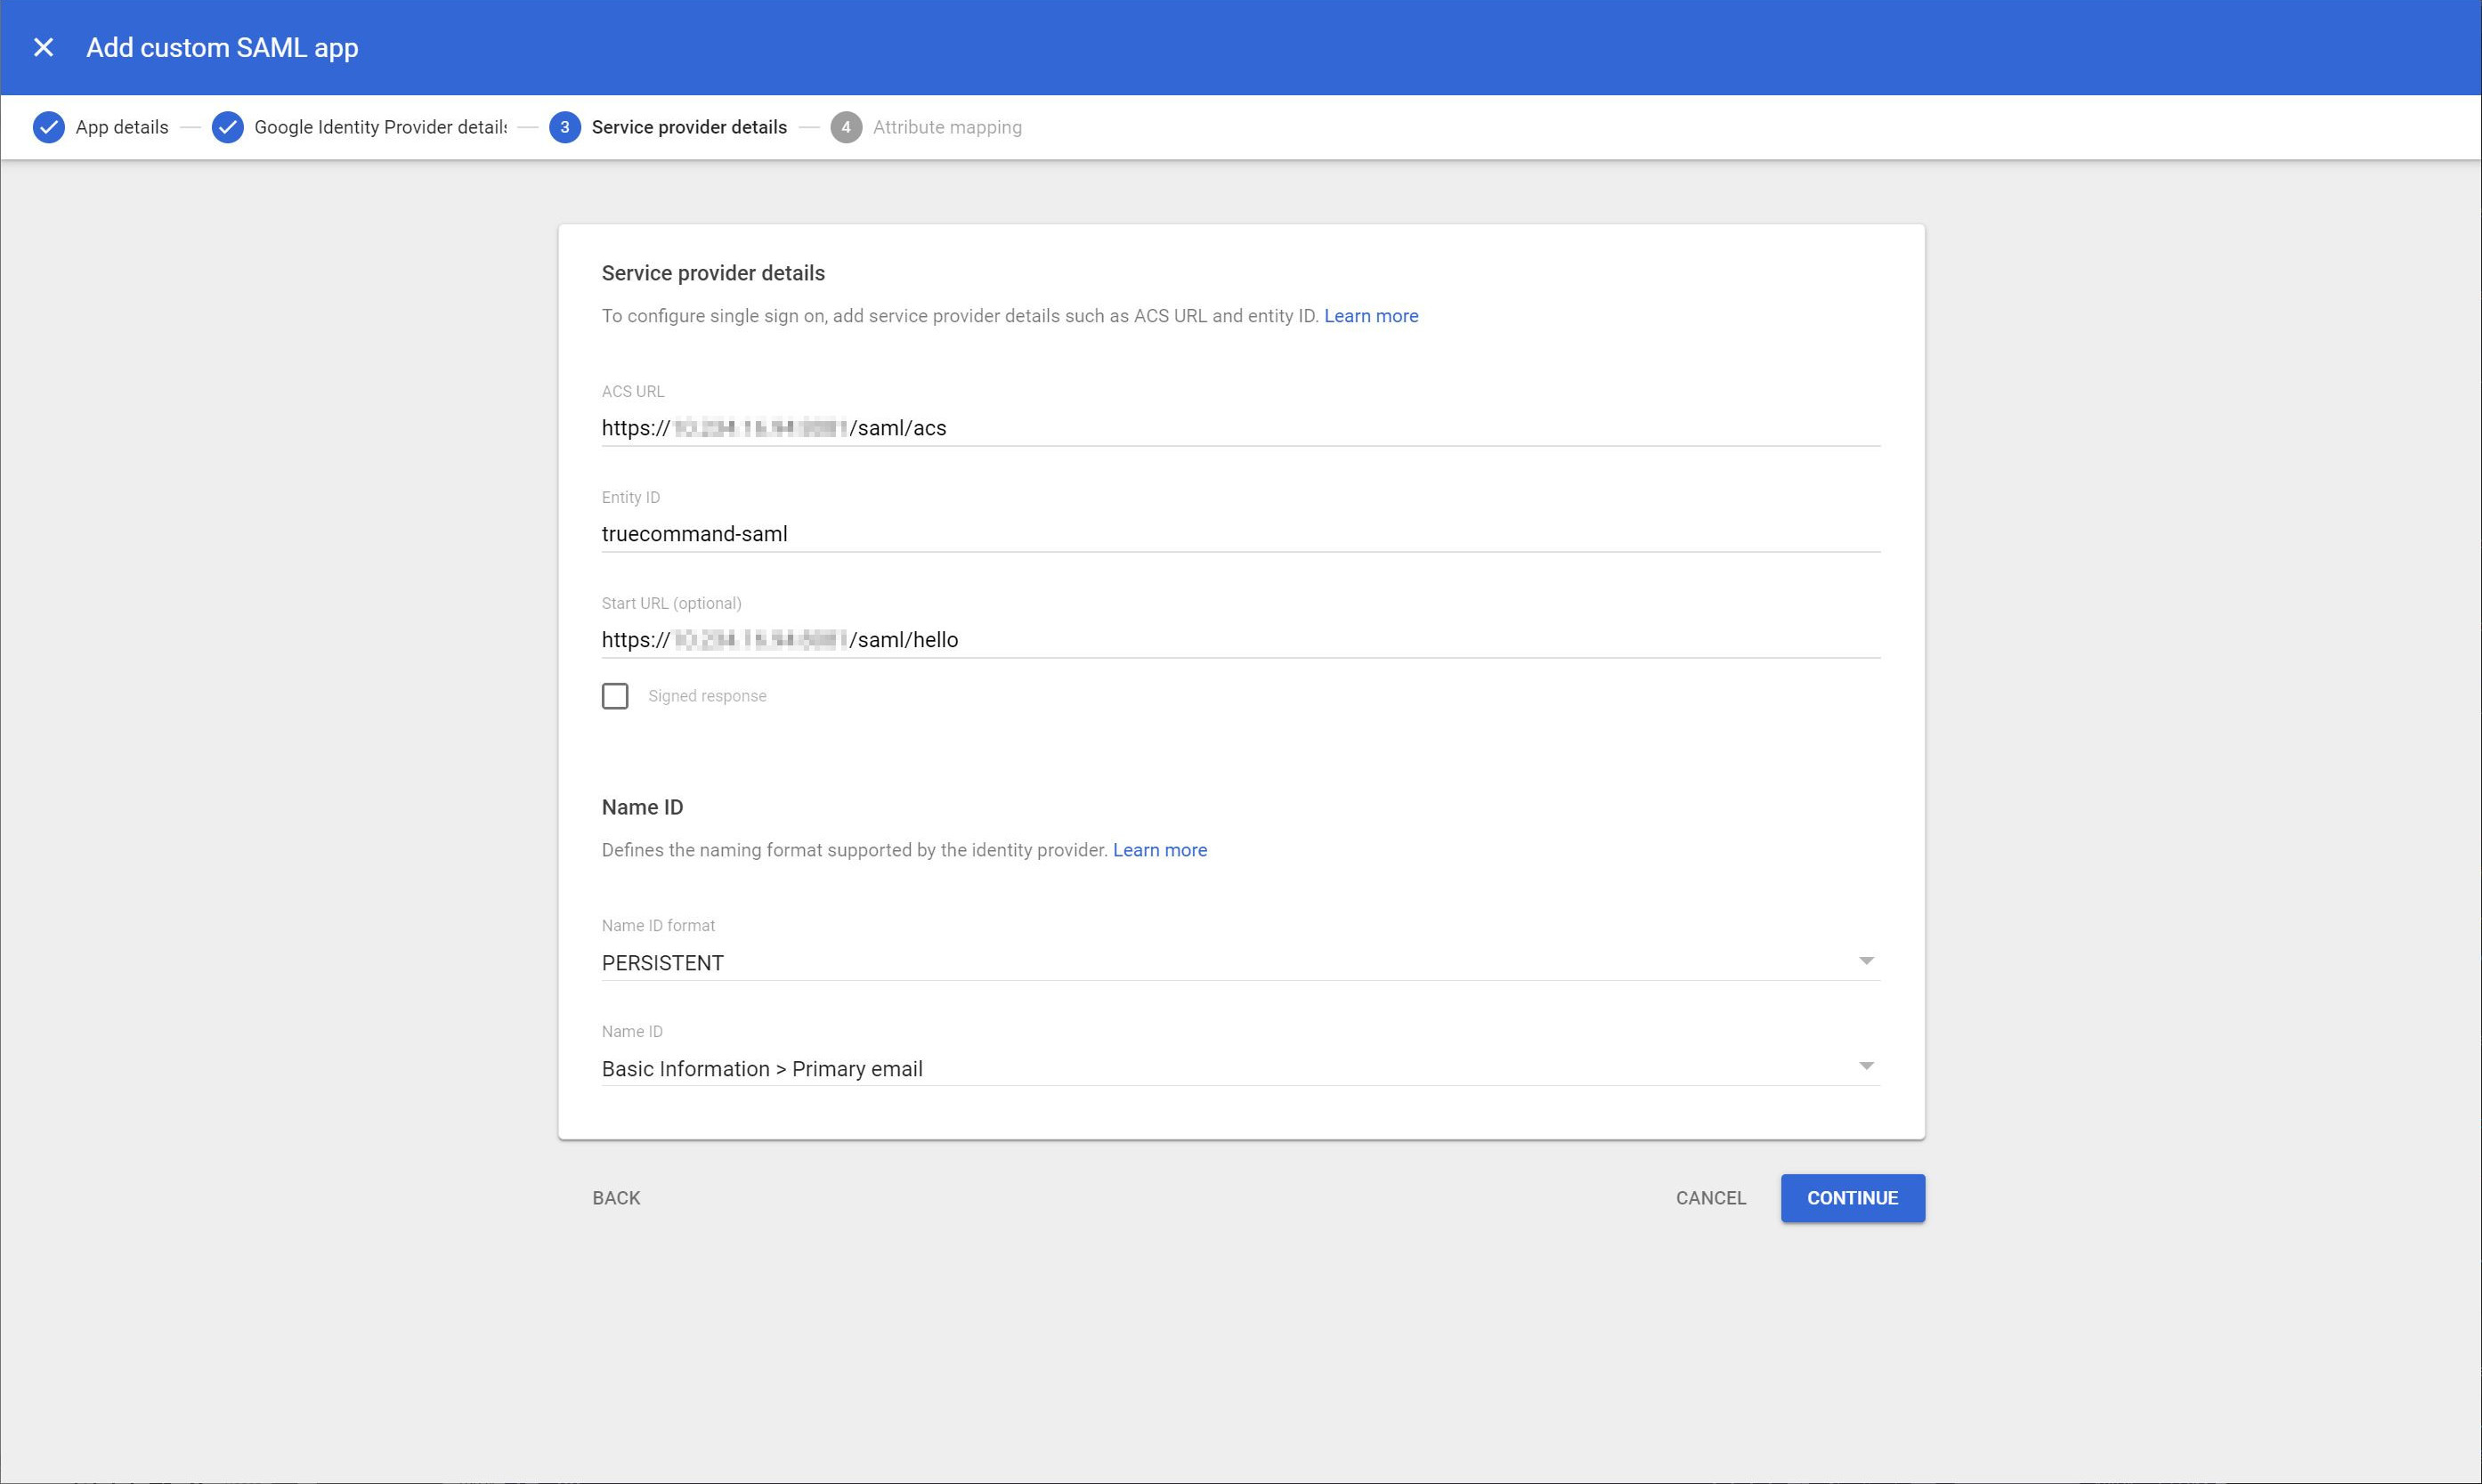
e. Set Name ID to Basic Information > Primary Email.
f. Click CONTINUE to view the Attribute Mapping screen.
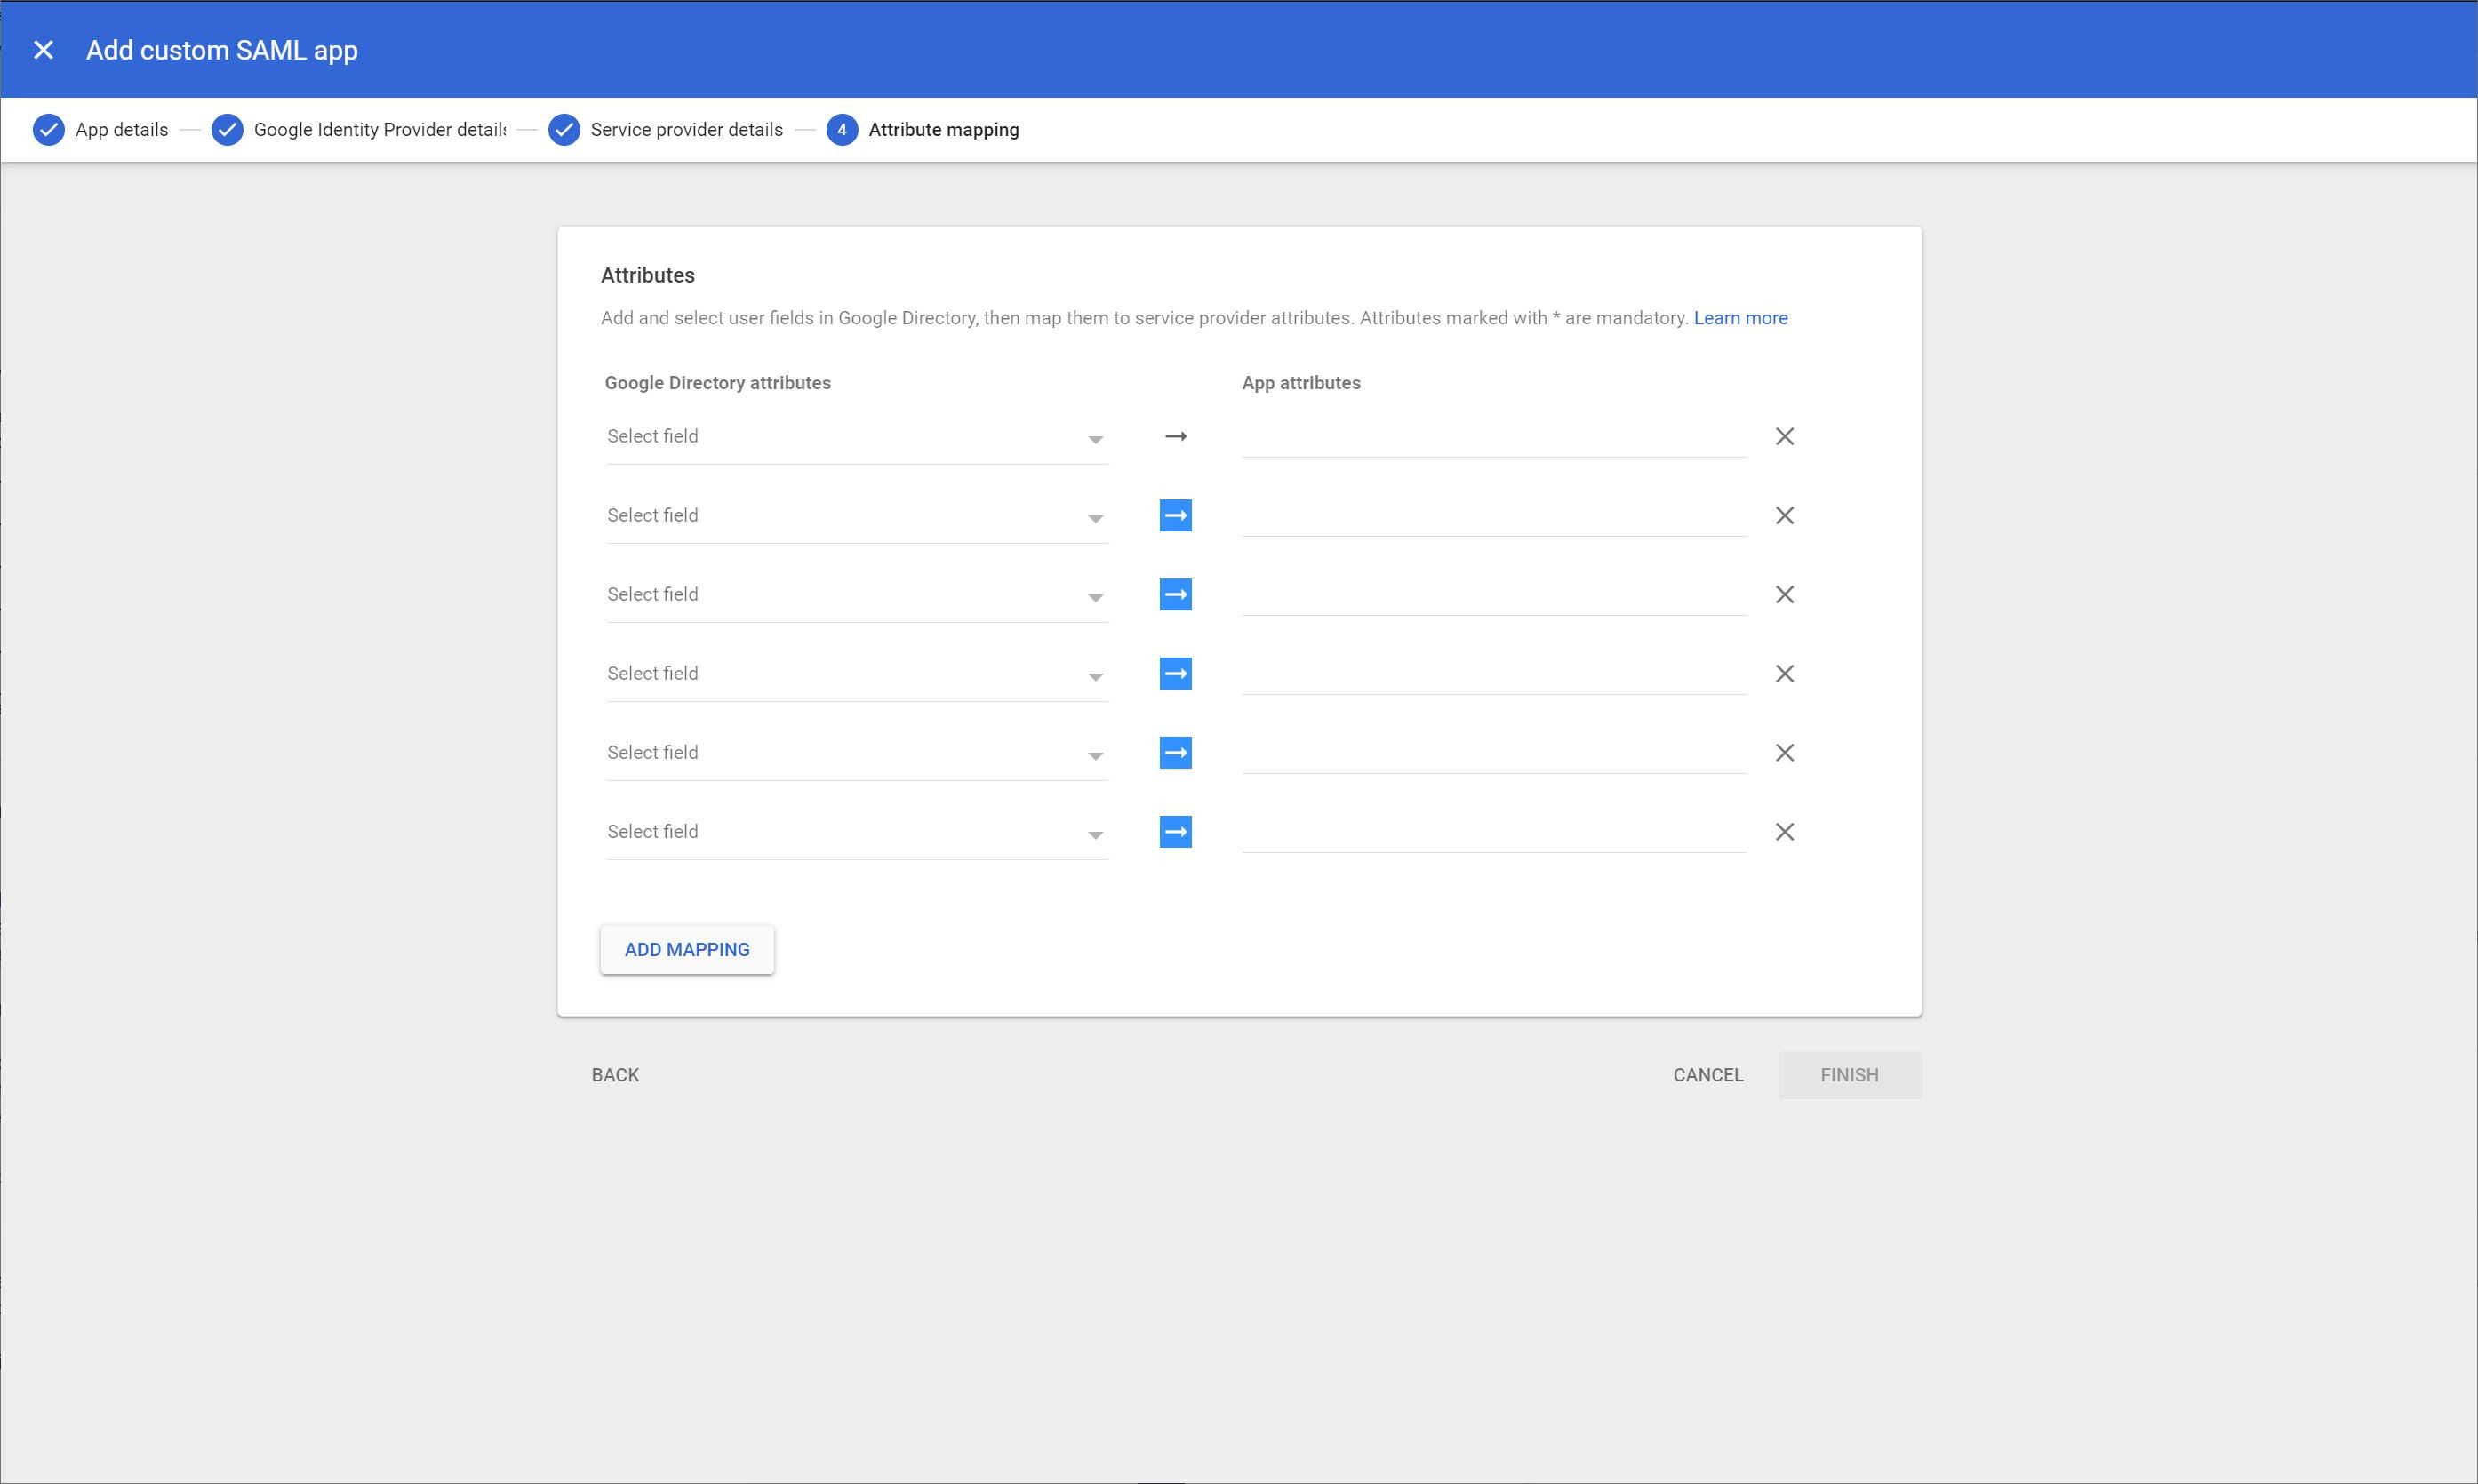
g. Enter the Attributes. Select the attribute using the Google Directory attributes dropdown menus, then type the attributes exactly as they are in the table below into the App attributes fields:
Parameter Value E-Mail-Addresses email Display-Name given_name User-Principal-Name unique_name Telephone-Number telephoneNumber Title title h. Click FINISH.
-
Verify the information is correct. Select TEST SAML LOGIN in the tcsaml area on the left side of the screen to open the TrueCommand SAML Test screen.
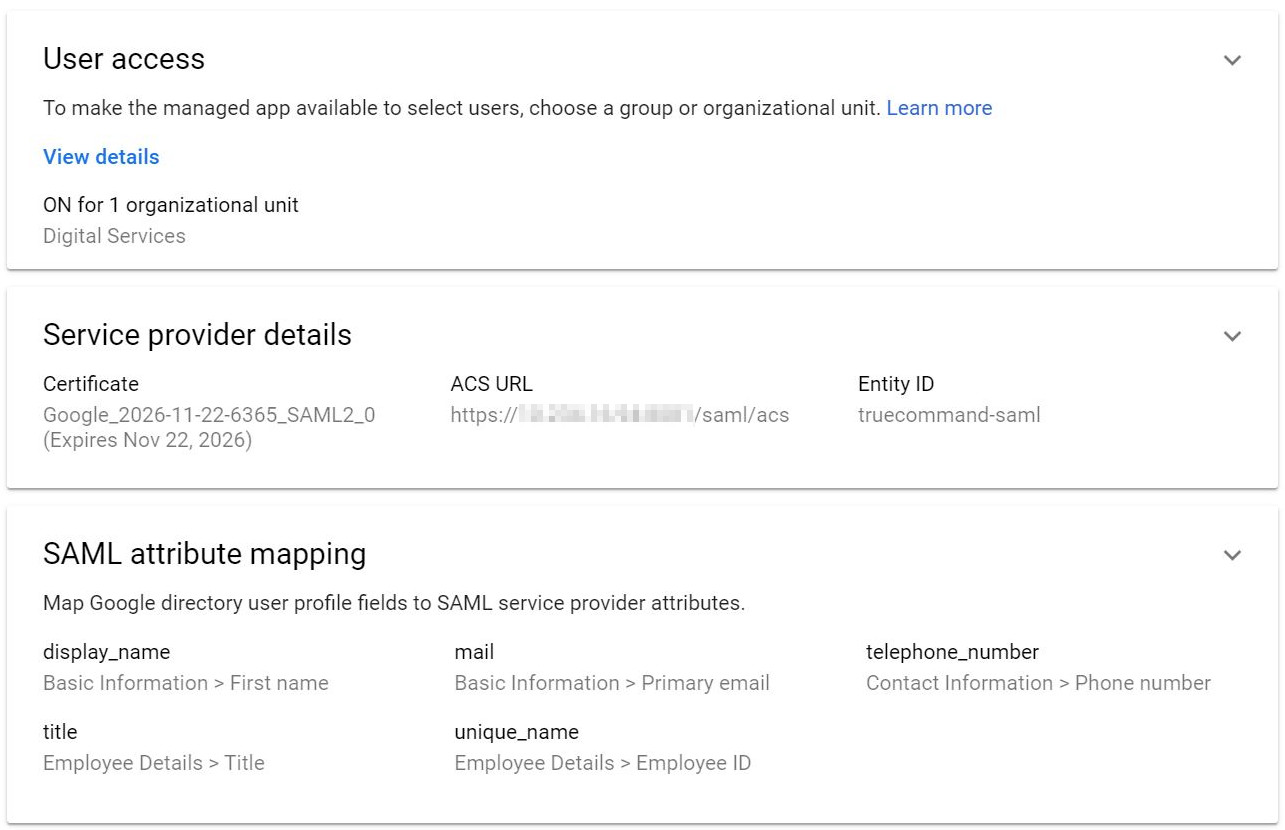
-
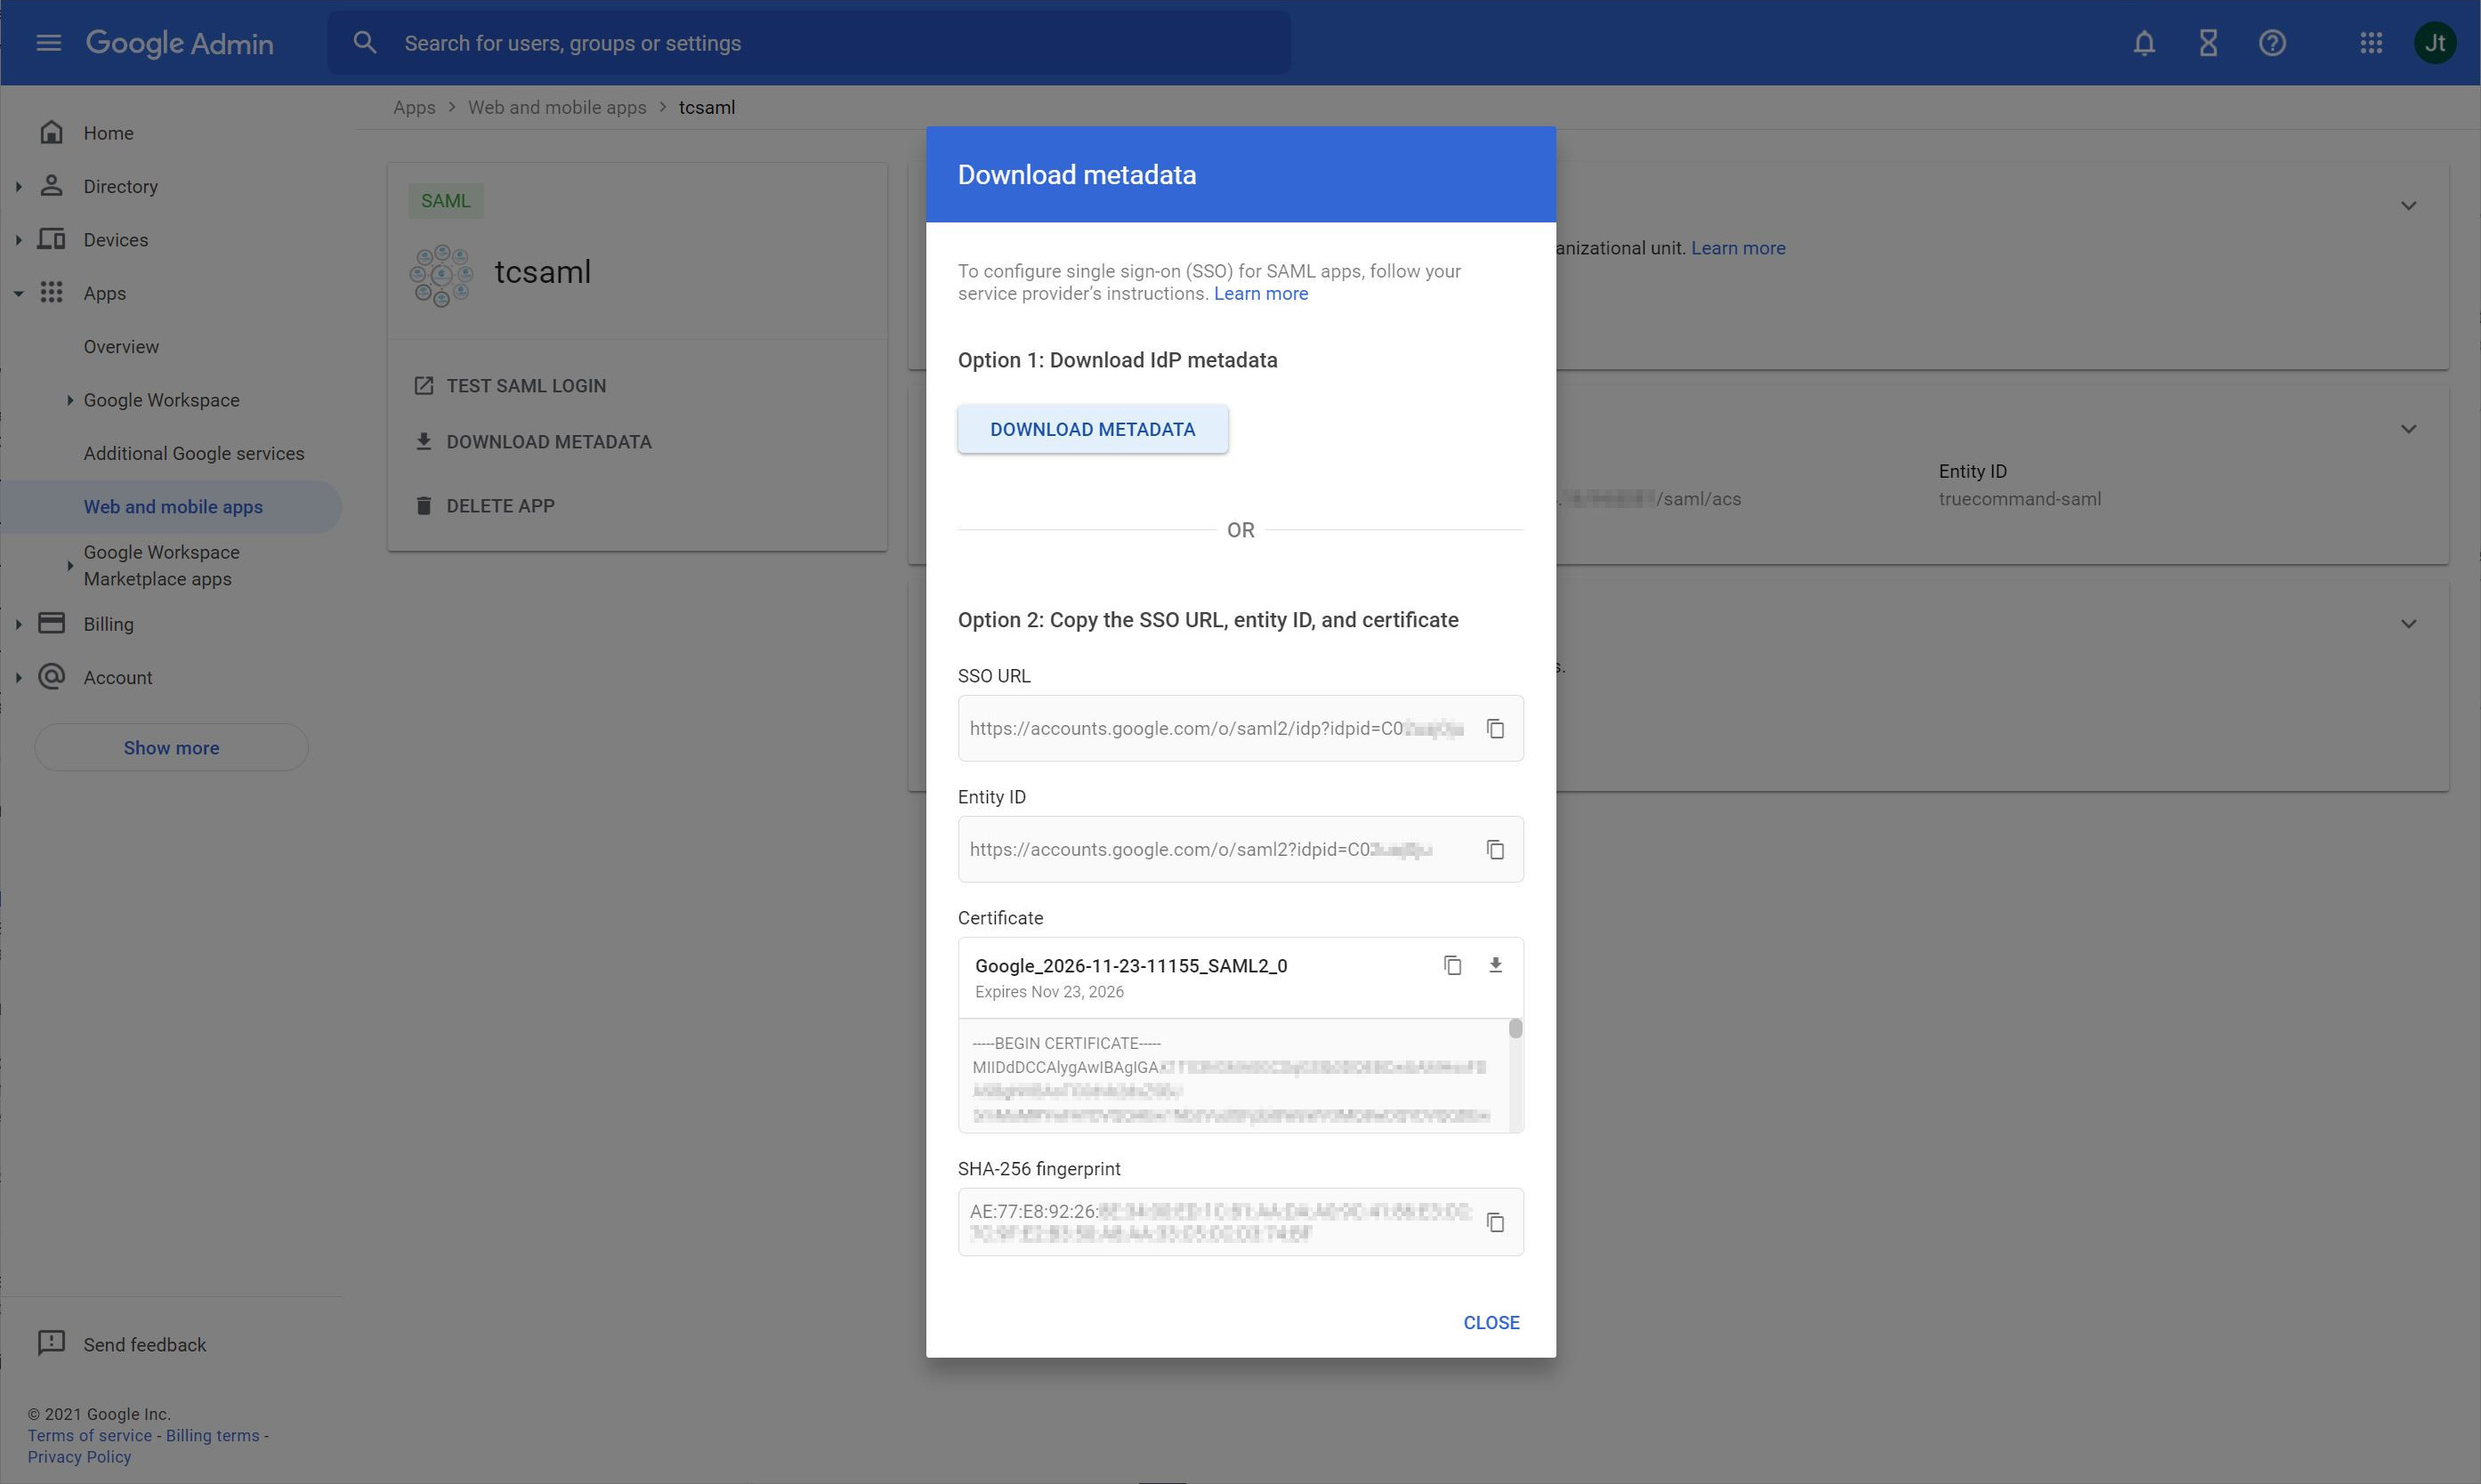
Download the metadata.
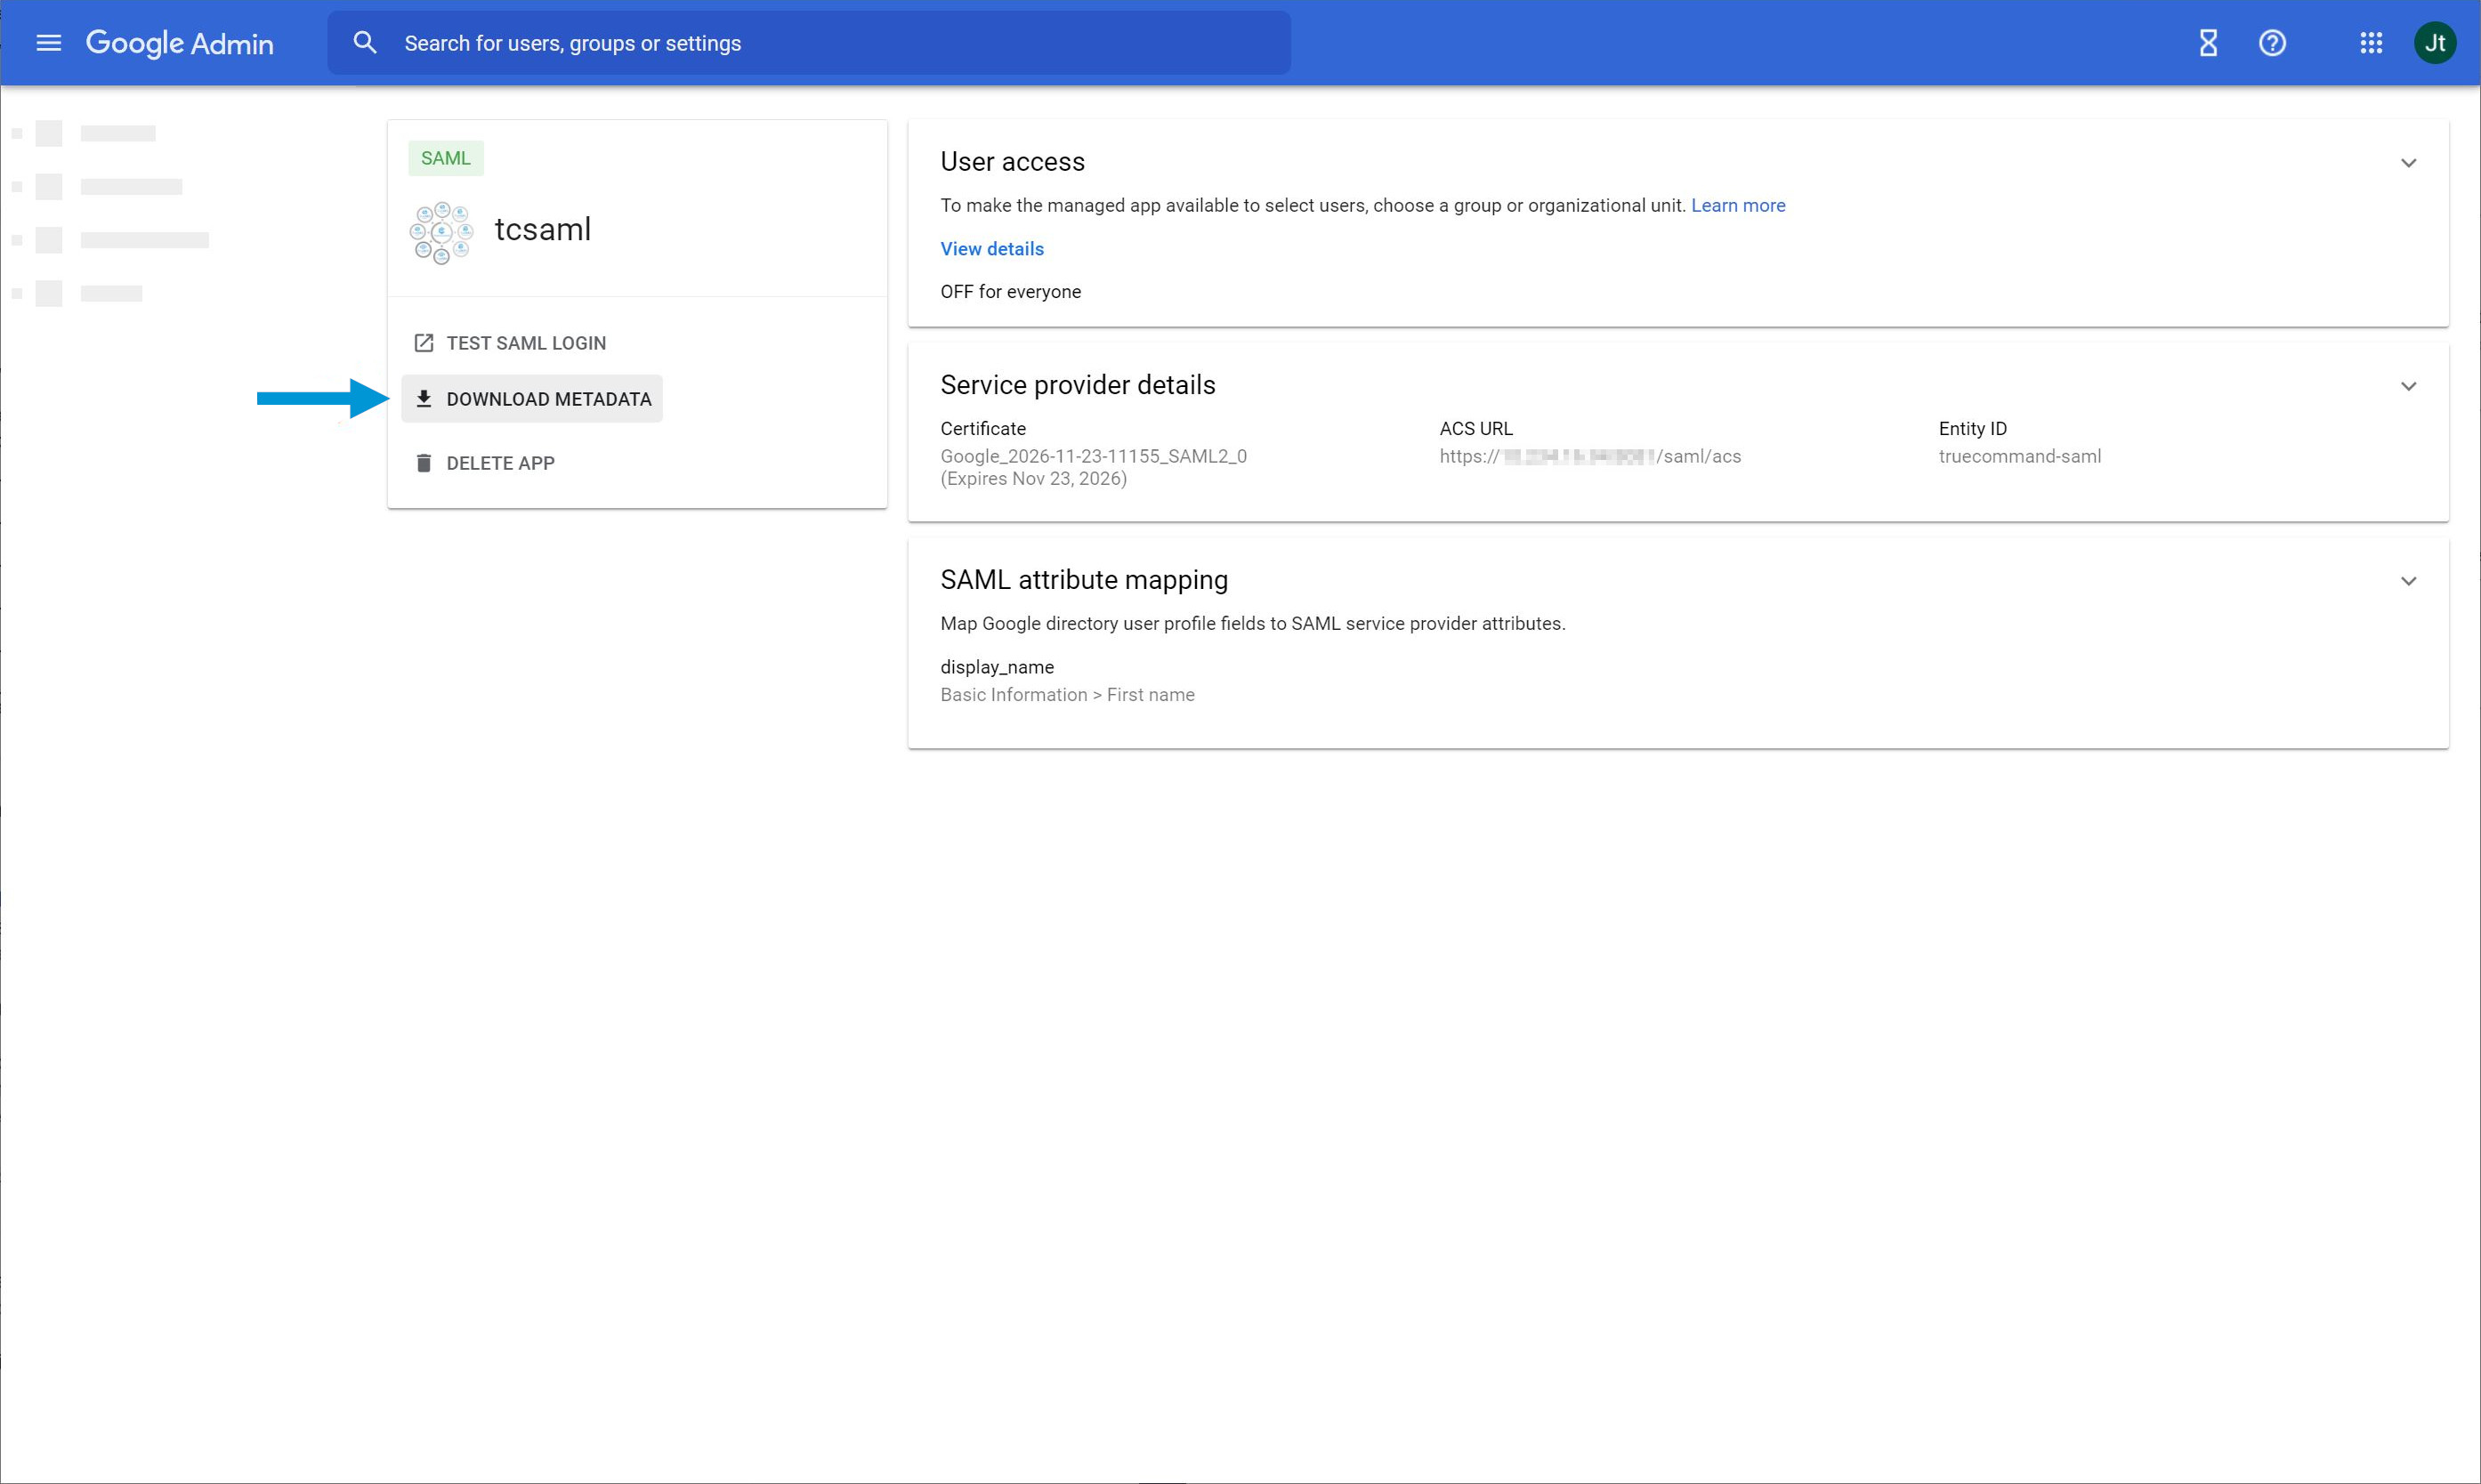
a. Select DOWNLOAD METADATA to open the Download Metadata window.
b. Click DOWNLOAD METADATA again. When complete, click CLOSE.
-
Verify user access details.
a. Click View Details under User access to display the Service status details.
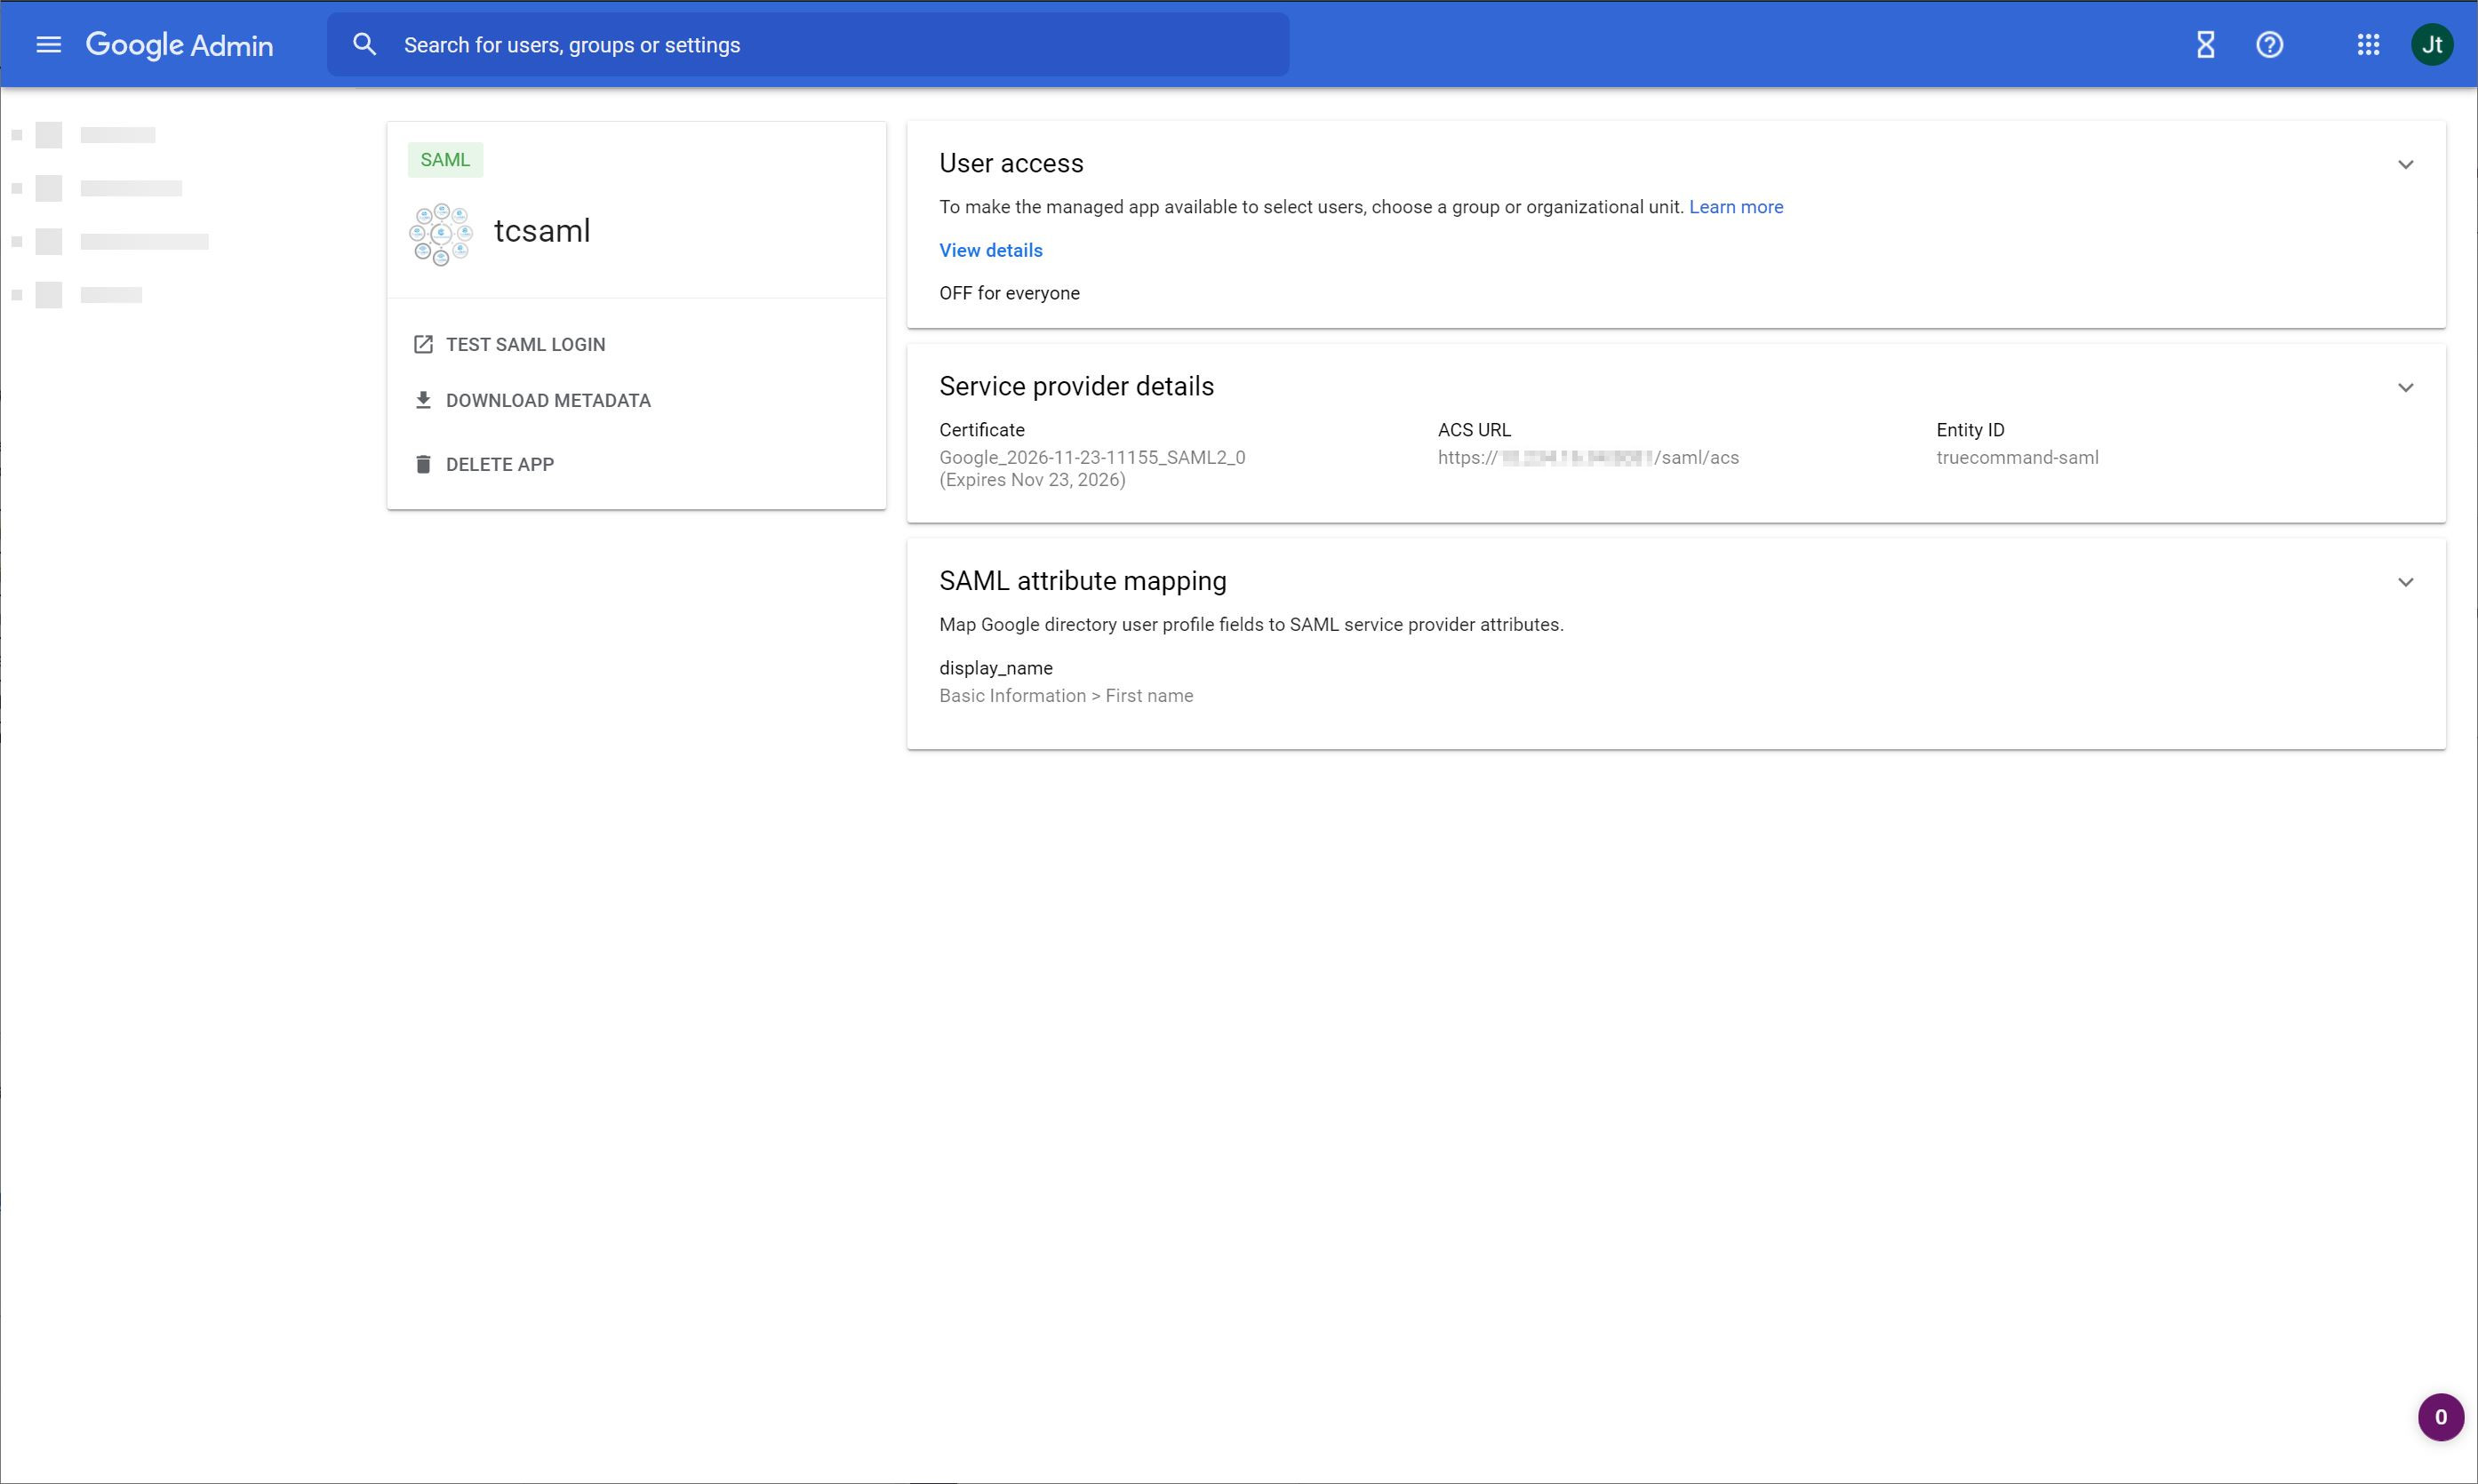
b. Select ON for everyone and click SAVE.
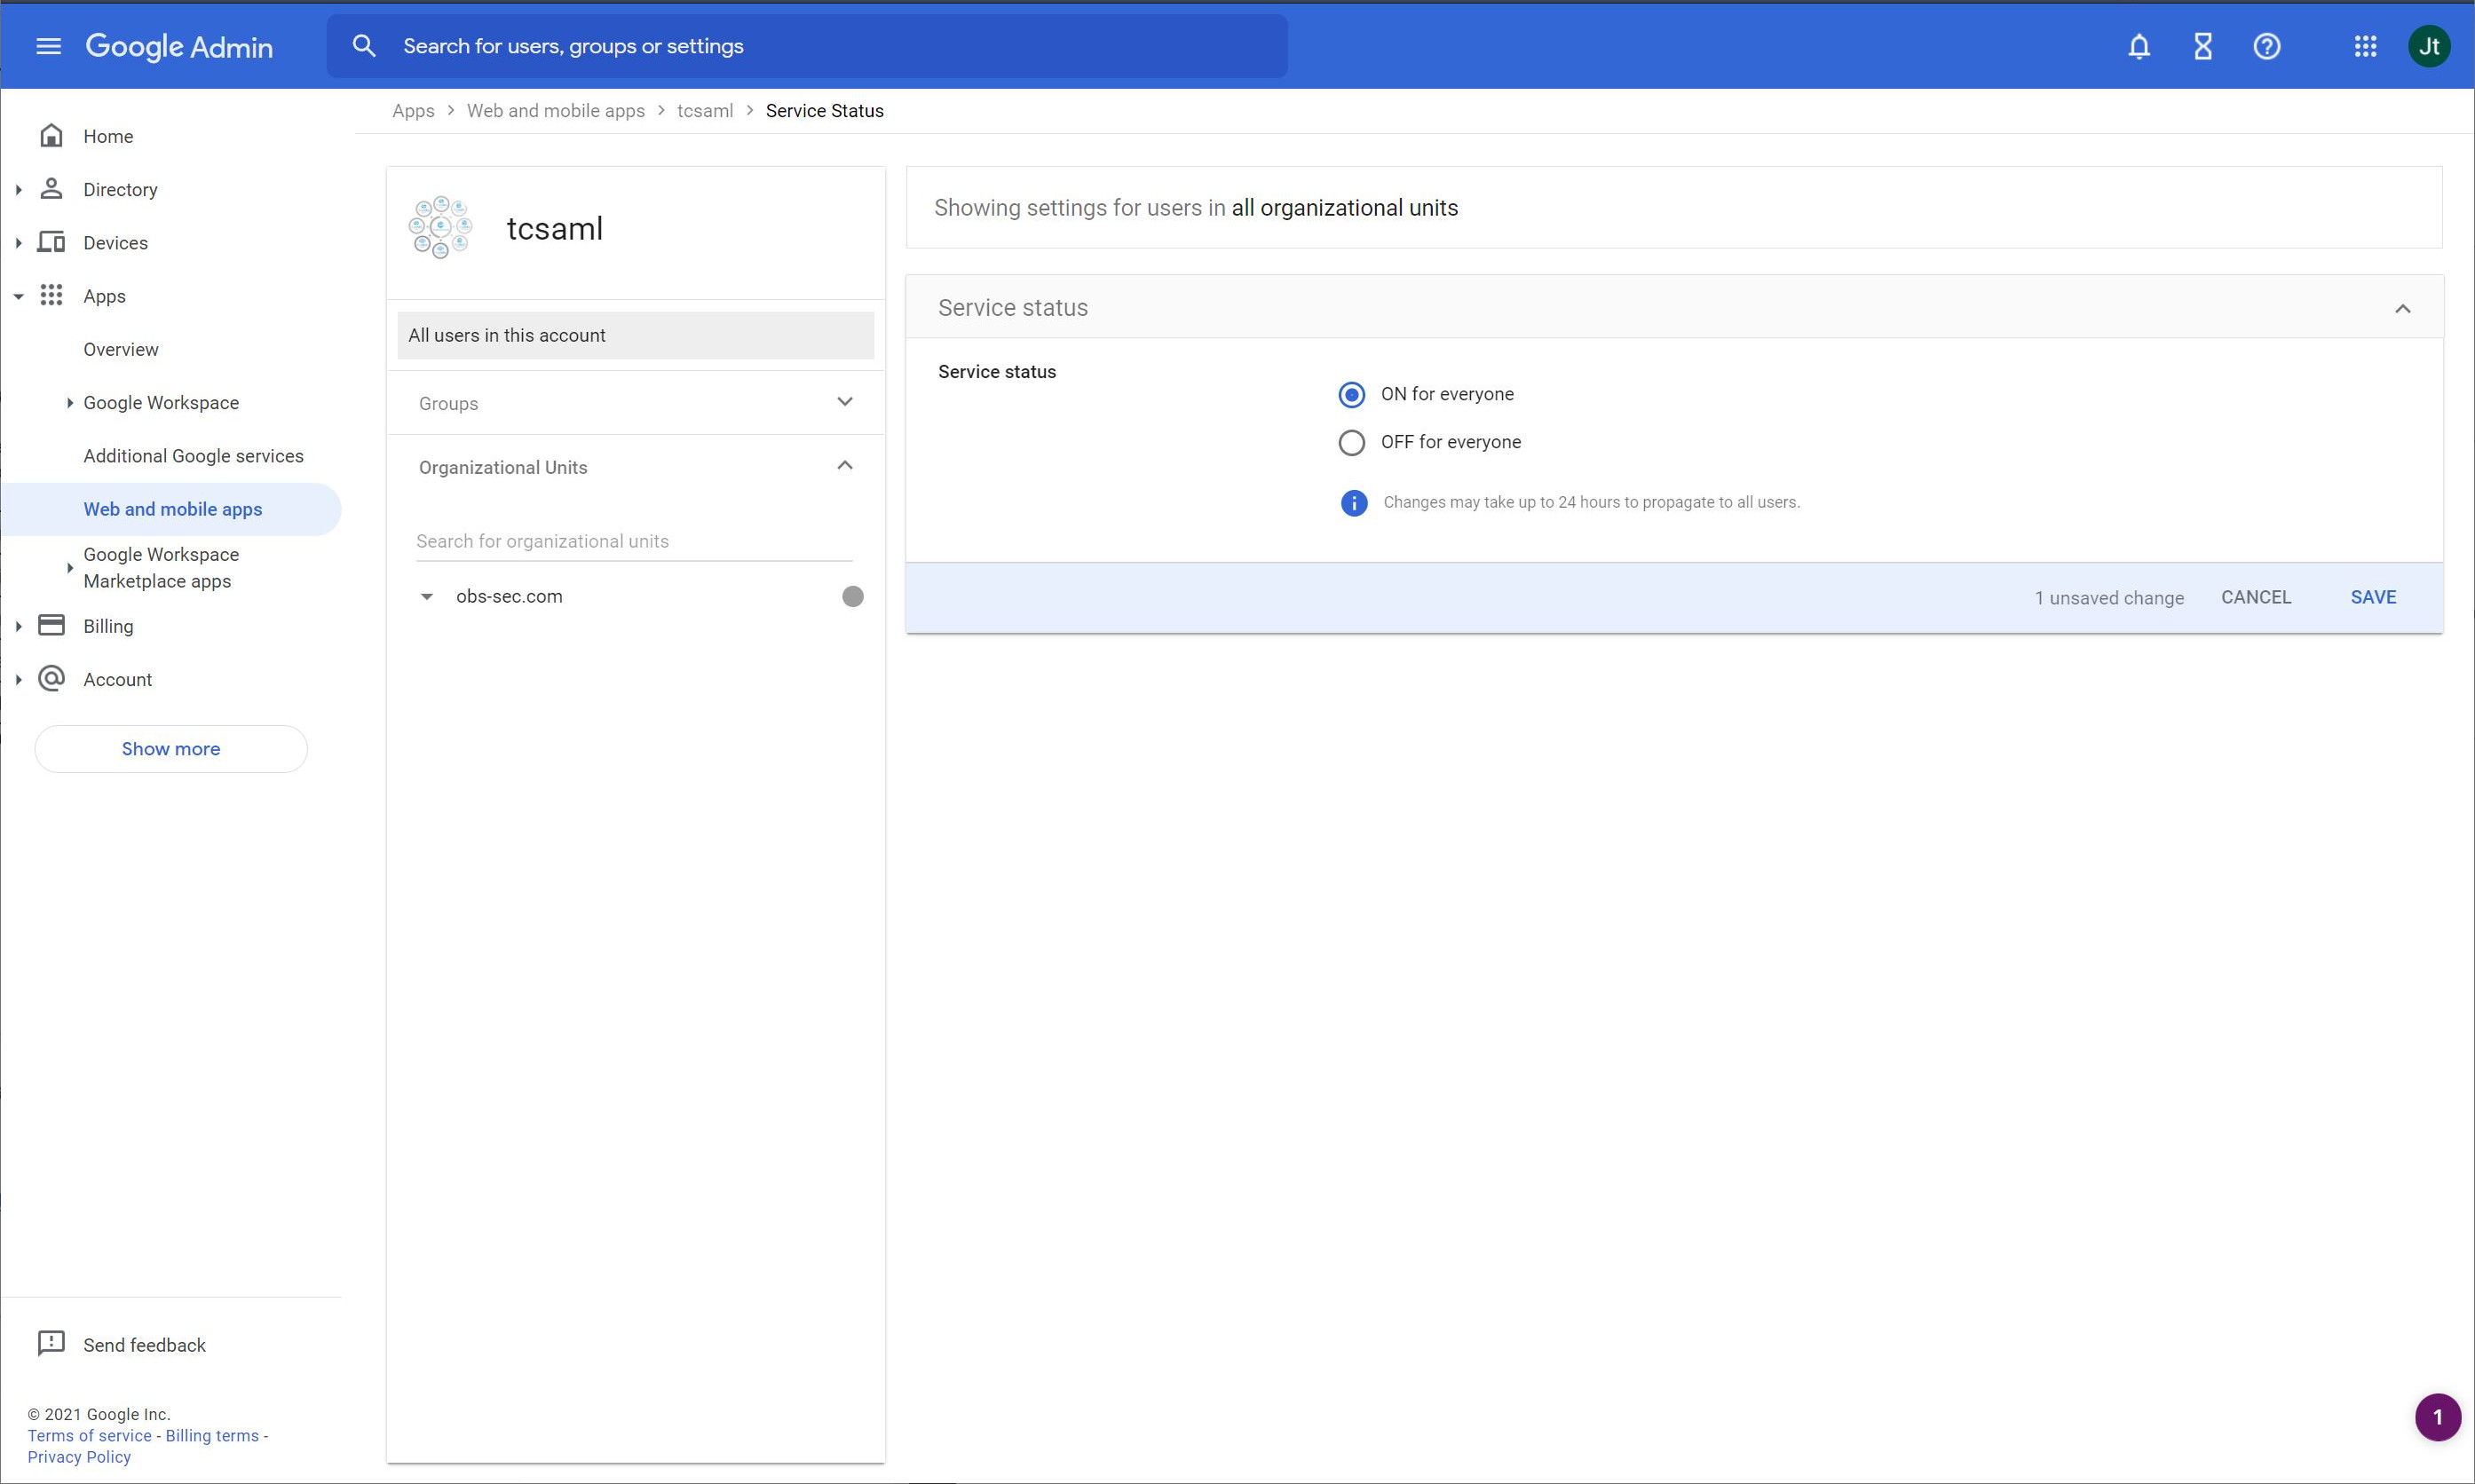
If you want granular user control, use this area to set it.
-
Wait up for approximately 10-20 minutes for Google to populate all settings through its servers
-
Log into TrueCommand as an administrator.
-
Click the settings button on the top toolbar. Click Administration. Click Configure in the Configuration widget. The Configuration screen with the editable settings displays. Scroll down to SAML settings.
-
Enter the Google Admin XML metadata file into the SAML Identity Provider Metadata XML Upload field, then click Save.
-
Select Start the SAML service to enable the service, and click Save again.
-
Log out of TrueCommand UI.
-
Login now using the SAML Login option.

