Importing Disks
2 minute read.
Last Modified 2022-12-09 09:08 -0500Importing is a one-time procedure that copies the data from that disk into a TrueNAS dataset. TrueNAS can only import one disk at a time, and you must install or physically connect it to the TrueNAS system.
You can use the import function to integrate UFS (BSD Unix), NTFS (Windows), MSDOS (FAT), or EXT2 (Linux) formatted disks into TrueNAS.
You can only import one disk at a time.
To import a disk:
-
Go to Storage and click Disks at the top right of the screen.
-
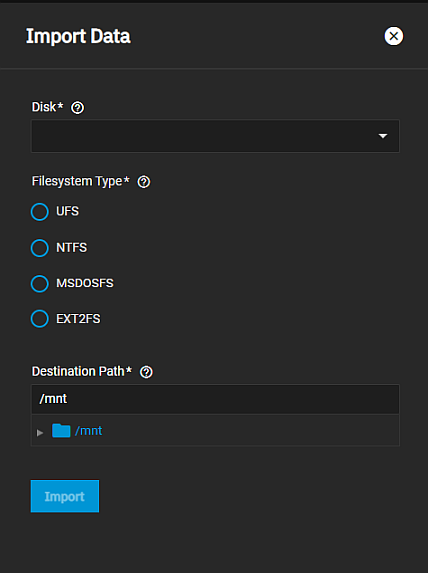
Select Import Disk to display the Import Disk screen.

-
Use the Disk dropdown list to select the disk you want to import.
TrueNAS attempts to detect and select the file system type. If not already selected by the system, click a radio button for a file system type to use from the on-screen options.
Selecting the MSDOSFS file system displays the MSDOSFS locale dropdown field. Use this option to select the locale when non-ASCII characters are present on the disk.
-
Select the ZFS dataset you want to hold the copied data in Destination Path.
-
Click Save. The disk mounts and copies its contents to the specified dataset you entered in Destination Path.
To monitor an in-progress import, open the Jobs Manager by clicking the assignment on the top toolbar. The disk unmounts after the copy operation completes. A dialog allows viewing or downloading the disk import log.

