Alert Management
6 minute read.
Last Modified 2022-03-08 15:48 -0500TrueCommand alerts provide visual warnings for monitored systems that require attention. Monitored systems and TrueCommand alert rules can both generate alerts.
TrueCommand provides three alert screen options:
- All Alerts displays all alerts from systems that TrueCommand monitors.
- Alert Rules allows administrators and users with permissions to configure alerts for monitored systems.
- Alert Services allows administrators to configure communication plugins.
The All Alerts, Dashboard, and Systems screens display alert indications.
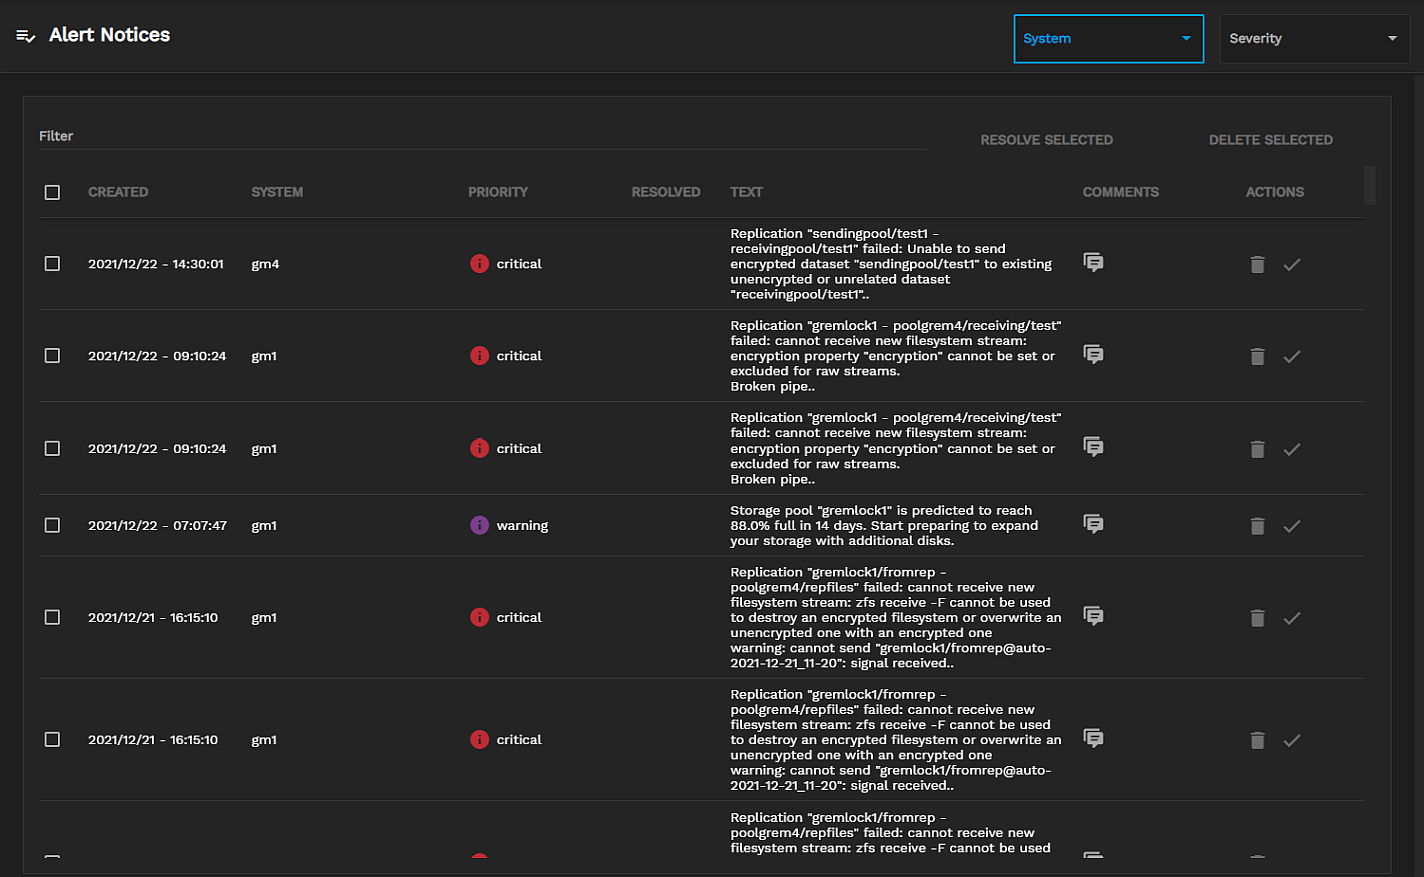
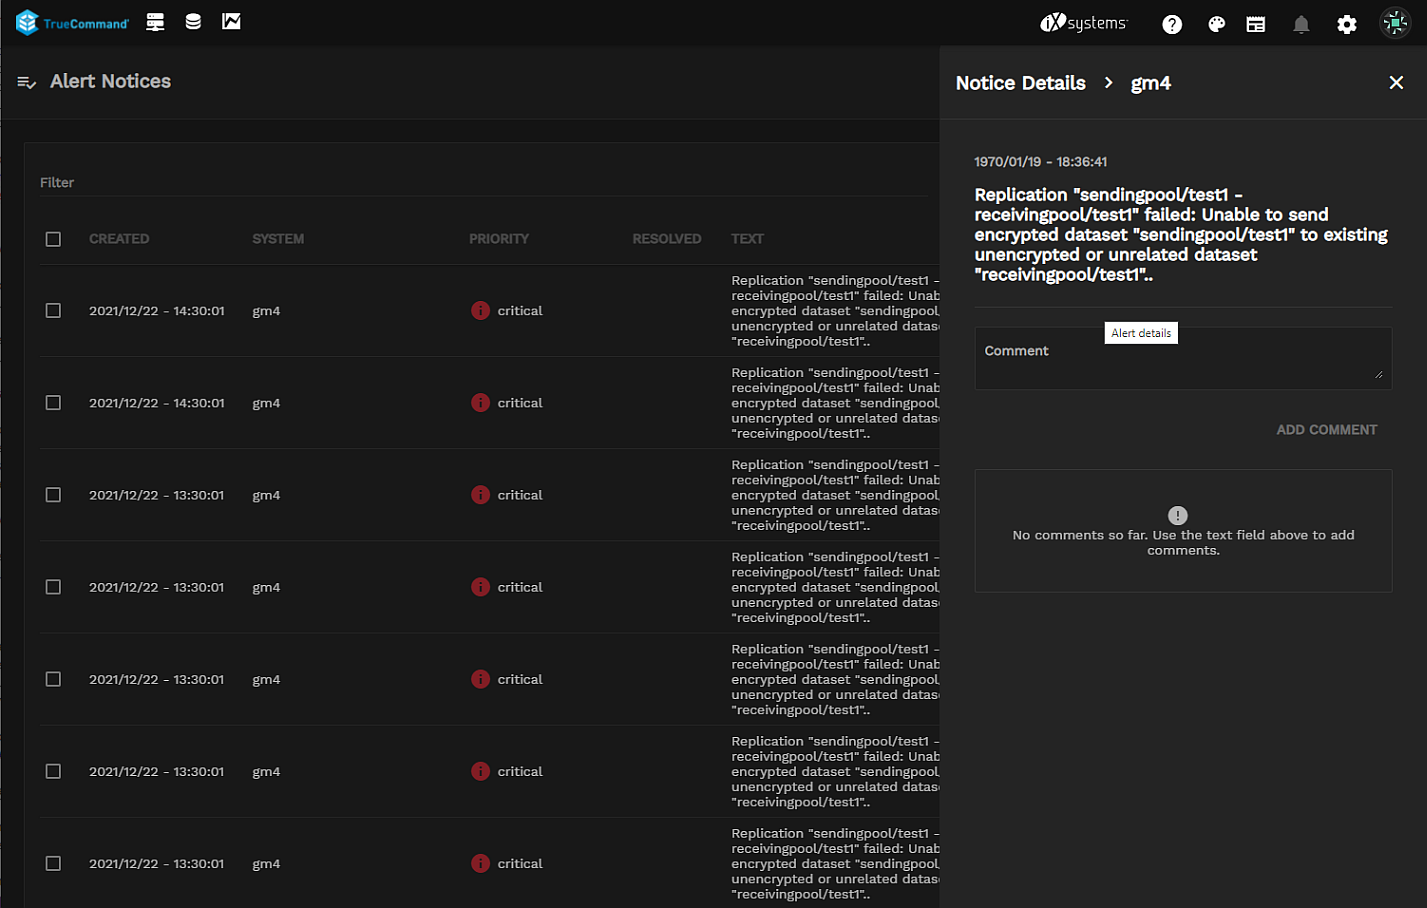
To see all alerts TrueCommand has discovered, open the Configure settings menu and click All Alerts. Administrator accounts can see all system alerts. Non-administrator accounts can only view alerts according to their team and user account permissions.
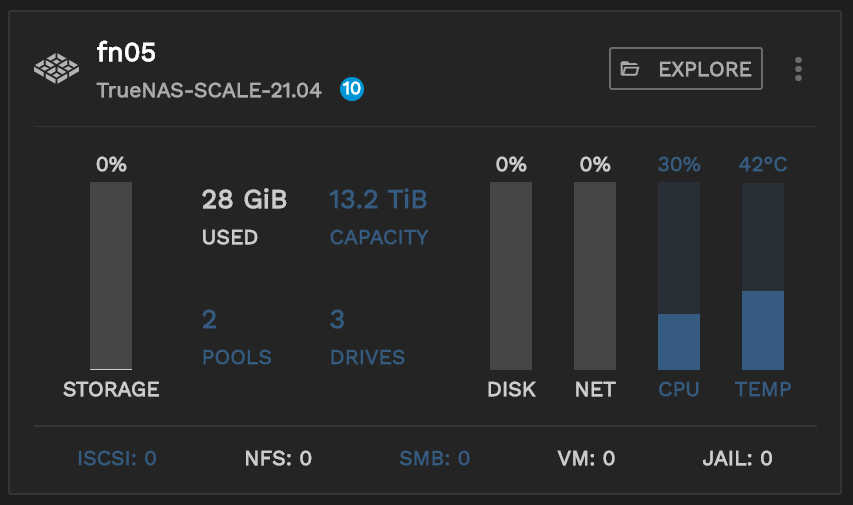
Alerts generated by a monitored system display on both the Systems screen and the system card or detail single system view on the Dashboard as a number to the right of the system name.
To view all alerts for a single system from the Dashboard, click on the system name to open the system details screen. The Alerts area displays the system’s alerts.
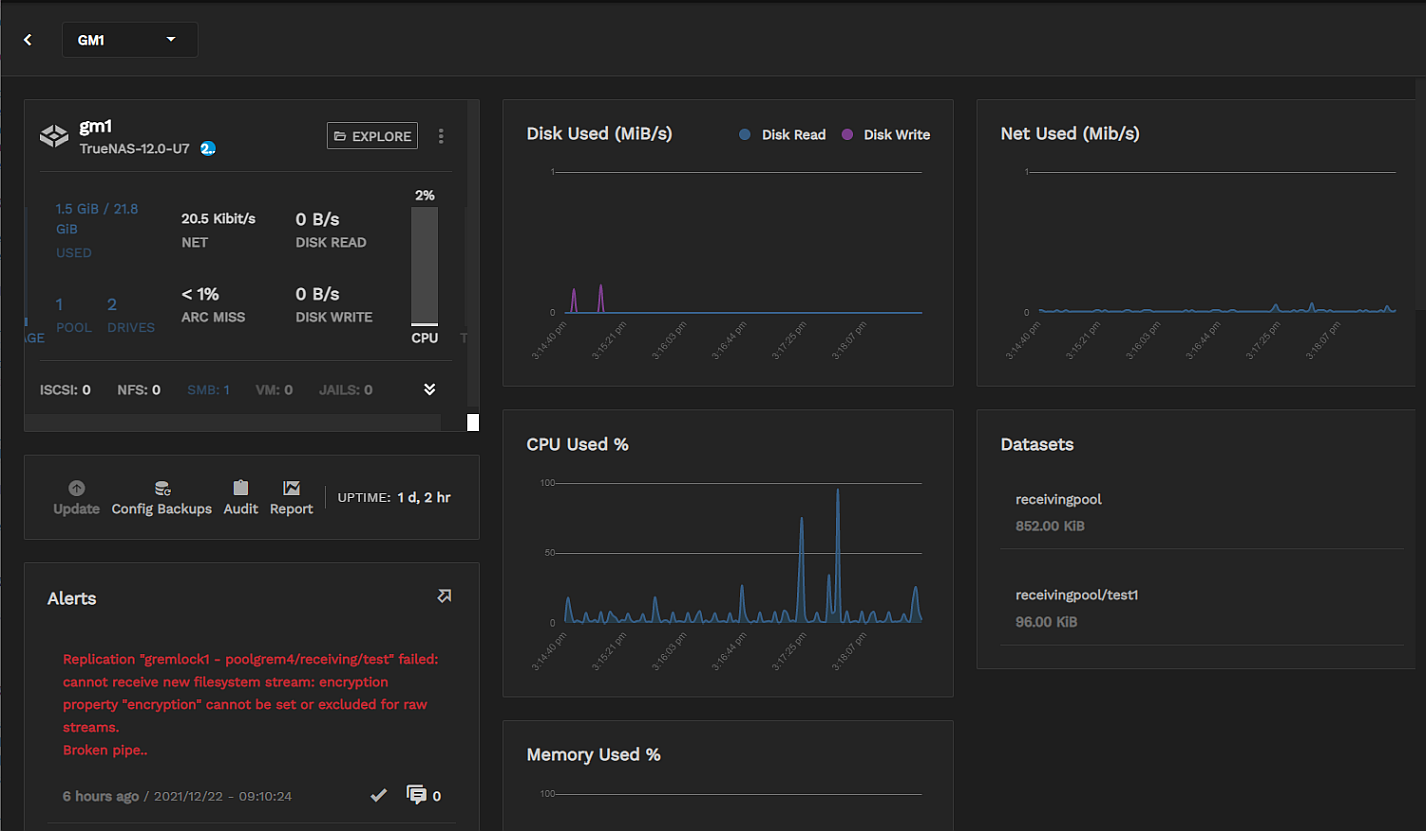
Click the icon in the Alerts area of the system detail screen to display the Notice Details side panel with information about the alert and any user comments made.
To view all alerts from the Systems screen system list, click the Configure settings menu and then click Systems.
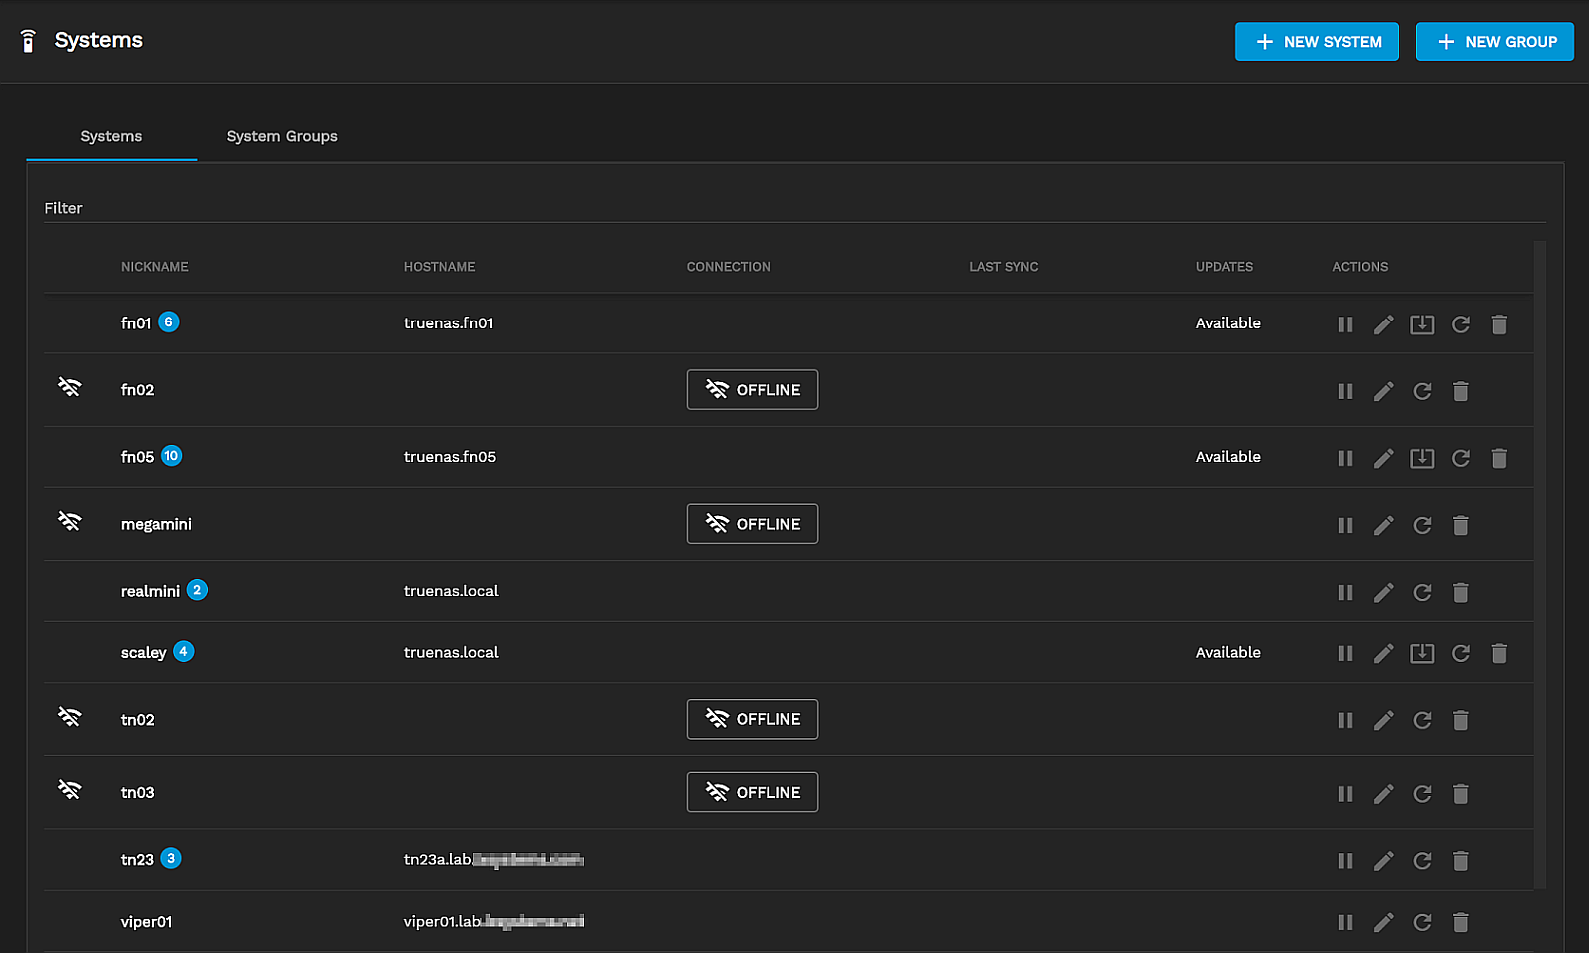
Just as with the systems detail alerts, click on the icon in the COMMENTS column to display the Notice Details side panel with information about the alert and any user comments made.
You can move an alert in the All Alerts screen to the RESOLVED column by clicking the Resolve check to the right of the delete icon.
To resolve multiple alerts, select each alert checkbox, then click RESOLVE SELECTED.
Click the icon in the COMMENTS column to display the Notice Details side panel with information about the alert and any user comments made.
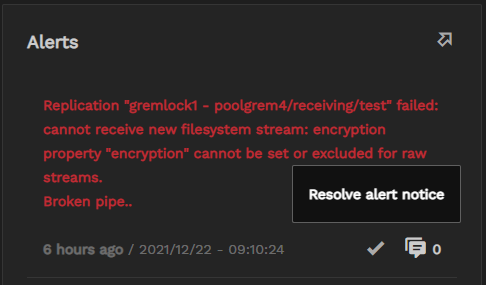
To resolve an alert on the system detail screen Alerts area, click Resolve alert notice check to the left of the comments icon.
Administrator accounts can delete an alert by clicking the delete icon. Deleting an alert cannot be undone. To delete multiple alerts, select each alert checkbox and click DELETE SELECTED delete.
Alert rules generate alerts in TrueCommand. TrueCommand has several built-in default rules. TrueCommand administrators and team members with the appropriate permissions can create new alert rules.
To view all TrueCommand alert rules, open the Configure settings menu and click Alert Rules.
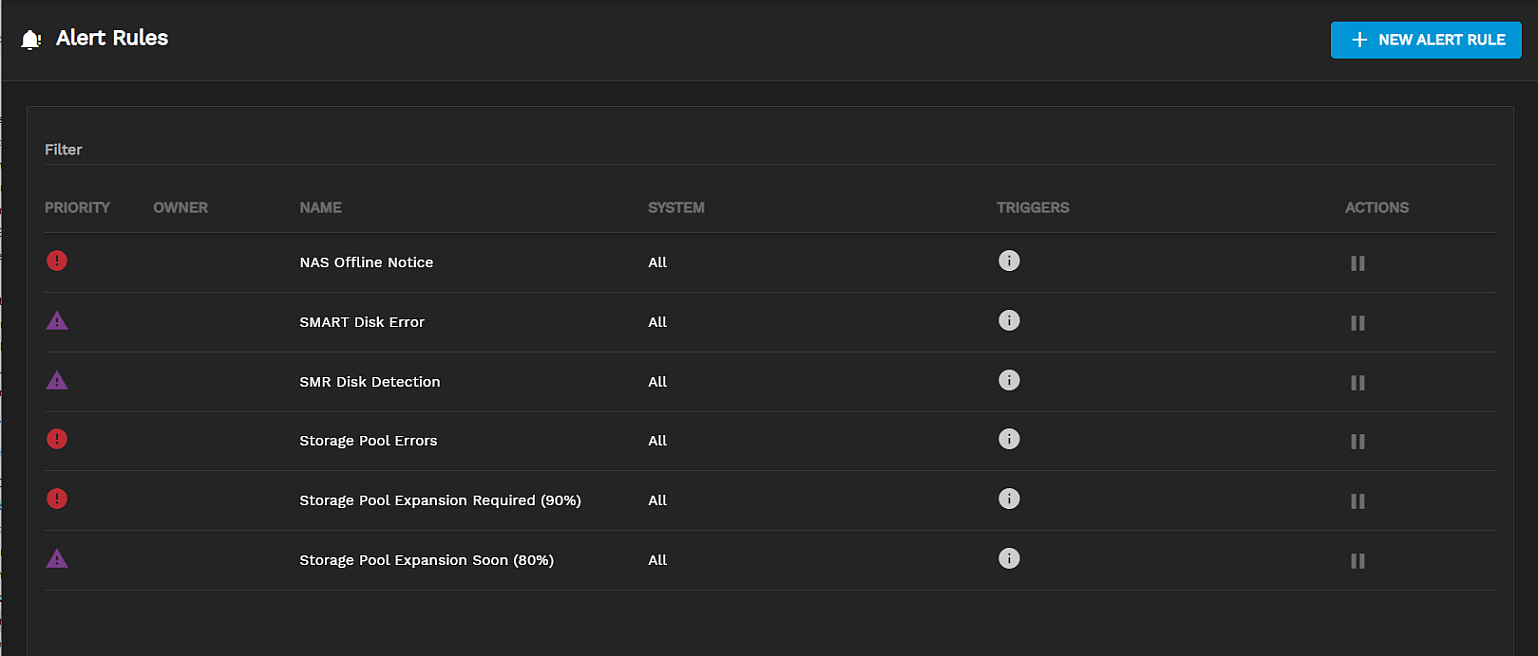
The Alert Rules screen details each TrueCommand alert rule and shows which user account created it.
Users can activate, suspend, edit, or delete alert rules using either an administrator account or the one that created them. Users can create new TrueCommand alert rules to monitor system information and generate a TrueCommand alert if specific conditions occur. To create a new alert rule, click + NEW ALERT RULE and follow the creation wizard:
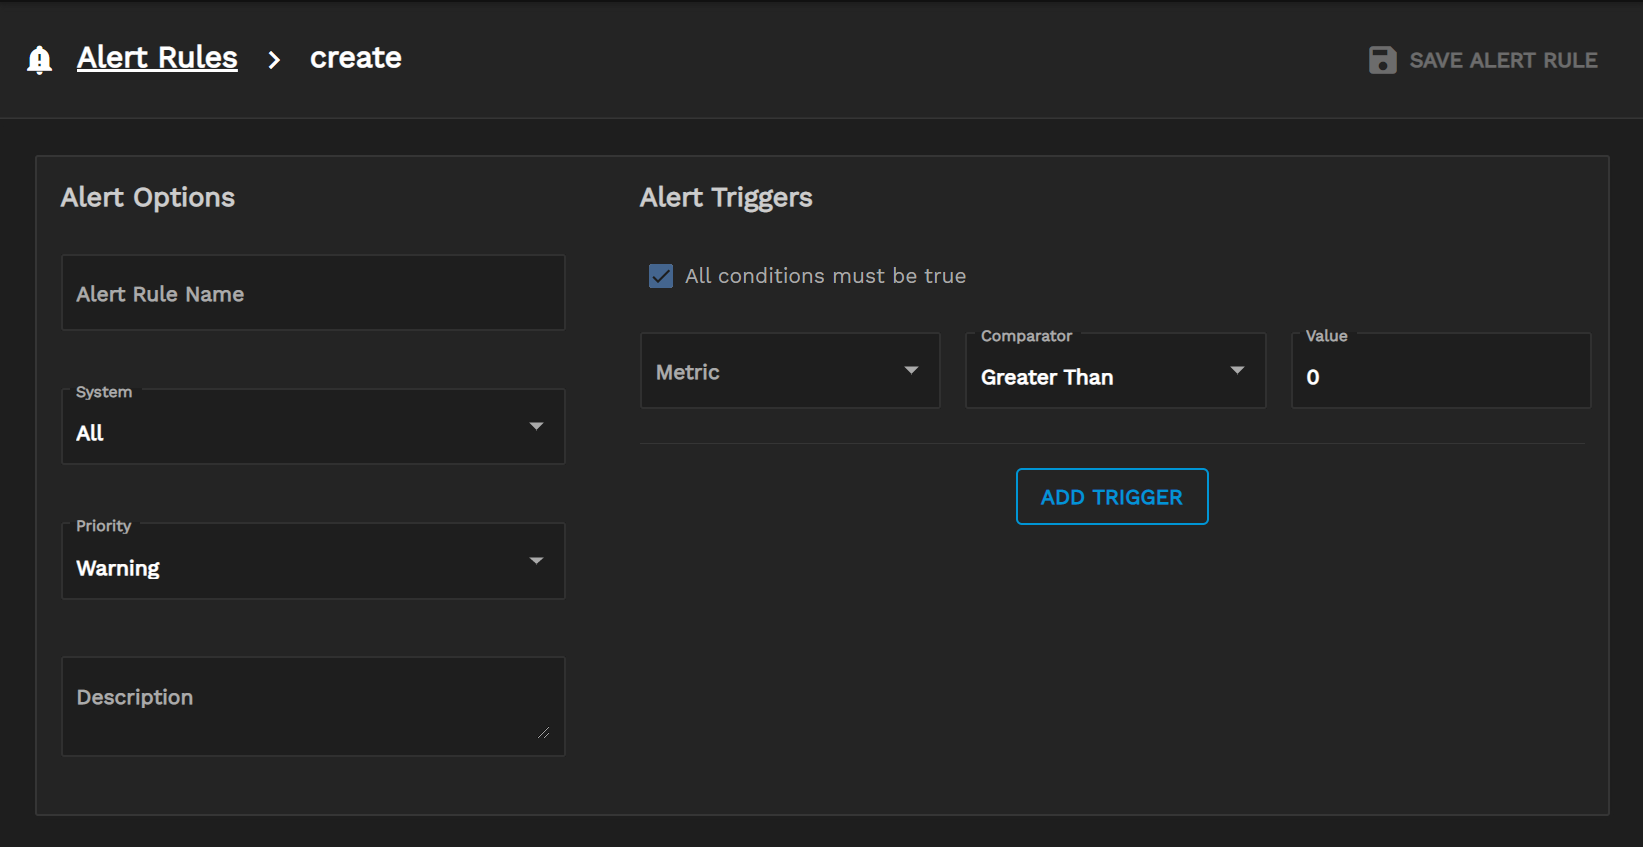
To create a new rule:
-
Specify the Alert Options: a. Enter a name into the Alert Rule Name field. b. Select a system from the System drop-down. The rule applies to the selected system(s). Non-administrative user accounts require appropriate system permissions. c. Select the alert type on the Priority drop-down list. Choose Information, Warning, or Critical to determine the alert category generated. d. Type a description for the alert.
-
Specify the Alert Triggers: Select a data source or rule type from the drop-down list to determine what can trigger an alert. For example, cpu_temperature means the alert rule monitors the temperature of the chosen system. Scroll down the list to find the desired source.
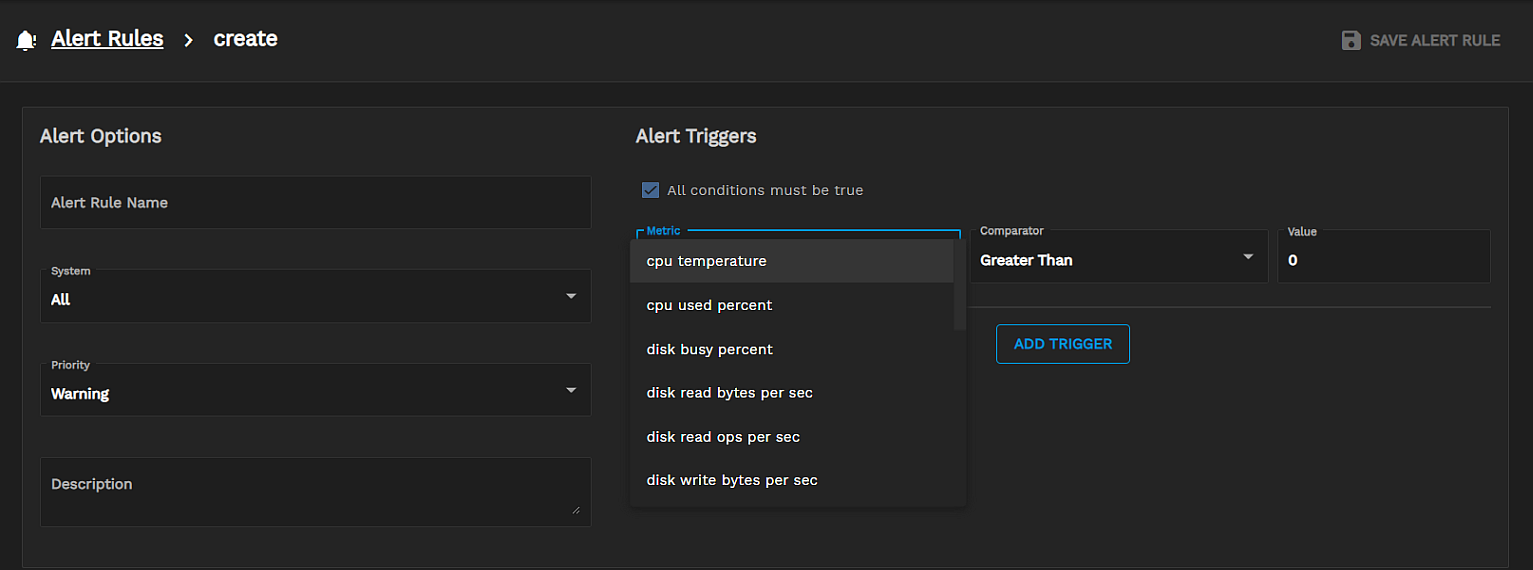
b. Select the comparison type from the Comparator drop-down list (Greater Than, Less Than, or Not Equals). The comparison type applies to the data source and comparison value. c. Specify the comparison value by entering an integer appropriate for the selected options in the Value field. The integer acts as a threshold or limitation for when the rule generates an alert.
-
To finish creating the new alert rule, click CREATE ALERT. To start over, click RESET.
Configurable alert services are only available for local installations or containerized TrueCommand deployments. TrueCommand Cloud instances use email alerts by default; PagerDuty is not an option.
TrueCommand uses different service plugins to expand how it communicates alerts to users or administrators. Individual user accounts can use service plugins to manage how TrueCommand notifies them of a system alert.
To configure an alert service plugin, open the Configure settings menu and click Alert Services. There are two services listed:
- PagerDuty is a plugin to configure a pager to receive an alert.
- SMTP Email is a plugin to configure system and user email services.

Each plugin has three options:
- Send test email
- Configure plugin settings
- Clear plugin configuration
Before proceeding, verify that the sending mailserver has TLS enabled. TrueCommand cannot send emails through a mailserver without TLS. The user’s profile page must have an email address to receive emails.
To properly configure SMTP email:
-
Enter values in all fields on the SMTP Email screen and then click SAVE:
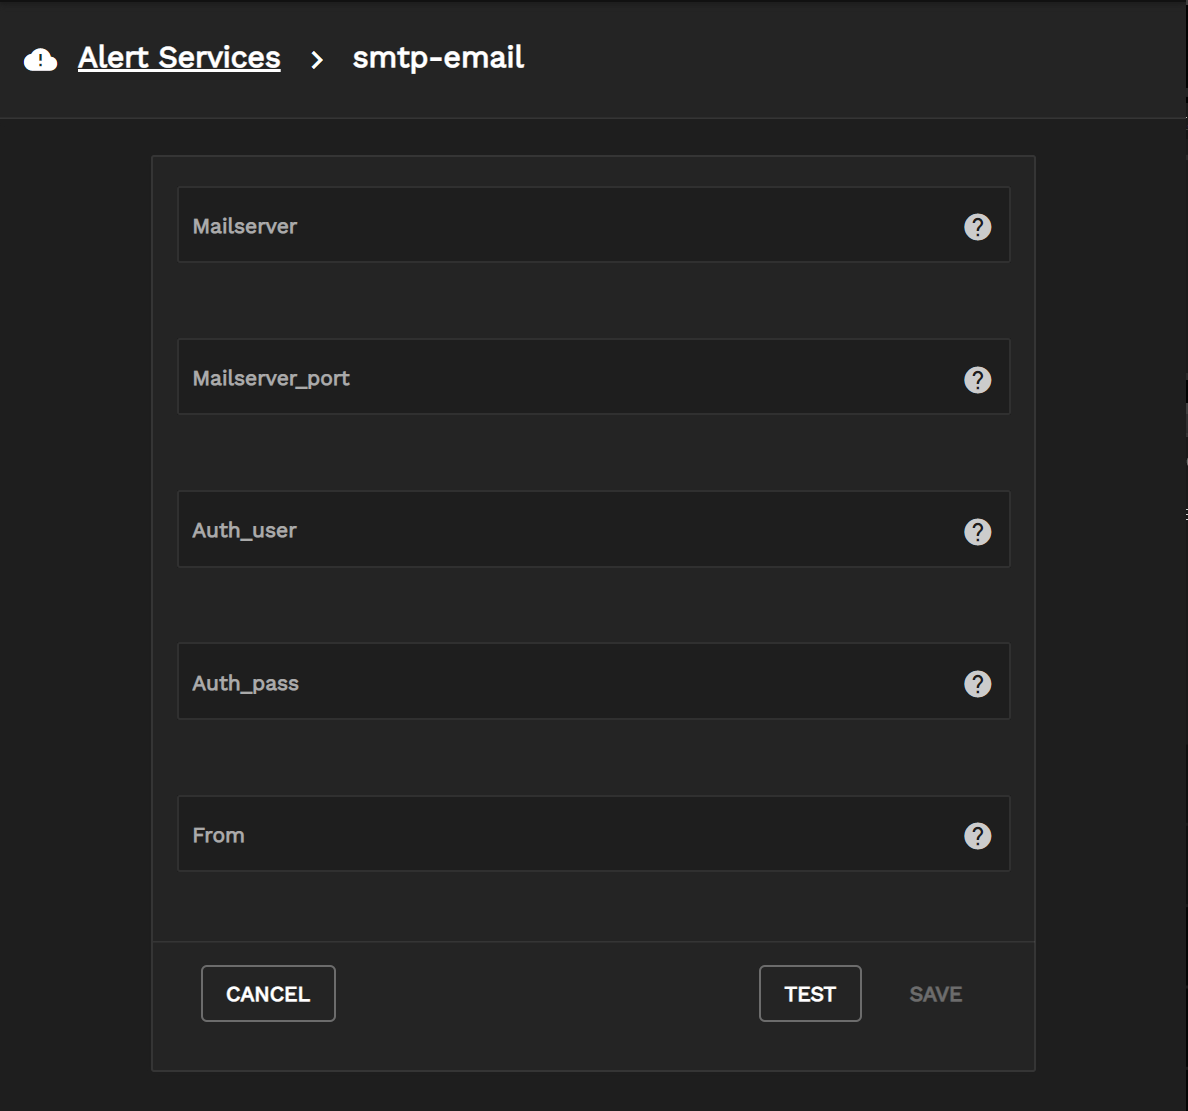
- Mailserver (smtp.gmail.com for example)
- Mailserver port number
- Auth user email address for plain authentication, for example, adminuser@yourmail.com
- Auth pass password for the plain authentication; for a No-Auth SMTP configuration, leave the password field blank
- From is what sends the email (i.e., no-reply@TrueCommand.io) or allows you to customize the sender field of the email
Click Test on the SMTP Email configuration screen to verify that the configuration is correct. If you did not receive a test alert email, check the values entered for accuracy.
-
Click on the avatar to the right of the Configure settings menu and then click Profile from the drop-down list.

-
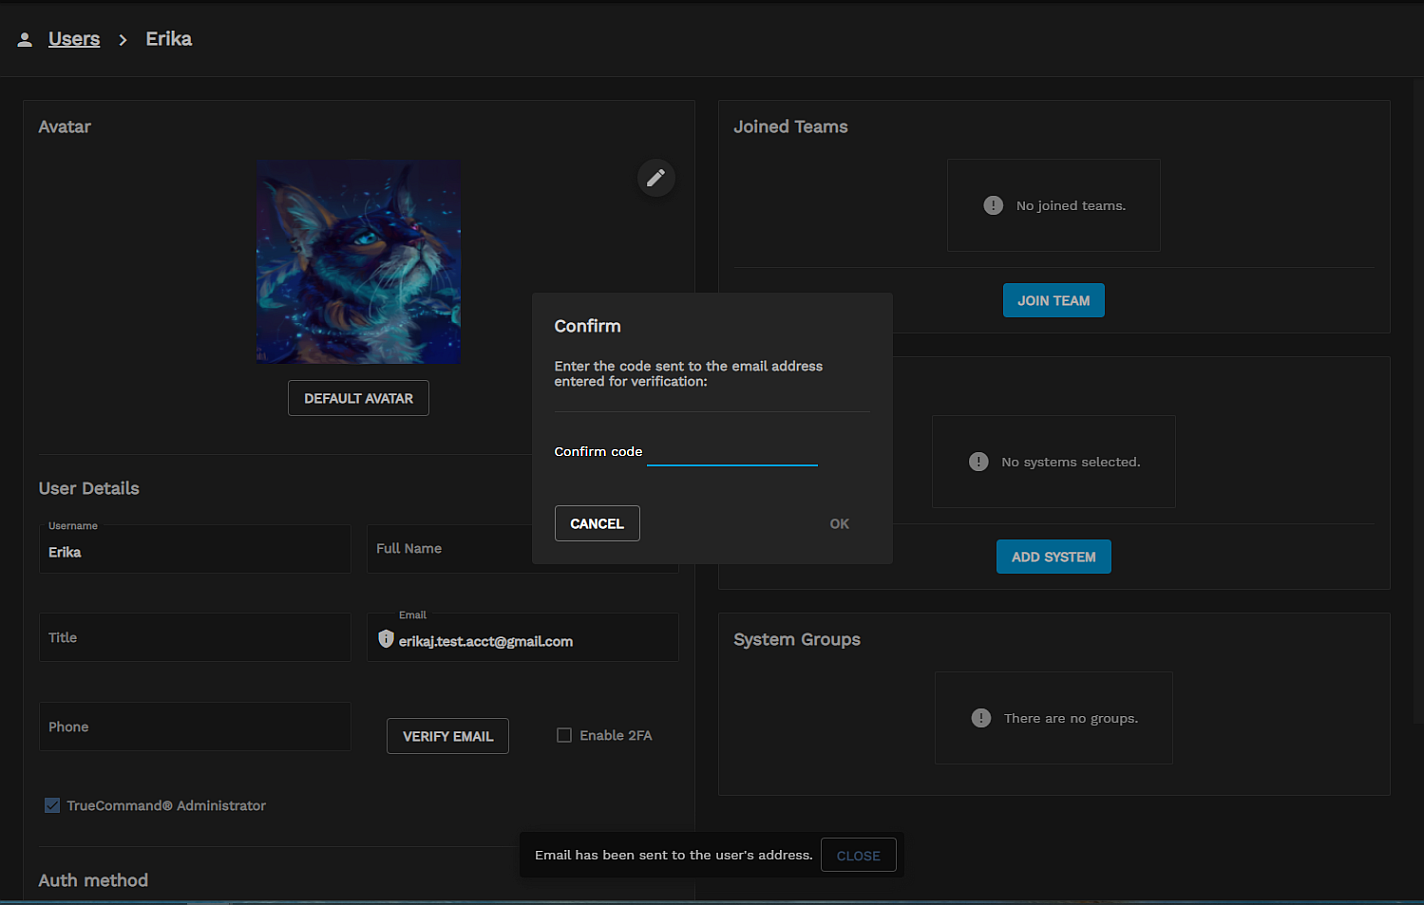
Type the email for that user in the Email field and click SAVE CHANGES. The first time you set up SMTP email, a VERIFY EMAIL button displays below the Email field to the left of the Enable 2FA checkbox.
The system should automatically send a test email to the specified email address. If it doesn’t, click VERIFY EMAIL. In the Confirm dialog box, enter or copy/paste the emailed code to verify the email.
Open the Configure Plugin settings for PagerDuty. Enter your PagerDuty API key in the Authtoken field. If you have an active subscription with PagerDuty, the key should be available to you. Click TEST.
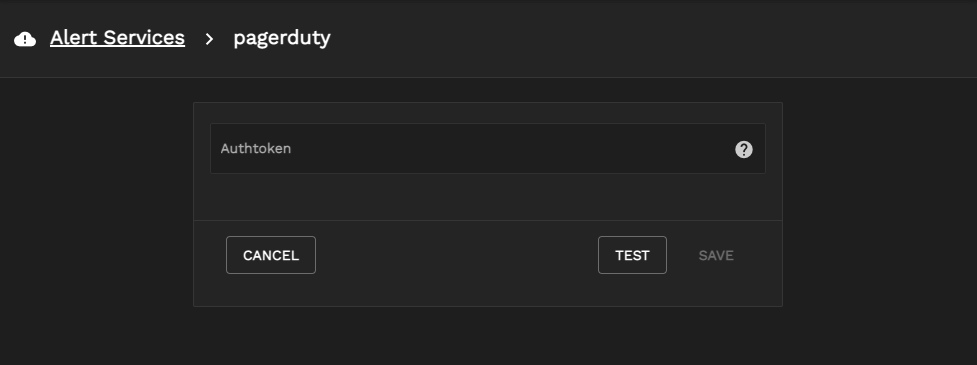
Log in to your PagerDuty account and check for open incidents. You should see the triggered test alert from TrueCommand.

If you did not receive a test alert, check the PagerDuty API key for accuracy in the alert service plugin configuration section.

