Configuring TrueCommand SAML Service for Active Directory
6 minute read.
Last Modified 2022-08-02 13:31 -0400Security Assertion Markup Language (SAML) is a single sign-on (SSO) standard for logging users into applications that require authentication credentials (like GitHub, G-Mail, etc.). Single Sign-on (SSO) works by transferring a known identity for a user to another location that provides services to the user. SAML accomplishes the transfer by exchanging digitally-signed XML documents.
A SAML configuration requires an Identity Provider (IdP) and Service Provider (SP). Active Directory is an example of an IdP.
This article provides instructions for setting up SAML service in TrueCommand and then in Active Directory.
-
Log in to your TrueCommand system (i.e., server, container, VM). To access the TrueCommand web interface, enter https://IP:PORT where IP:PORT is the IP address and port number assigned to your TrueCommand system, into a web browser URL field and then press Enter.
-
Go to Settings > Administration, then click on Configure in the Configuration widget. The Configuration screen with editable settings displays.
The SSL Options on the Configuration settings form has Accept self-signed certificates selected by default. Keep this setting to be able to use a self-signed certificate. It also helps prevent issues with HTTP versus HTTPS URLs.
-
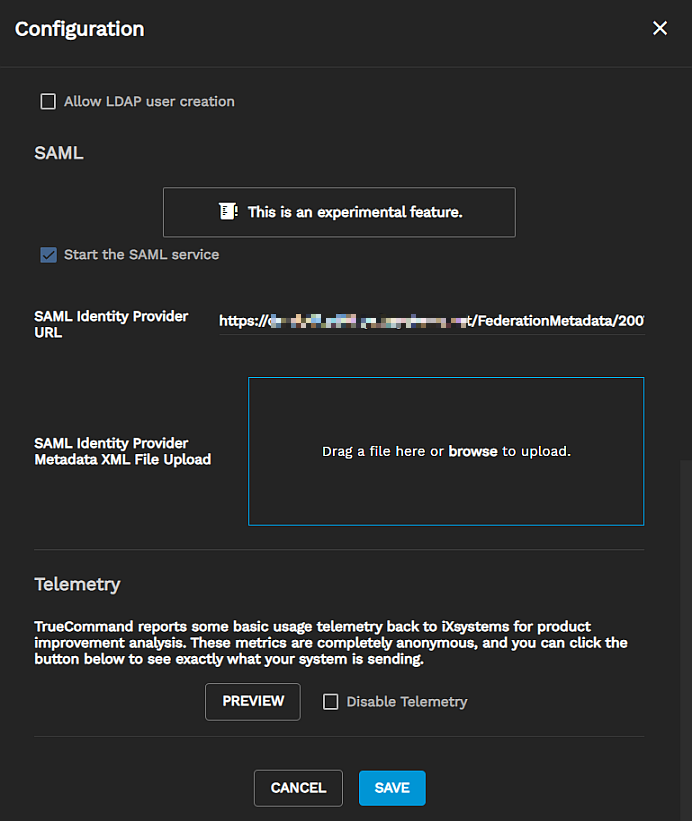
Enter the URL from Active Directory. Enter https://ds.yourcompany.net/FederationMetadata/2007-06/FederationMetadata.xml in the SAML Identity Provider URL field, then click Save.
-
Click Configure again, scroll down and select Start the SAML service, then click Save to start the service.
-
Click Configure again, click DOWNLOAD SERVICE PROVIDER METADATA. Test the service as described in the detailed steps by entering the metadata file from Active Directory in the SAML Identity Provider URL field.
-
Log out of TrueCommand.
To configure AD as the IdP, you must create a Relying Party Trust and then modify the properties of that relying party trust. After accessing the server hosting AD, you must:
-
Create an AD FS Relying Party Trust.
-
Download and modify your TrueCommand system certificate. Each TrueCommand has a unique certificate you must use for the configuration to work.
-
Configure the TrueCommand URL in Active Directory as a trusted URL
-
Configure the identifiers.
-
Modify the Relying Party Trust properties to add and edit endpoints.
-
Configure the Claim Issuance Policy to add the incoming and outgoing claim types.
This process is described in the next section.
-
Log into your Active Directory server as an administrator user (QE is the administrator user in this example procedure).
-
Create an AD FS Relying Party Trust. Go to Tools and select AD FS Management.
a. Go to Trust Relationships > Relying Party Trusts and then delete any entries found. Each TrueCommand has a unique certificate. To ensure you have the correct TrueCommand certificate, delete existing certificates and then obtain a new one.
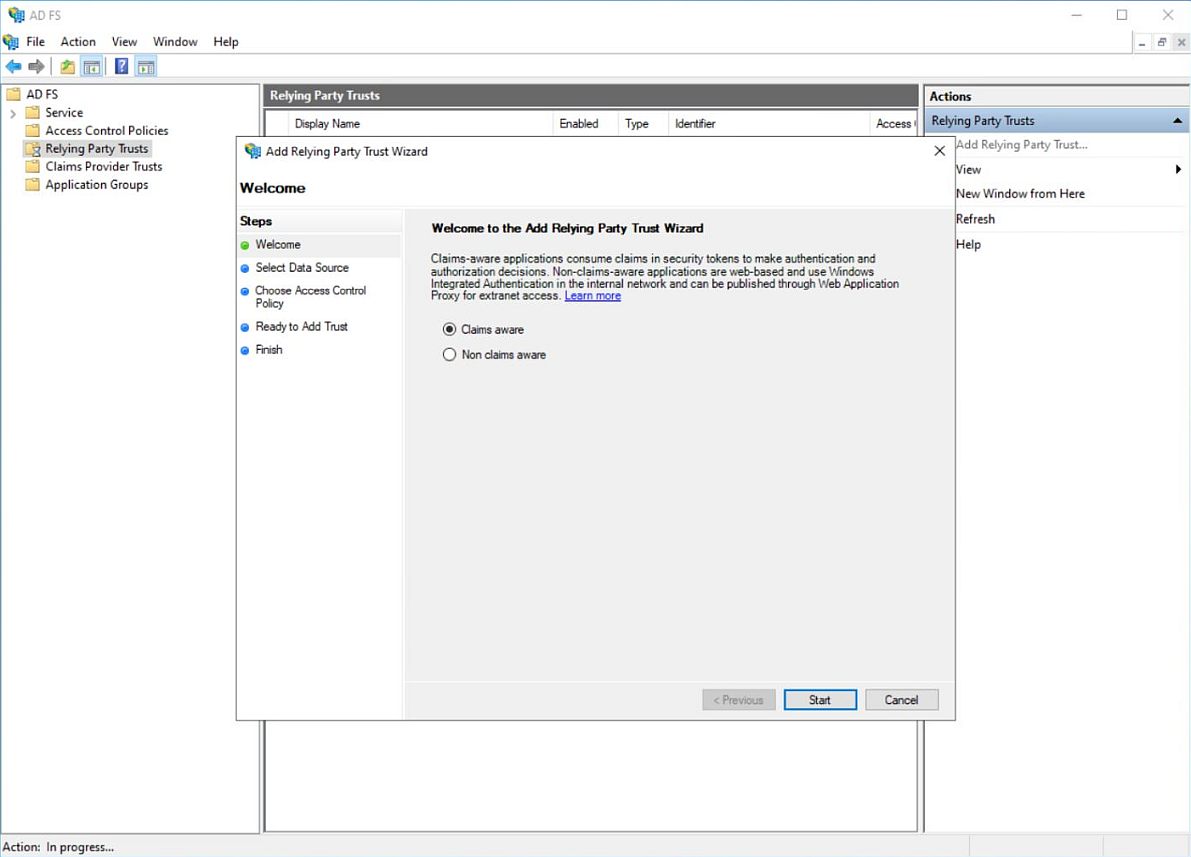
b. Select Add Relying Party Trust on the AD FS to open the Add Relying Party Trust Wizard. Click Start.
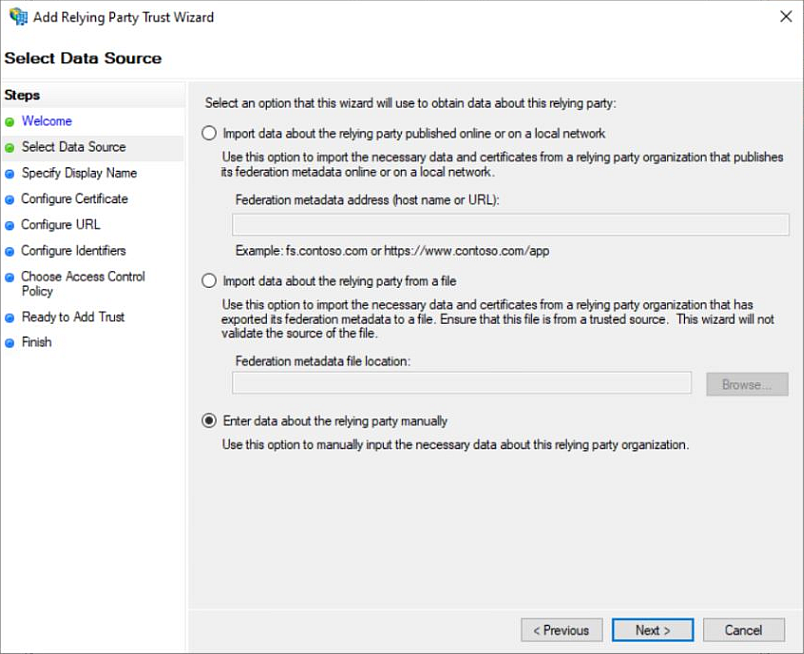
c. Select Enter data about the relying party manually, then click Next.
d. Enter the name for the Relying Party Trust in the Display Name field. The example uses QE SAML. QE is the Windows administrator name, and SAML is the service name.
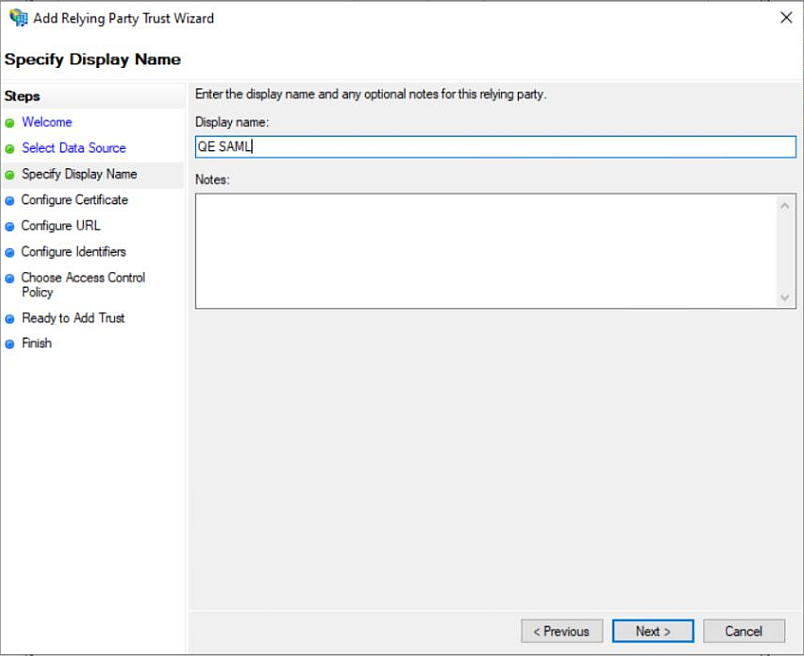
e. Click Next to move on to the Configure Certificate window.
-
Modify the TrueCommand Certificate (
tc.cer ).a. Open PowerShell and type the command
invoke-webRequest -uri http://IP:PORT/saml/metadata -outfile tc.cer. IP:PORT is your TrueCommand system IP address/port number.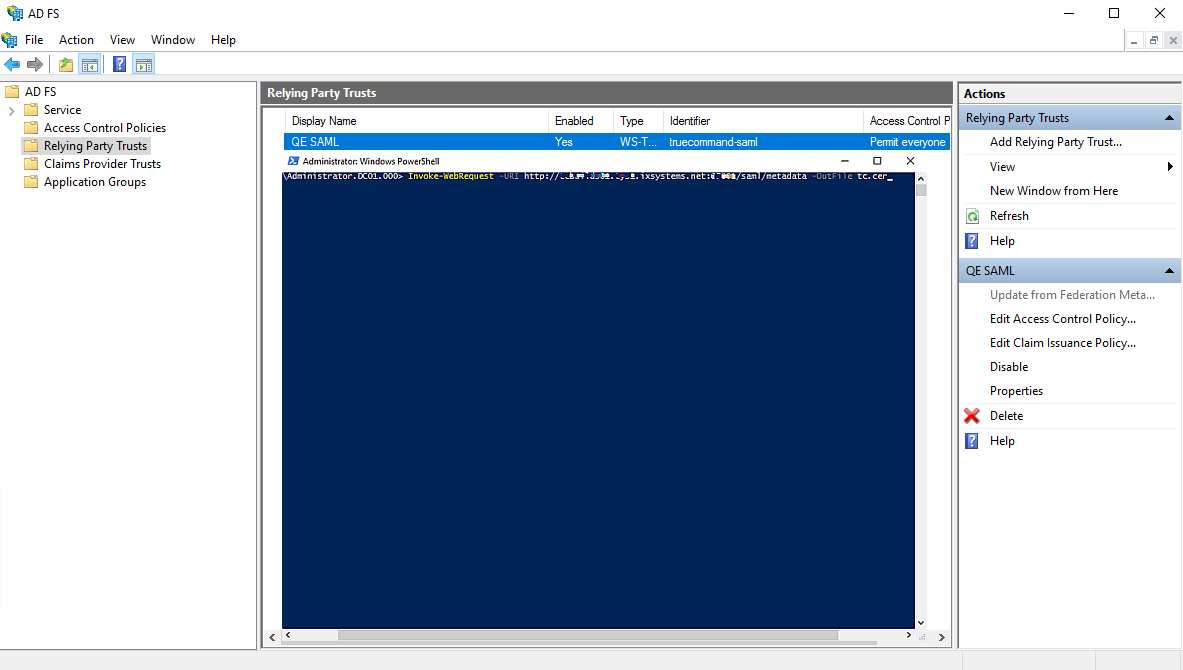
b. Edit the certificate.
-
Open a File Explorer window and locate the
tc.cer file inC:/local data/user/QE .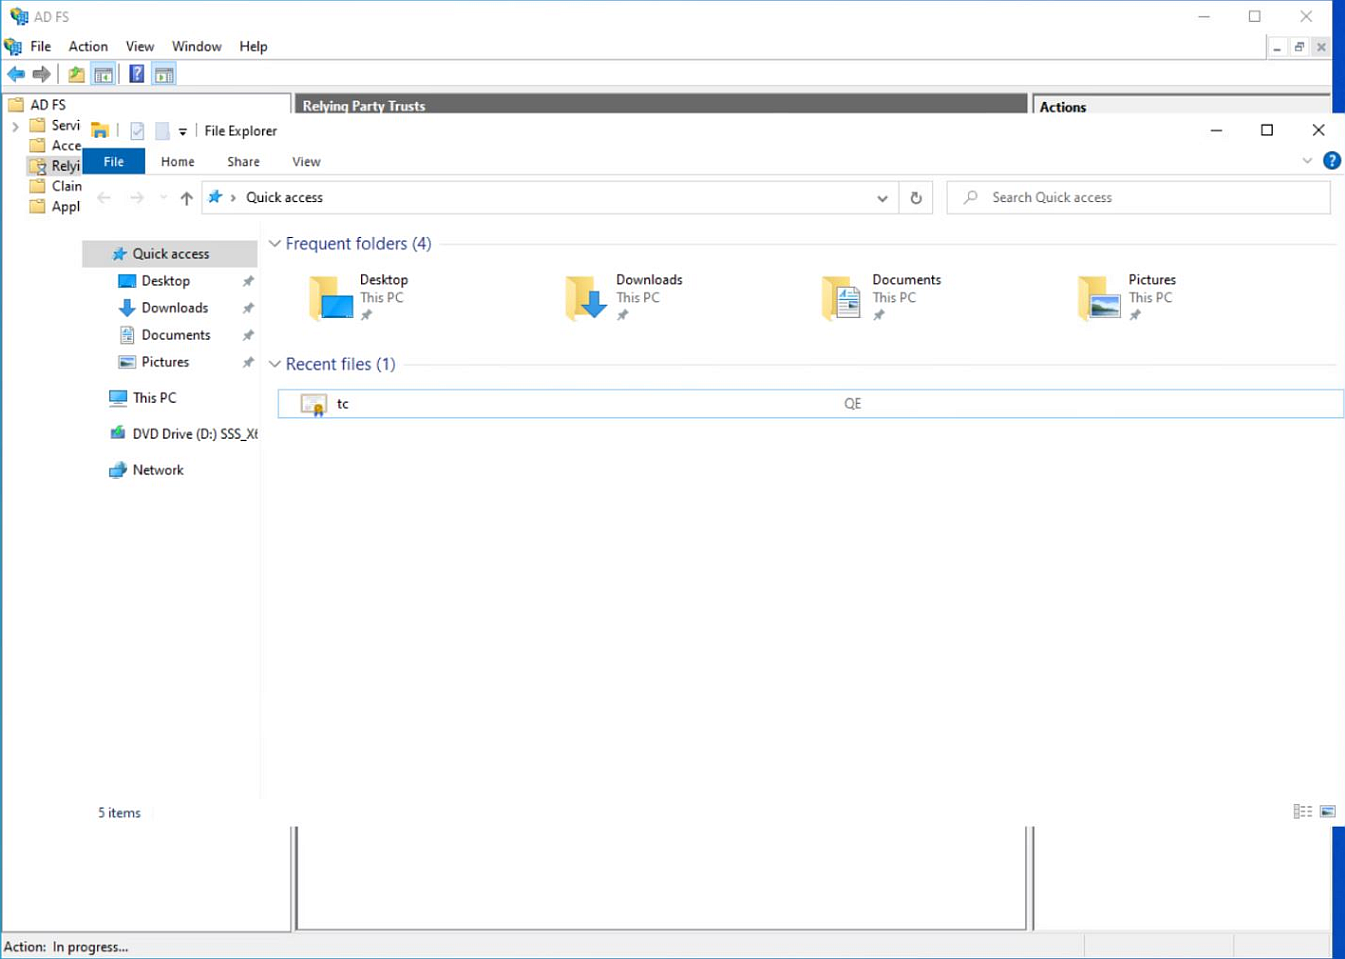
-
Select the
tc.cer file, right-click, then select Open with Notepad. -
Delete everything before the certificate open tag
<x509Certificate>and the open tag. Delete any URL immediately following the open tag, and everything after the certificate close tag</x509Certificate>and the close tag. The only thing that remains is the certificate with no tags at the beginning and end of it.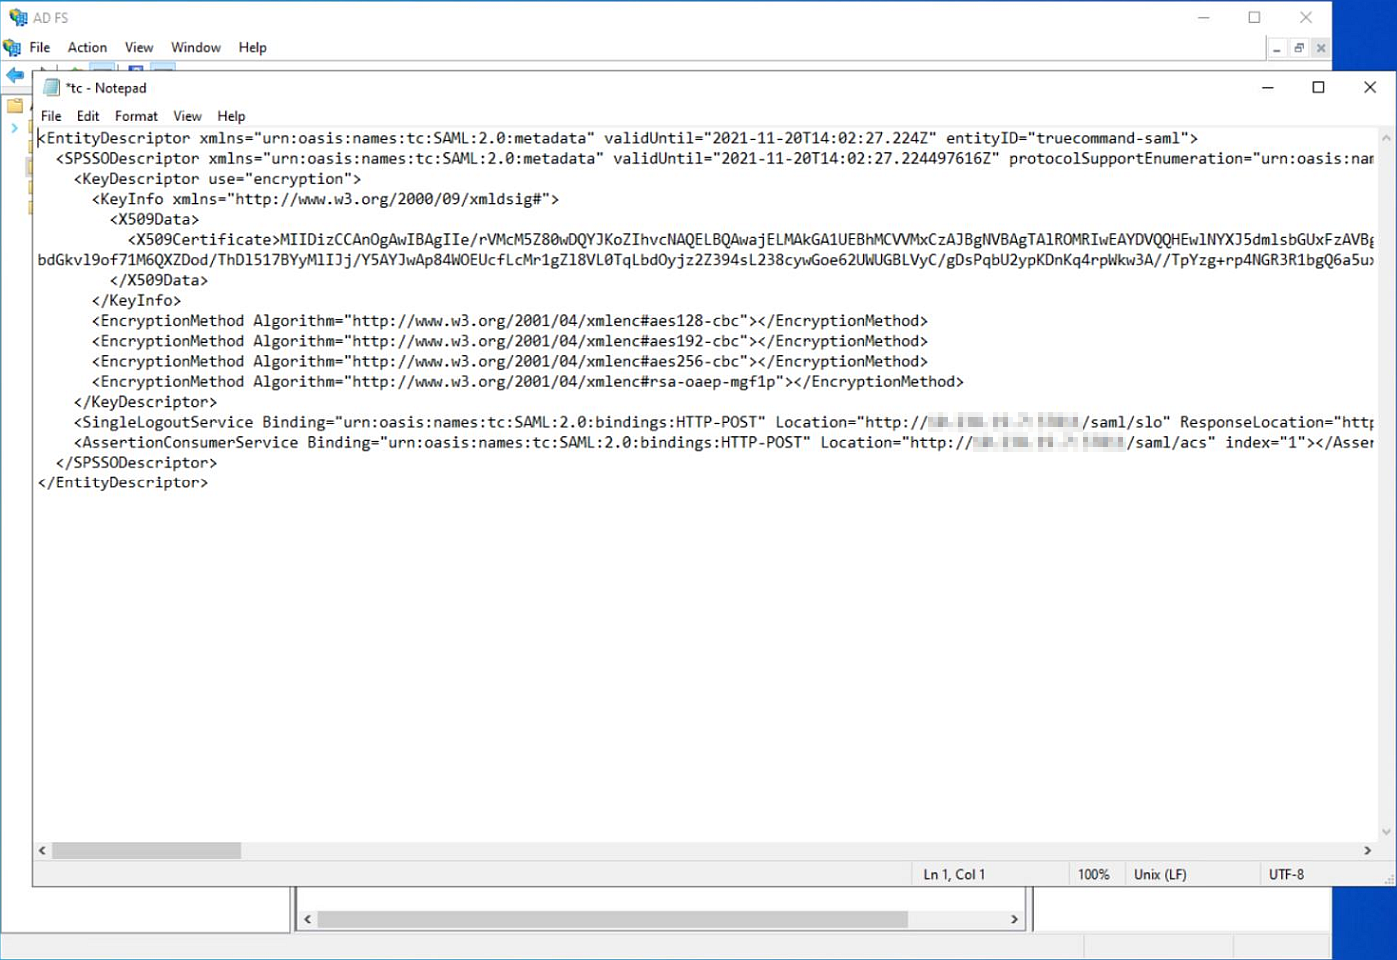
-
Type this string at the beginning of the certificate, exactly as
-----BEGIN CERTIFICATE-----with five dashes before and after the text with no spaces. -
Type this string at the end of the certificate, exactly as
-----END CERTIFICATE-----with five dashes before and after the text with no spaces.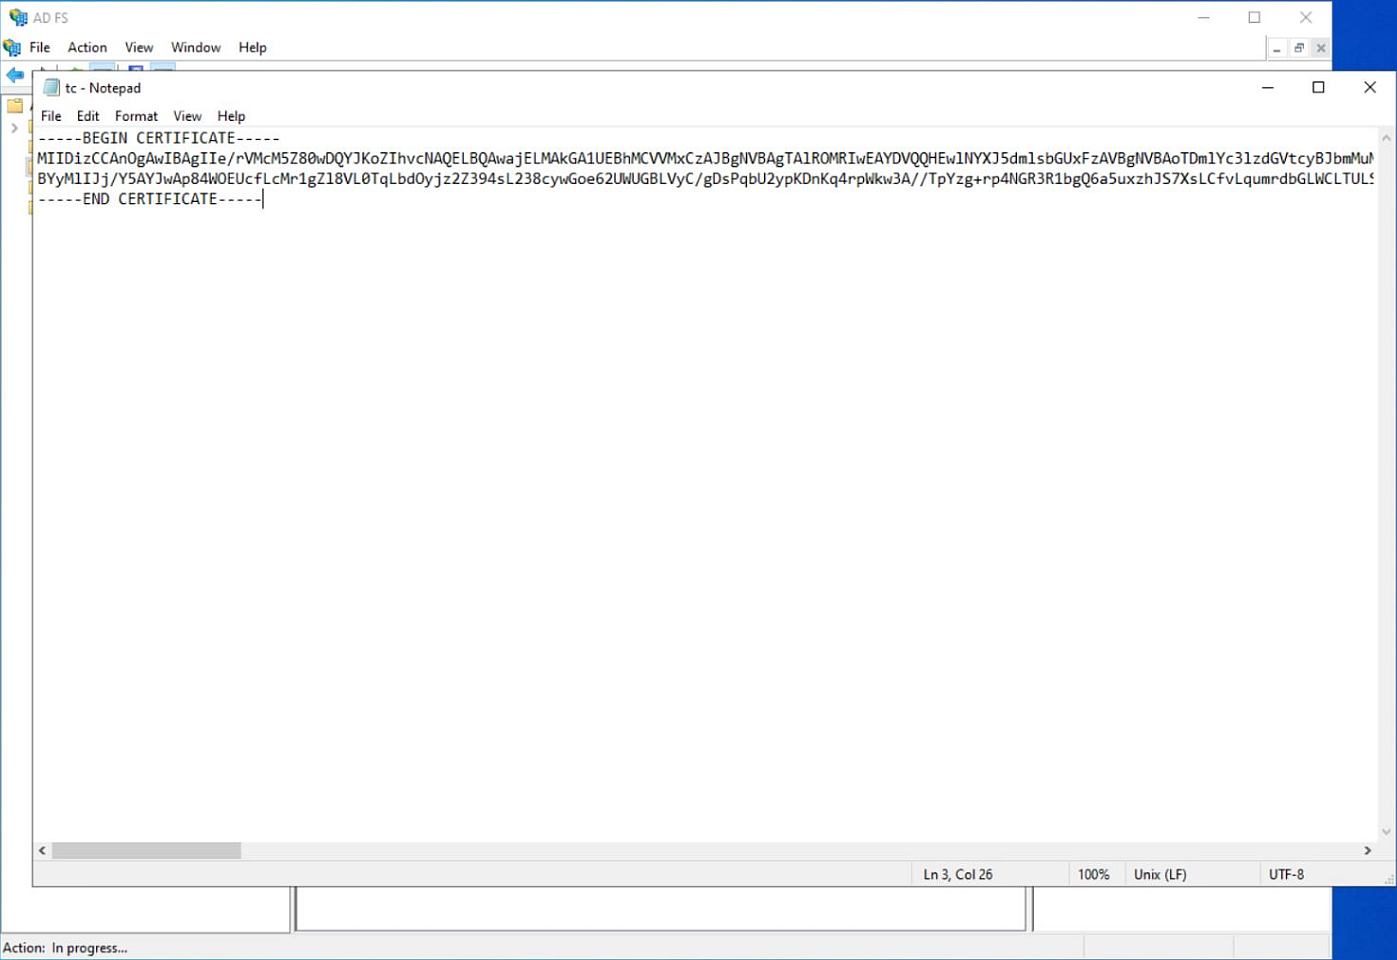
-
Click Save (or Ctrl-S) and then close Notepad, and then Powershell.
d. Select Browse in the Configure Certificate Relying Party Trust Wizard window. The Encryption Certificate window opens.
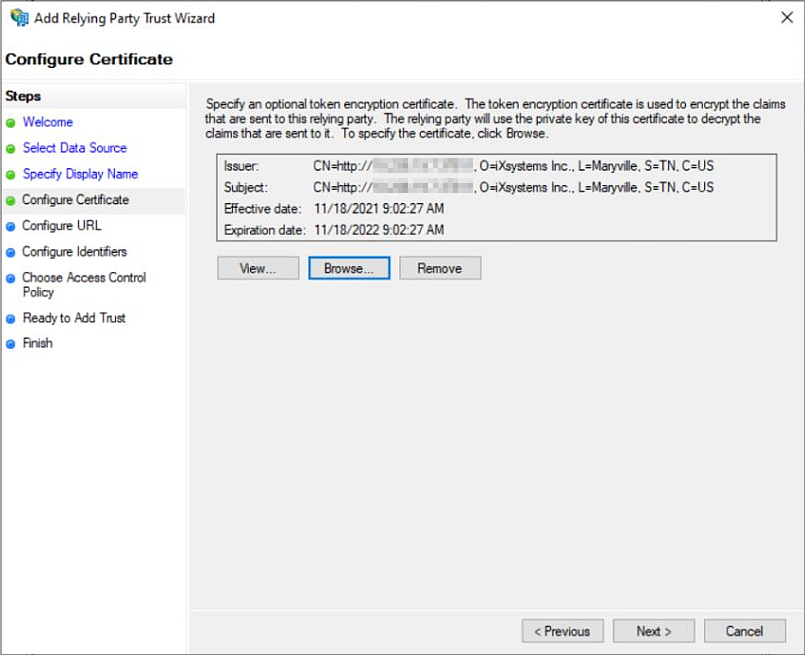
e. Locate the
tc.cer file (C:/local disk/users/QE and then select thetc.cer ). Click Open to view the Configure Certificate window and see information about the certificate. Click Next to move on to the Configure URL window. -
-
Configure the URL. In the Configure URL window:
a. Select Enable support for the SAML 2.0 WebSSO protocol.
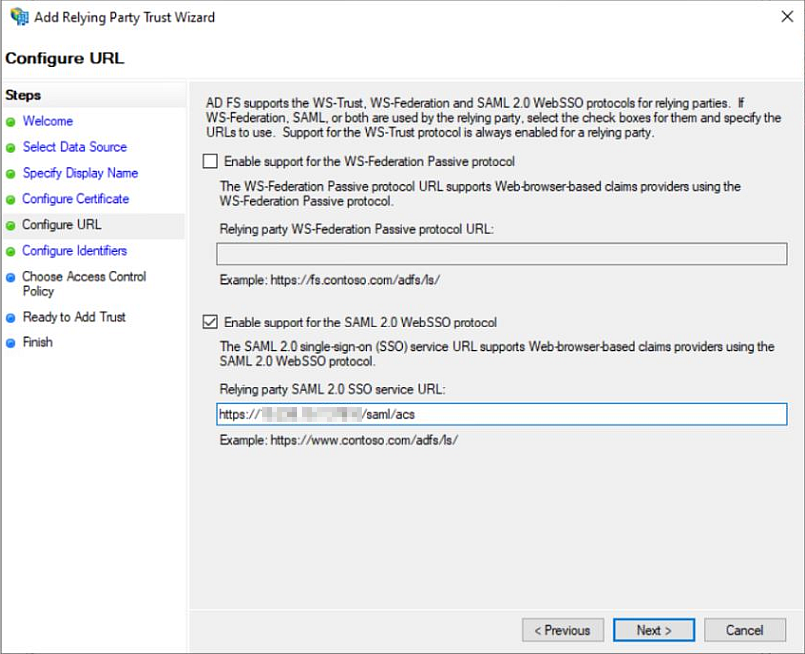
b. Enter the TrueCommand login URL (http://IP:PORT/saml/acs) in the Relying party SAML 2.0 SSO service URL field. IP:PORT is your TrueCommand system IP and port address.
c. Click Next to continue to the Configure Identifiers window.
-
Configure the SAML identifiers.
a. Type truecommand-saml into the Relying party trust identifier field and click Add.
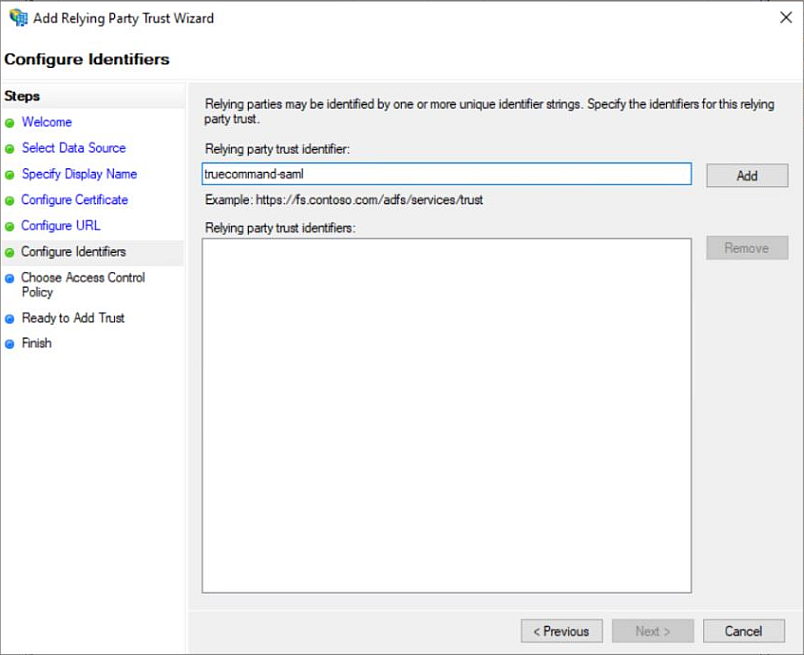
b. Click Next to move on to the Choose Access Control Party window.
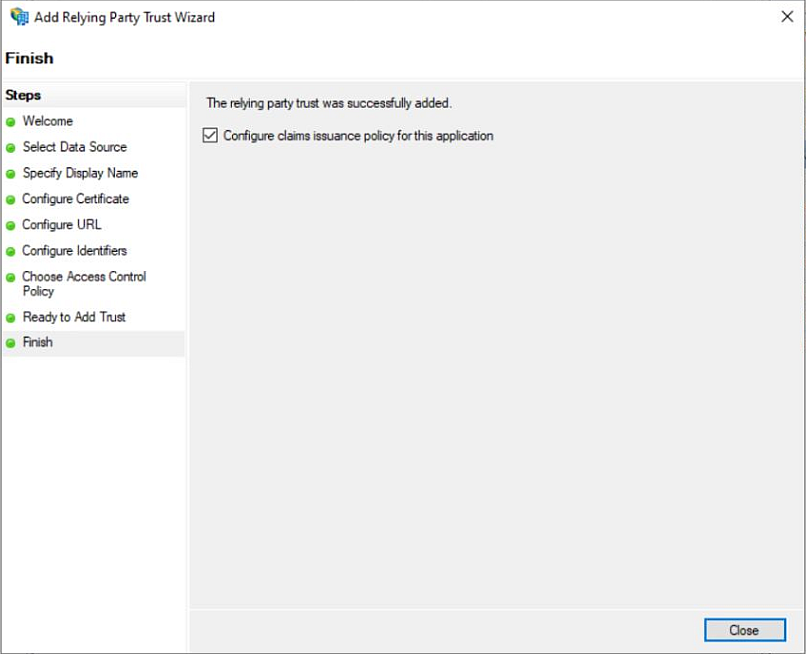
c. Click Next again to view the Ready to Add Trust window, then click Next once more and then select Close.
-
Modify the newly-created Relying Party Trust.
a. Select the new SAML Relying Party Trust. With it highlighted, select Properties in the Actions menu on the right side of the screen to open the Properties window.
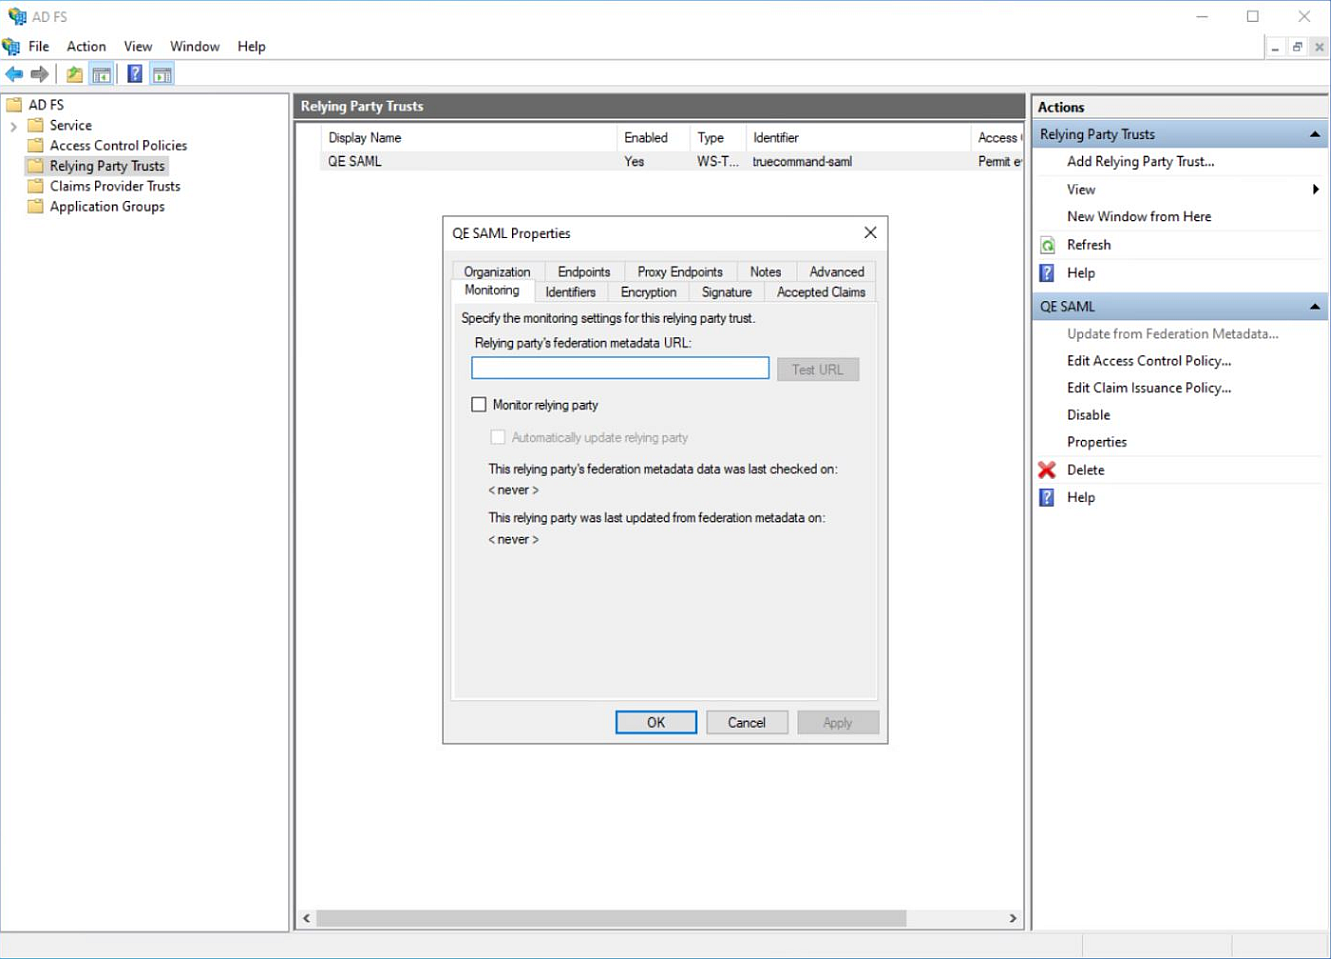
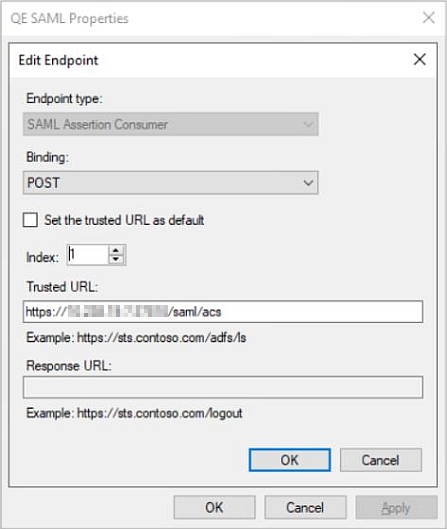
b. Select the Endpoints tab, then click Edit to open the Edit Endpoint window.
c. Change the Index value to 1 and click OK.
d. Click the Add SAML button to open the Add an Endpoint window.
e. Select SAML Logout from the Endpoint Type dropdown list and then enter the TrueCommand URL (http://IP:PORT/saml/slo) in the Trusted URL field.
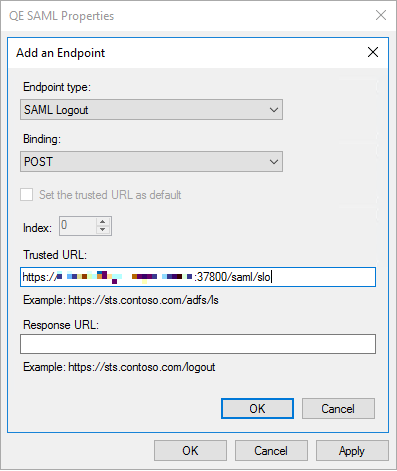
f. Click OK, then Apply, and then finally OK.
-
Configure the Claim Issuance Policy.
a. Select Edit Claim Issuance Policy in the Actions menu to open the Edit Claim Issuance Policy for QE SAML window. The QE SAML is the name you gave your new SAML Relying Party Trust in the preceding step 2.d.
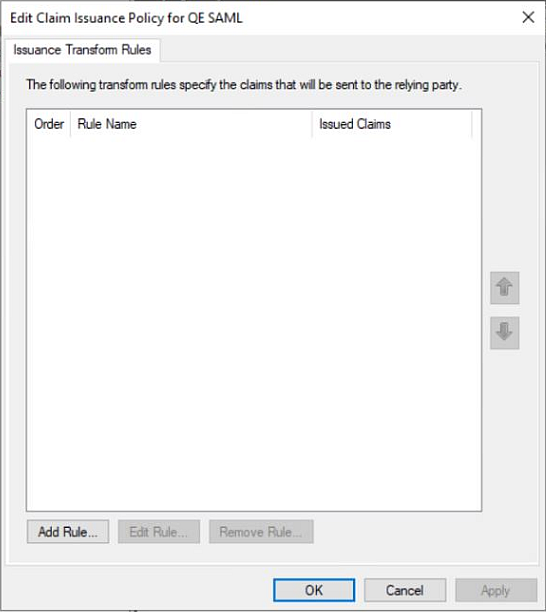
b. Click Add Rule and select Transform an Incoming Claim, then click Next.
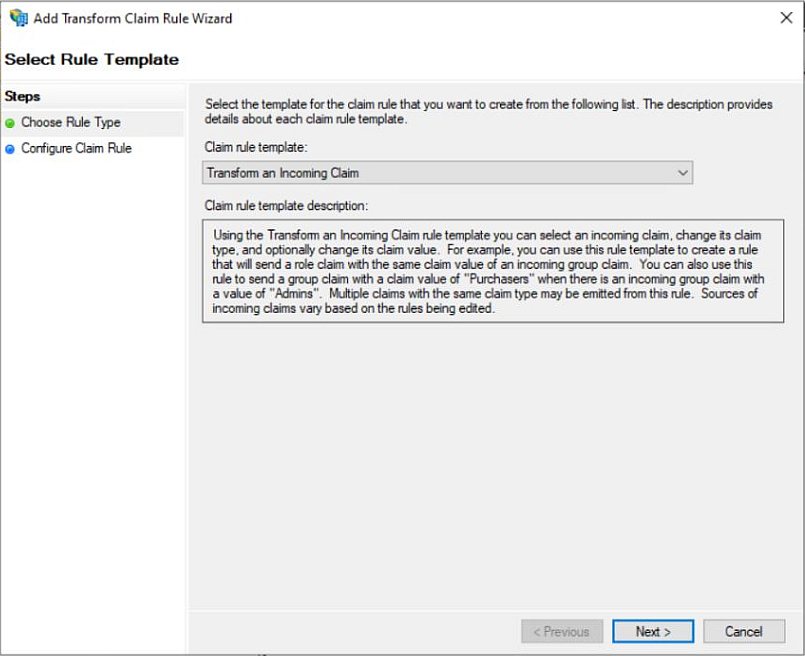
c. Select Windows account name in the Incoming claim type drop-down menu.
d. Select Name ID in the Outgoing claim type drop-down menu.
e. Select Persistent Identifier in the Outgoing name ID format drop-down menu, then click Finish.
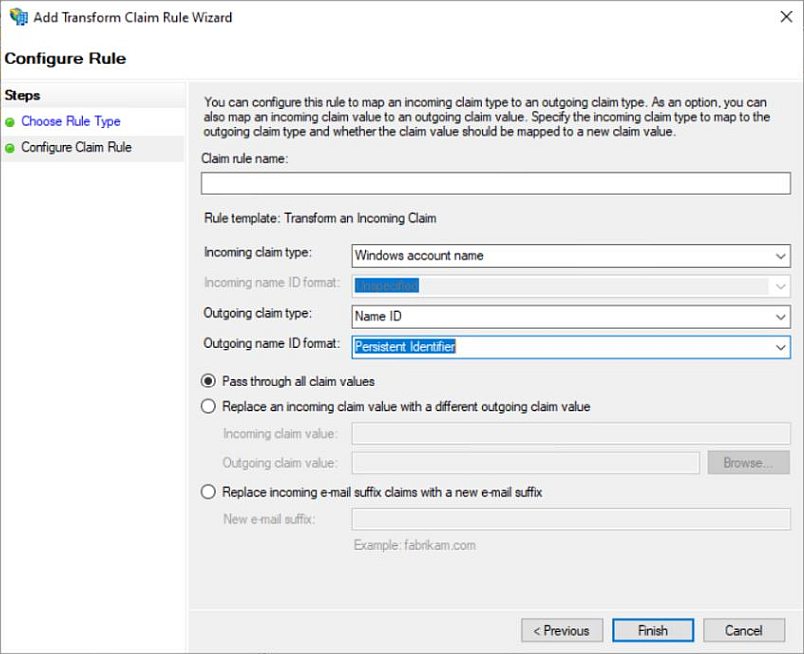
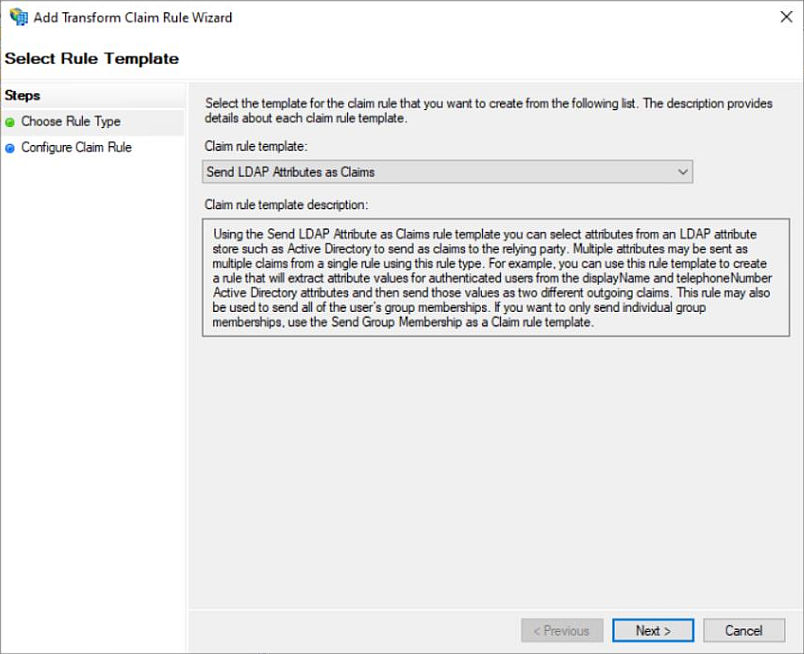
f. Click Add Rule to add a new rule.
g. Select Send LDAP Attributes as Claims (the default choice) and click Next.
h. Select Active Directory as the Attribute Store. Type the attributes exactly as below:
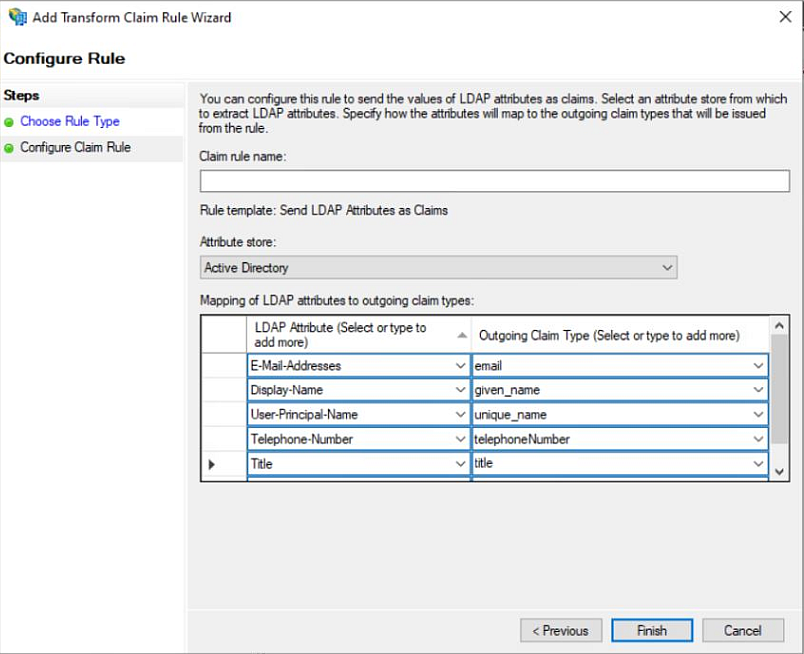
Parameter Value E-Mail-Addresses email Display-Name given_name User-Principal-Name unique_name Telephone-Number telephoneNumber Title title i. Click Finish, then Apply, and finally OK.
-
Close Active Directory.
Go to the TrueCommand login page and click the SAML Login option to log in. Enter your Active Directory user login credentials (for example, username@ds.yourcompany.net).

