TrueNAS vCenter Plugin
7 minute read.
Last Modified 2022-04-15 10:49 -0400vCenter Server provides a web interface to manage physical and virtual machines. vCenter uses plugins to integrate server management into the vCenter application. The iXsystems TrueNAS vCenter Plugin activates management options for TrueNAS hardware attached to vCenter Server. This enables some management of TrueNAS systems from a single interface.
The current release version of the TrueNAS vCenter Plugin is 3.4.0. This version is only compatible with VMware vCenter Server version 6.7.0.
Currently, the plugin is only available to TrueNAS Enterprise customers. iXsystems Support staff are available to assist with deploying the TrueNAS vCenter Plugin. Please contact iXsystems Support to learn more and schedule a time to deploy the plugin.
After being assisted with deploying the plugin, using the plugin follows a simple process of connecting TrueNAS hosts and configuring the various features to your use case. The interface suspends after several minutes of inactivity and displays a warning that the interface is suspended and must be refreshed.
In a browser, go to your vCenter Server web interface, log in, and click Menu > Global Inventory Lists > Manage TrueNAS > + Add host to add TrueNAS hosts to vCenter.
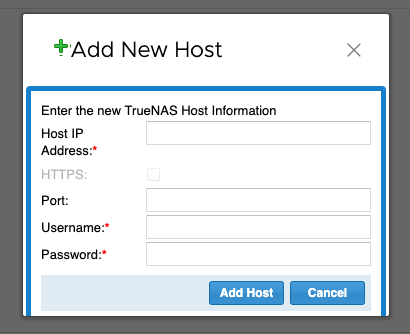
Fill in the required information. A hostname or IP address can be used for the TrueNAS system. For High Availability systems, use the VIP address or hostname to ensure the plugin remains connected in the event of a system failover. Click Add Host and the TrueNAS hostname or IP address appears in the list of connected systems.
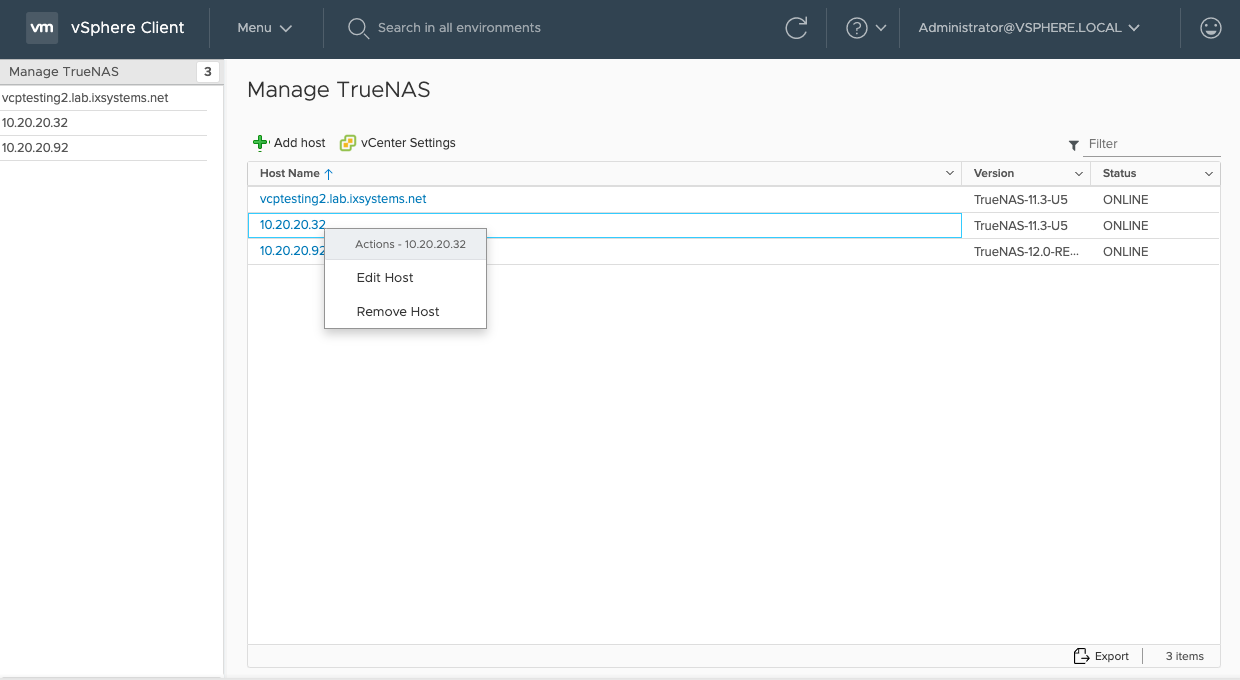
Right-click a list entry to see options to edit the host user credentials or remove that host from vCenter. Click a hostname to see the system management options. Clicking a system entry opens the management interface.
The system management screen shows a summary and options to modify the system.
To modify the TrueNAS system, click Configure.
Each submenu has a row of buttons to add or make changes to any items in the list.
vCenter works in the background when resolving change requests.
Refresh updates the list to see any items that might have finished being created or modified.
Tasks in progress display in the collapsible Recent Tasks area across the bottom of the screen.
Naming objects in the plugin follow a standard convention.
Names can contain spaces, alphanumeric, -, and . characters.
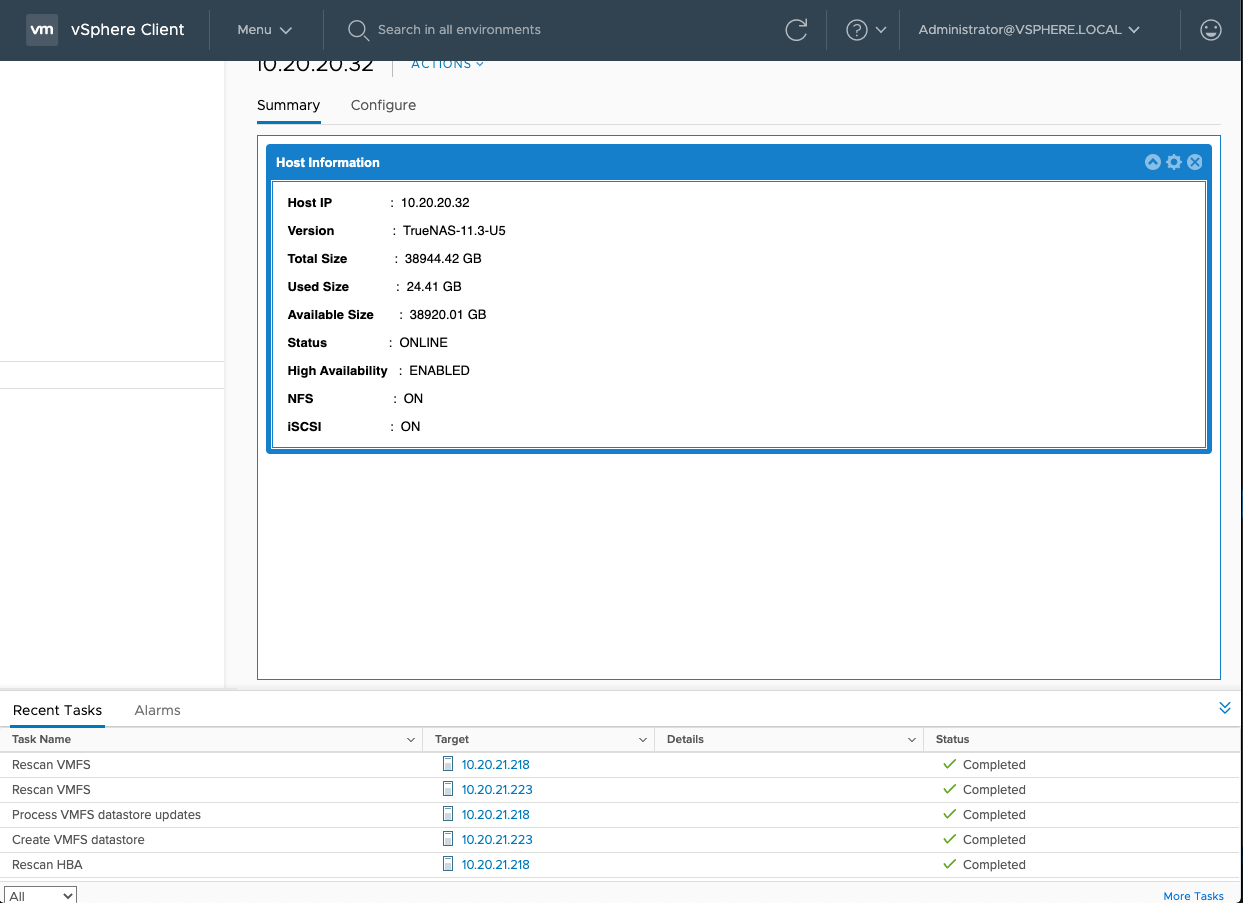
Click Summary to view basic information about this system. The IP address, installed version of TrueNAS, storage availability, and system service status are shown.
The vCenter plugin can create two different kinds of datastores on a TrueNAS host:
- Virtual Machine File System (VMFS) for iSCSI block-level access
- Network File System (NFS) for file-level access

vCenter has a default limit of eight NFS datastores per ESX host. See this VMware article about maximum supported volumes for more details.
The list shows Datastores that have been created and are managed by the plugin. The list does not display other types of shares created and managed through the TrueNAS web interface.
Click + (Add) to create a new datastore.
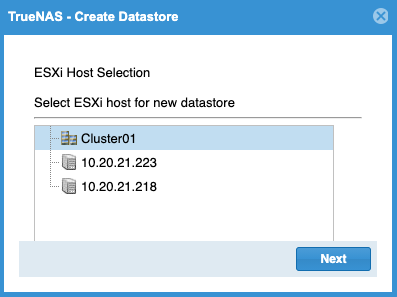
Choose an ESXi host for the datastore or an ESXi cluster to spread the reserved space across multiple systems. Clusters can be used as long as a single member of the cluster supports the datastore features. Click Next.
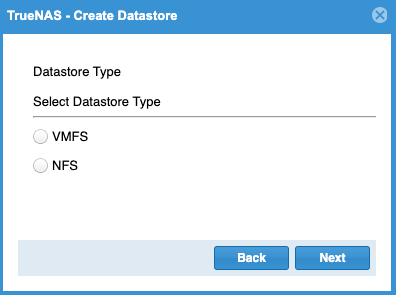
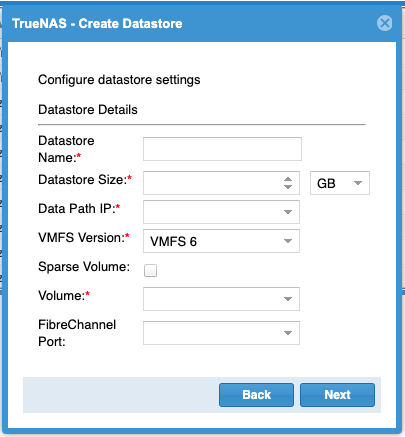
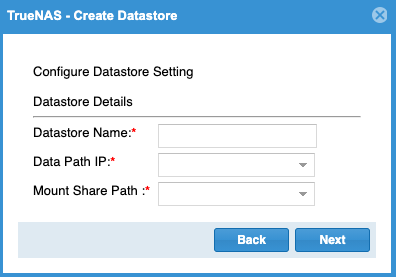
Choose the datastore type. VMFS datastores provide block-level (iSCSI) storage for virtual machines. NFS datastores provide file-level storage access. Click Next to view specific options for each datastore type
After configuring the VMFS or NFS datastore, vCenter will show a summary of the new datastore. To begin creating the datastore, review the settings and click Finish. The interface shows a warning when the datastore contains more than 80% of the available space. Click Refresh to see the new datastore after creating it.
Users needing additional space can increase the total size of a VMFS datastore. Highlight a VMFS datastore from the list and click Edit to extend it.
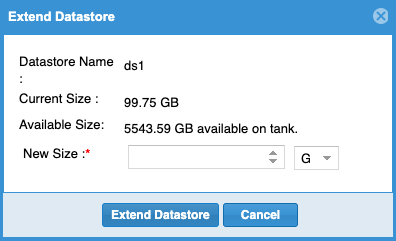
The new size must be larger than the current size and less than the total available capacity. For best performance, we recommend using less than 80% of the total available size. Using decimal notation will round down the size to the nearest 1024 bytes (or whatever the volume’s configured default block size is). Click Extend Datastore. Datastores reserve some available space for internal use and set the available capacity to slightly less than the chosen amount.
Cloning an NFS or VMFS datastore duplicates that datastore. Select a datastore from the list and click Clone. Choose an ESXi host to store the new datastore and click Next. Enter a name for the clone and click Clone Datastore.
vCenter starts the cloning process and continues the task in the background. Click Refresh after some time to see the cloned datastore.
An administrator can grant vCenter users specific role-based access to the TrueNAS systems managed by this plugin.
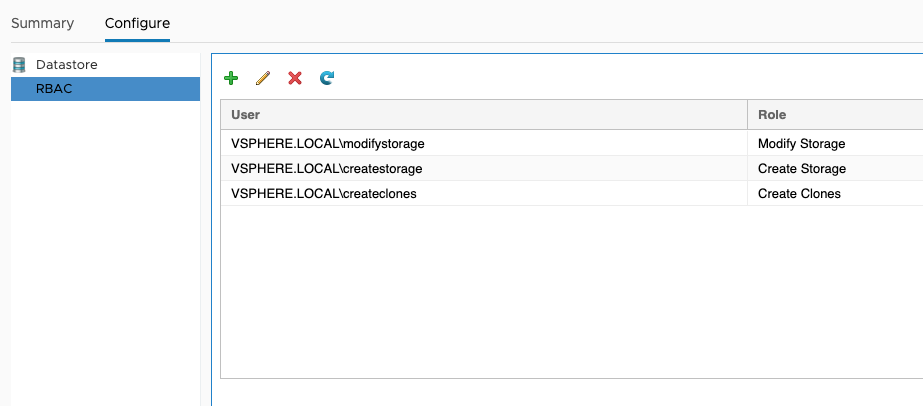
| Role Name | User is allowed to: |
|---|---|
| Discover | Add TrueNAS systems to vCenter |
| Create Clones | Copy existing datastores |
| Create Storage | Create new datastores |
| Modify Storage | Edit existing datastores |
| Destroy Storage | Delete datastores |
Each role gives the user the ability to perform the functions in that role and all of the roles that precede it in the list. For example, a user with a Create Storage role can create a new datastore and clone existing datastores. The vCenter administrator account always has all permissions.
New vCenter users must be created in Menu > Administration > Single Sign On > Users and Groups.
Click + to open the Add Role Based Access Control window.
Type a user name in the form DOMAIN.NAME\username, where DOMAIN.NAME is the user Domain found in the vCenter Menu > Administration > Single Sign On > Users and Groups page.
Open the Assign Role drop-down menu and choose a role for the user.
Click Add to add the role.
If the entry does not appear in the list immediately, click Refresh.


