Get a Quote     (408) 943-4100               TrueNAS Discord      VendOp_Icon_15x15px   Commercial Support Toggle between Light and Dark mode

General Settings Screen

  8 minute read.

Last Modified 2022-12-01 16:51 -0500

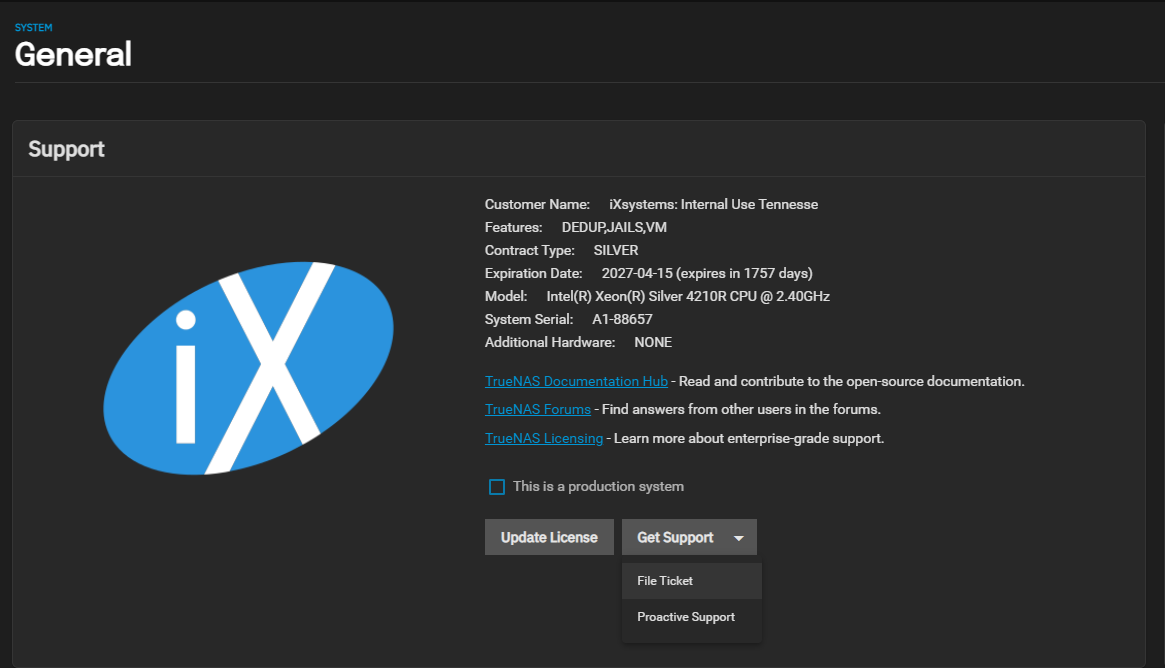
The TrueNAS SCALE System Settings > General screen includes widgets for Support, GUI, Localization, and NTP functions.
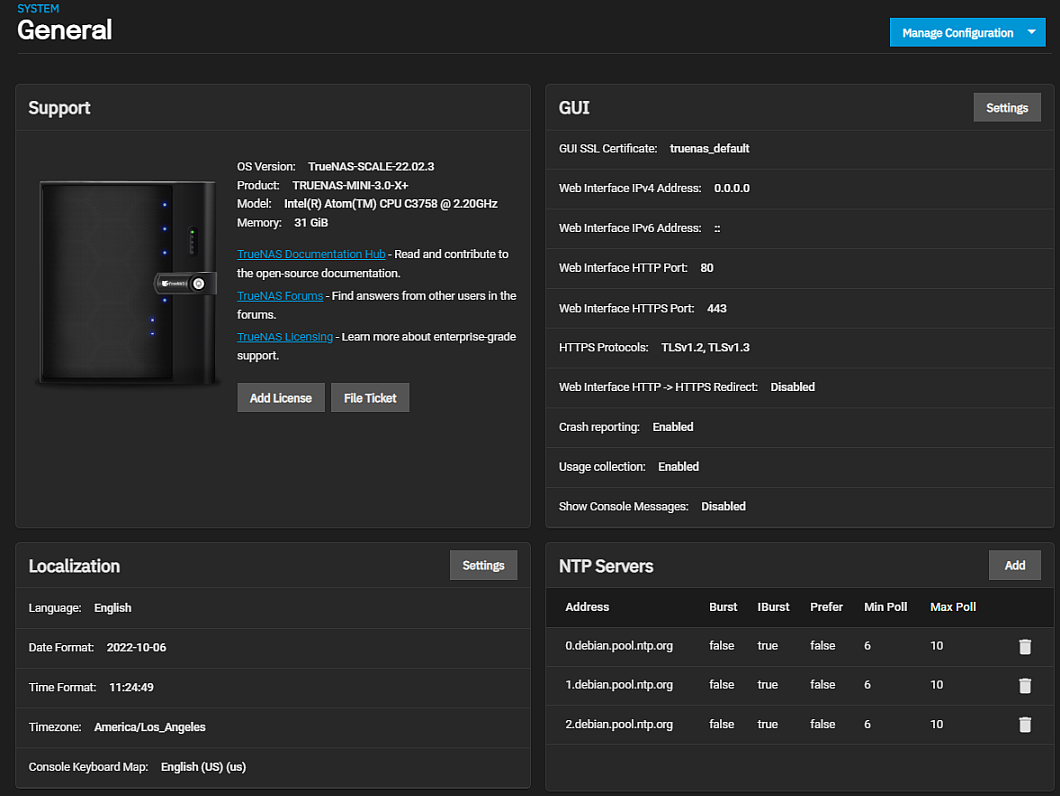
SystemGeneralScreen

Manage Configuration provides three options to backup, restore, or reset system configuration settings.

Manage Configuration Screens

TrueNAS SCALE allows users to manage the system configuration via uploading/downloading configurations or resetting the system to the default configuration.

Download File Window

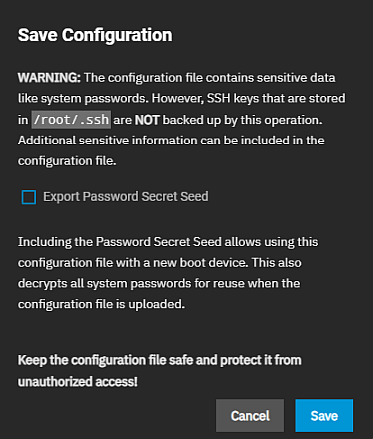
The Download File option opens the Save Configuration window. This allows you to download the TrueNAS SCALE current configuration for your system to the local machine.
SystemGeneralSaveConfiguration

The Export Password Secret Seed includes encrypted passwords in the downloaded configuration file. This allows you to restore the configuration file to a different operating system device where the decryption seed is not already present. Users must physically secure configuration backups containing the seed to prevent unauthorized access or password decryption.

Upload File Window

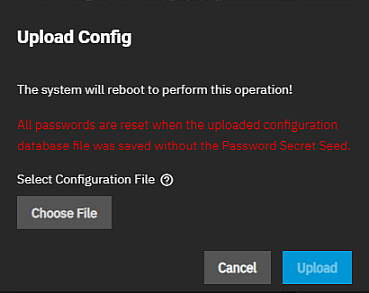
The Upload File option opens the Upload Config window with the Choose File option that lets you replace the current system configuration with any previously saved TrueNAS SCALE configuration file.
SystemGeneralUploadConfig

Choose File opens a file browser window where you can locate the downloaded and saved configuration. After selecting the file it displays in the Upload Config window. Upload uploads the selected configuration file.

All passwords are reset if the uploaded configuration file was saved without the selecting Export Password Secret Seed.

Reset to Defaults Window

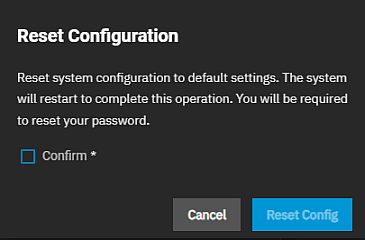
The Reset to Defaults option opens the Reset Configuration window. This resets the system configuration to factory settings and restarts the system. Users must set a new login password.
SystemGeneralResetConfiguration

Save the system current configuration with the Download File option before resetting the configuration to default settings.

If you do not save the system configuration before resetting it, you may lose data that was not backed up, and you will not be able to revert to the previous configuration.

Support Widget

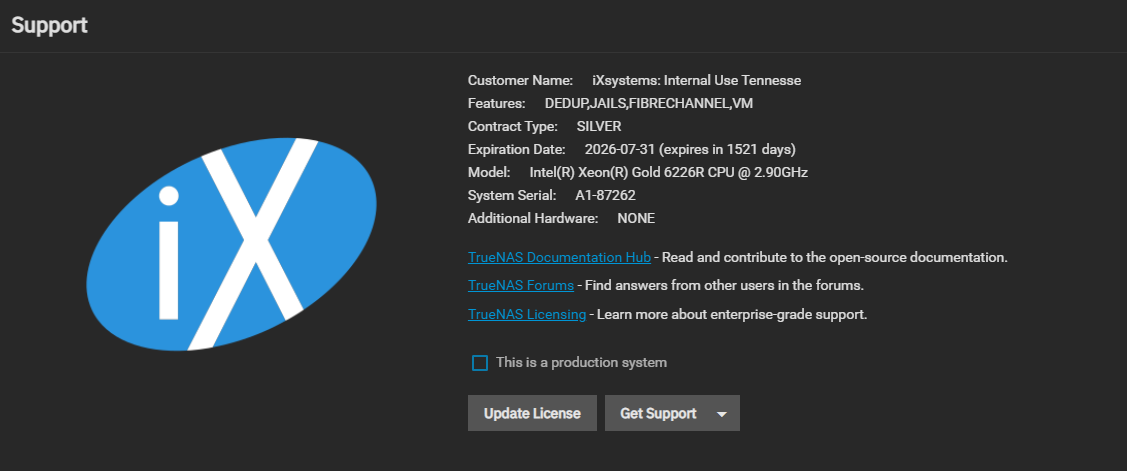
The Support widget displays the systems general hardware and software specs and contains links to the Documentation Hub, TrueNAS Forums, and offers TrueNAS Licensing information.
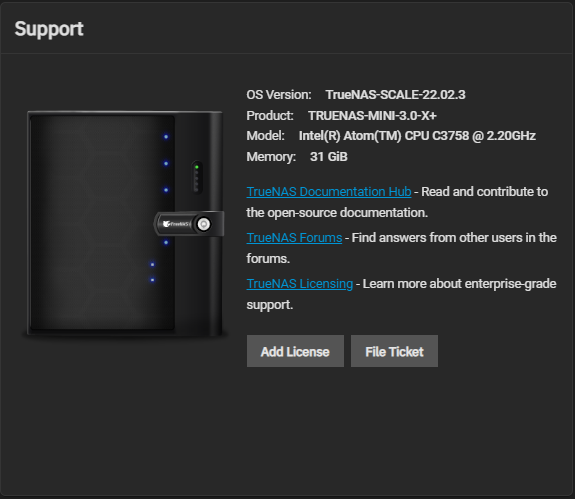
SystemGeneralSupportWidget

Add License opens the License screen.

File Ticket opens the File Ticket screen.

License Screens

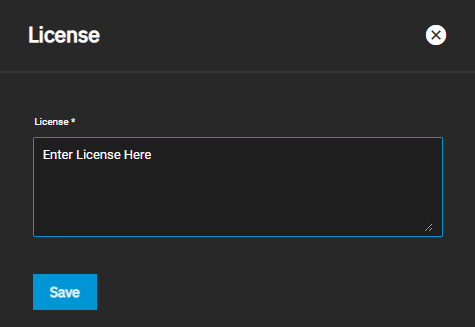
The License screen allows you to copy your license into the box and then save it.

GeneralSettingsSCALESupportLicenseEntry

When prompted to reload the page, click Reload Now.

When the End User License Agreement (EULA) opens, read it thoroughly and completely, click I AGREE.

GeneralSettingsSCALESupportLicenseComplete

Select the This is a production system option and click the Proceed to notify iXsystems through an email the system sends declaring that the system is in production.

File Ticket Screen

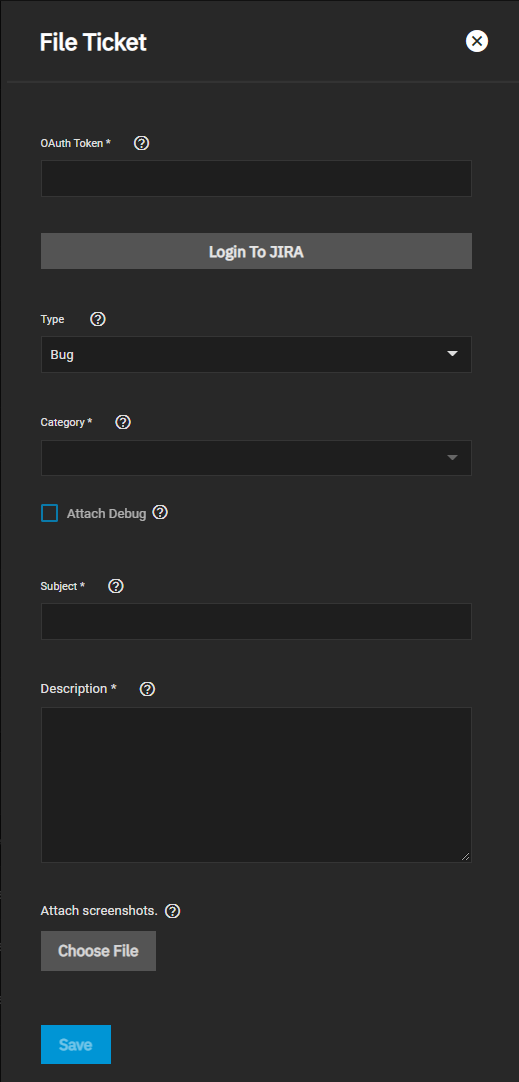
The File Ticket screen settings allow you to log into Jira where you can submit a ticket. The screen provides the required ticket information fields to complete when submitting an issue report.

GeneralSettingsSCALESupportJiraTicketCreate

Setting Description
OAuth Token Populated with the authentication token generated by logging into to Jira.
Login to JIRA Opens a login widow where you enter your Jira credentials. After logging in to Jira, select Allow to give TrueNAS read and write access to your data on the Jira site. This generates token that displays in the OAuth Token field.
Type Select the issue type from the dropdown list. Select Bug to report a problem, Feature to submit a new feature request.
Category Select the option from the dropdown list that best fits your report. Becomes active after logging into Jira.
Attach Debug Select to downloads and attach a debug file to the issue ticket. If the debug file is too large to attach to your ticket, a window with instructions opens.
Subject Enter a brief summary of the issue as the title or subject of the ticket.
Description Enter details or an outline that describes the reason for submitting the ticket. Be complete with your description.
Choose File Opens a file browser that allows you to add any screenshots or log files as attachments.
Save Submits the ticket and then opens a window with a link to the ticket.

Get Support

For Enterprise customers, the Get Support option displays on the Support widget and provides the options File Ticket and Proactive Support.

Proactive Support Screen

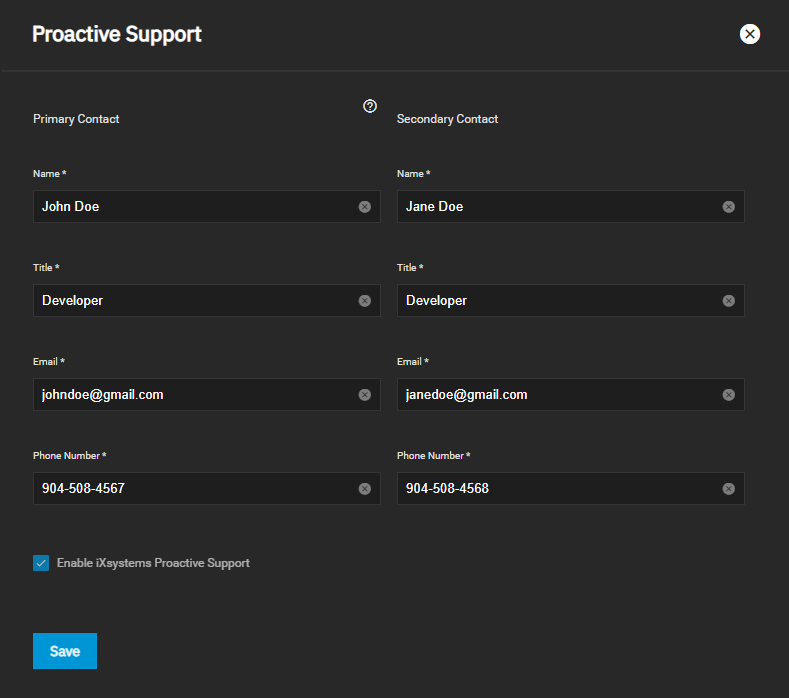
Silver/Gold Coverage Customers can enable iXsystems Proactive Support. This feature automatically emails iXsystems when certain conditions occur in a TrueNAS system.

To configure Proactive Support, click the Get Support dropdown and select Proactive Support.

GeneralSettingsSCALEProactiveSupport

Complete all available fields and ensure the Enable iXsystems Proactive Support box is checked, click Save.

GeneralSettingsSCALEProactiveSupportForm

GUI

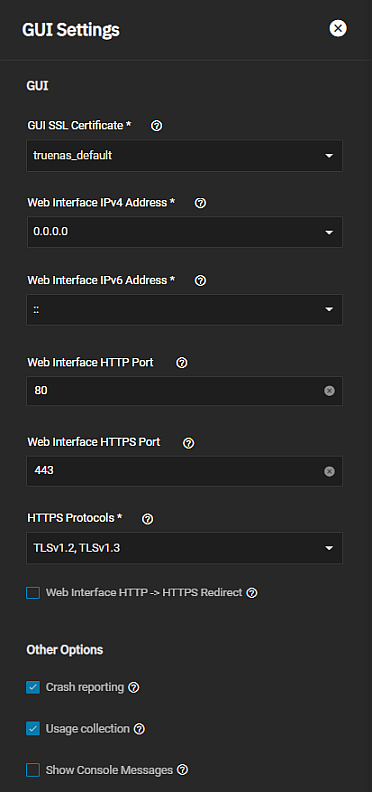
The GUI widget allows users to configure the TrueNAS SCALE web interface address.

Click Settings to open the GUI Settings screen.

SystemGeneralGuiSettings

Setting Description
Theme Select a preferred color theme from the dropdown list of eight options.
GUI SSL Certificate Select a self-signed certificate from the dropdown list. The system uses a self-signed certificate to enable encrypted web interface connections.
Web Interface IPv4 Address Select a recent IP address from the dropdown list to limit the usage when accessing the administrative GUI. The built-in HTTP server binds to the wildcard address of 0.0.0.0 (any address) and issues an alert if the specified address becomes unavailable.
Web Interface IPv6 Address Select a recent IPv6 address from the dropdown list to limit the usage when accessing the administrative GUI. The built-in HTTP server binds to the wildcard address of 0.0.0.0 (any address) and issues an alert if the specified address becomes unavailable.
Web Interface HTTP Port Enter a port number for an HTTP connection to the web interface. Allow configuring a non-standard port to access the GUI over HTTP. Changing this setting might require changing a Firefox configuration setting.
Web Interface HTTPS Port Enter a port number for an HTTPS connection to the web interface. This field allows configuring a non-standard port to access the GUI over HTTPS.
HTTPS Protocols Select the Transport Layer Security (TLS) versions TrueNAS SCALE can use for connection security from the dropdown list. Cryptographic protocol for securing client/server connections.
Web Interface HTTP -> HTTPS Redirect Select to redirect HTTP connections to HTTPS. A GUI SSL Certificate is required for HTTPS. Activating this also sets the HTTP Strict Transport Security (HSTS) maximum age to 31536000 seconds (one year). This means that after a browser connects to the web interface for the first time, the browser continues to use HTTPS and renews this setting every year.
Crash Reporting Select to send failed HTTP request data, which can include client and server IP addresses, failed method call tracebacks, and middleware log file contents, to iXsystems.
Usage Collection Select to enable sending anonymous usage statistics to iXsystems.
Show Console Messages Select to display console messages in real time at the bottom of the browser.

Allows configuring a non-standard port to access the GUI over HTTP. Changing this setting might require changing a Firefox configuration setting.

Localization

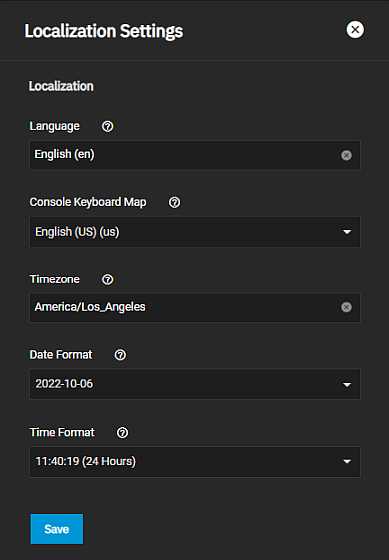
The Localization widget lets users localize their system to a specific region.

Click Settings to open the Localization Settings screen.

SystemGeneralLocalizationSettings

Setting Description
Language Select a language from the dropdown list.
Console Keyboard Map Select a language keyboard layout from the dropdown list.
Timezone Select a time zone from the dropdown list.
Date Format Select a date format from the dropdown list.
Time Format Select a time format from the dropdown list.

NTP Servers

The NTP Servers widget allows user to configure Network Time Protocol (NTP) servers, which sync the local system time with an accurate external reference.

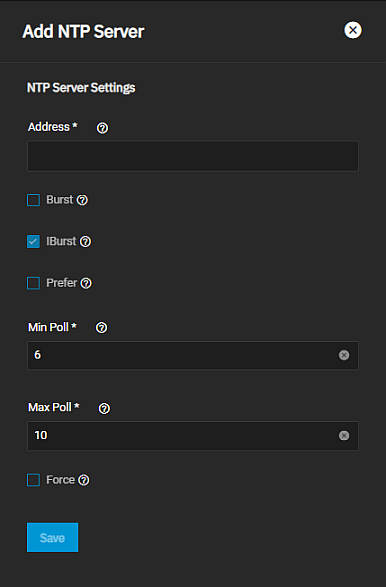
By default, new installations use several existing NTP servers. TrueNAS SCALE supports adding custom NTP servers. Click Add to open the Add NTP Server screen.

SystemGeneralAddNTPServer

Setting Description
Address Enter the hostname or IP address of the NTP server.
Burst Select to use a non-public NTP server. Recommended when Max Poll is greater than 10. Only use on personal NTP servers or those under direct control. Do not enable when using public NTP servers.
IBurst Select to speed up the initial synchronization (seconds instead of minutes).
Prefer Select when using a highly accurate NTP servers such as those with time monitoring hardware. Only use for these highly accurate NTP servers.
Min Poll Enter the minimum polling interval, in seconds, as a power of 2. For example, 6 means 2^6, or 64 seconds. The default is 6, minimum value is 4.
Max Poll Enter the maximum polling interval, in seconds, as a power of 2. For example, 10 means 2^10, or 1,024 seconds. The default is 10, maximum value is 17.
Force Select to force the addition of the NTP server, even if it is currently unreachable.

Related Content

Related Console Articles