Snapshots Screens
3 minute read.
Last Modified 2022-12-09 08:45 -0500Use the Snapshots screen to manage existing snapshots or to add new snapshots. To access the Snapshots screen, from the Storage screen, click the Snapshots button in the top right of the screen and select Snapshots.
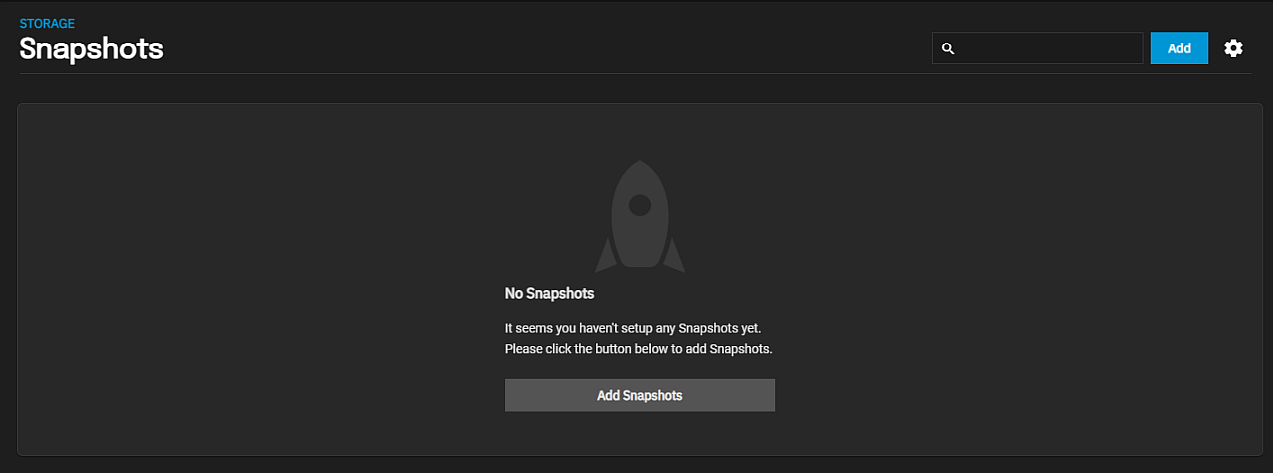
If you don’t have snapshots created, the Snapshots screen displays the Add Snapshots option in the center of the screen.

If you have existing snapshots set up they display in the list on this screen.

Click the icon to display the Show Extra Columns dialog displays.

Click Show to add the Used, Data Created and Referenced columns to the list of snapshots. These columns add the space used (Used), the snapshot creation date, and the amount of data the dataset can access (Referenced).
Click the icon again to view the Hide Extra Columns dialog. Click Hide to return to the default view with only the Dataset and Snapshot columns displayed.
Click to view snapshot details an additional options availabe for each snapshot. To view the options for the listed snapshots, click the icon to expand the snapshot and display the options for managing that snapshot.

| Setting | Icon | Description |
|---|---|---|
| Delete | Displays a delete confirmation dialog. Select Confirm to activate the DELETE* button. | |
| Clone to New Dataset | Displays the Clone to New Dataset screen. | |
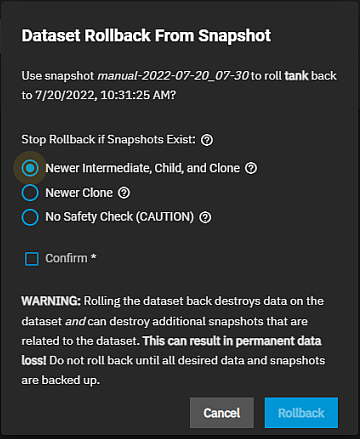
| Rollback | Displays the Dataset Rollback From Snapshot dialog. |
WARNING: Rolling the dataset back destroys data on the dataset and can destroy additional snapshots that are related to the dataset. This can result in permanent data loss! Do not roll back until all desired data and snapshots are backed up.

| Setting | Description |
|---|---|
| Stop Roolback if Snapshot Exists | Select radio button for the rollback action safety level for the selected snapshot. Select the radio button that best fits. When the safety check finds additional snapshots that are directly related to the dataset being rolled back it cancels the rollback. |
| Newer intermeidate, Child, and clone | Select to stop rollback when the safety check finds any related intermediate, child dataset, or clone snapshots that are newer than the rollback snapshots. |
| Newer Clone | Select to stop rollback when the safety check finds any related clone snapshots that are newer than the rollback snapshot. |
| No Safety Check (CAUTION) | Select to stop rollback if snapshot exists. The rollback destroys any related intermediate, child dataset, and cloned snapshots that are newer than the rollback snapshot. |
| Confirm | Select to confirm the selection and activate the ROLLBACK button. |
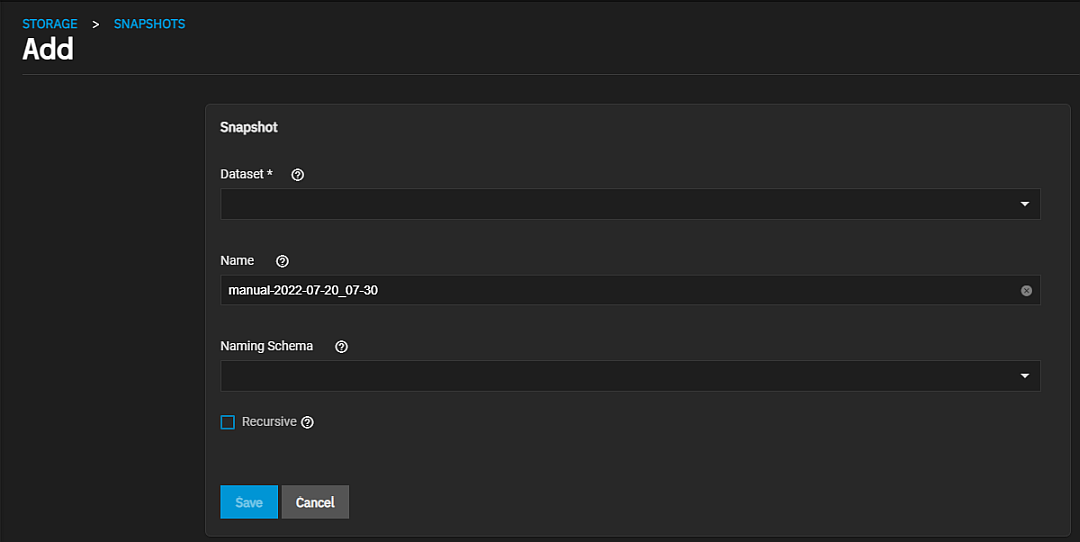
Click either Add Snapshots or ADD at the top right of the screen to display the Add Snapshot screen.

| Setting | Description |
|---|---|
| Dataset | Select the dataset or zvol from the dropdown list. The snapshot created is from this dataset or zvol. |
| Name | TrueNAS populates this with a name but you can override the name with any string of your choice. You cannot use Name and Naming Schema for the same snapshot. |
| Naming Schema | Select an option from the dropdown list or leave this blank to use the name the system or you entered in Name. This generates a name for the snapshot using the naming schema from a previously-entered periodic snapshot. This allows the snapshot to be replicated. You cannot use Naming Schema with Name. Selecting a schema option overwrites the value in Name. |
| Recursive | Select to include child datasets or zvols in the snapshot. |
Use Save to retain the settings and return to the Snapshots screen.

