Configuring WebDAV Service
2 minute read.
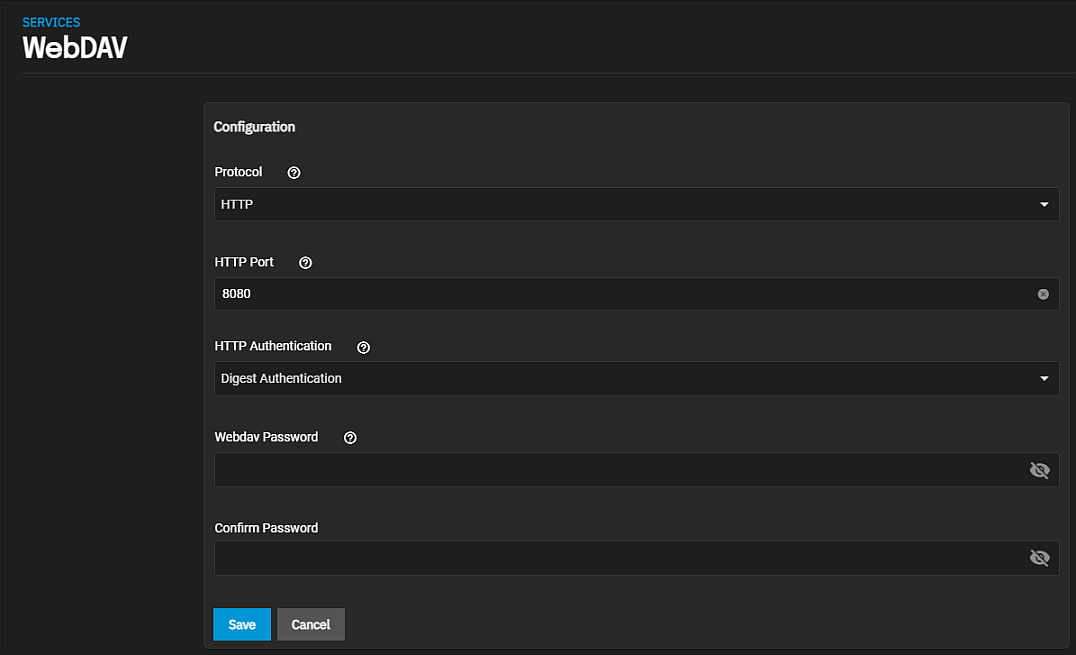
Last Modified 2022-09-21 15:57 -0400The Services > WebDAV configuration screen displays settings to customize the TrueNAS WebDAV service.
You can access it from System Settings > Services screen. Locate WebDAV and click edit to open the screen, or use the Config Service option on the WebDAV widget options menu found on the main Sharing screen.
Select Start Automatically to activate the service when TrueNAS boots.

If you require it, you must choose an SSL certificate (freenas_default is always available). All Protocol options require you to define a number in the Port field. Make sure the network is not already using the WebDAV service port.
Select the protocol option from the Protocol dropdown list. For better security, select HTTPS.
Enter a port number for unencrypted connections in HTTP Port. The default 8080 is not recommended. Do not reuse a port number.
Select the authentication method from the HTTP Authentication dropdown list. Select Basic Authentication for unencrypted or Digest Authentication for encrypted. No Authentication to not use any authentication method. To prevent unauthorized access to the shared data, set the HTTP Authentication to either Basic or Digest and create a new Webdav Password.
Enter and then confirm a password but do not use the know default davtest password.
Click Save.
Start the service.

