Configuring SMB Service
2 minute read.
Last Modified 2022-09-29 10:26 -0400The Services > SMB screen displays after going to the Shares screen, finding the Windows (SMB) Shares section, and clicking + Config Service. Alternately, you can go to System Settings > Services and click the edit icon for the SMB service.
The SMB Services screen displays setting options to configure TrueNAS SMB settings to fit your use case. In most cases you can set the required fields and accept the rest of the setting defaults. If you have specific needs for your uses case, click Advanced Options. This displays more settings

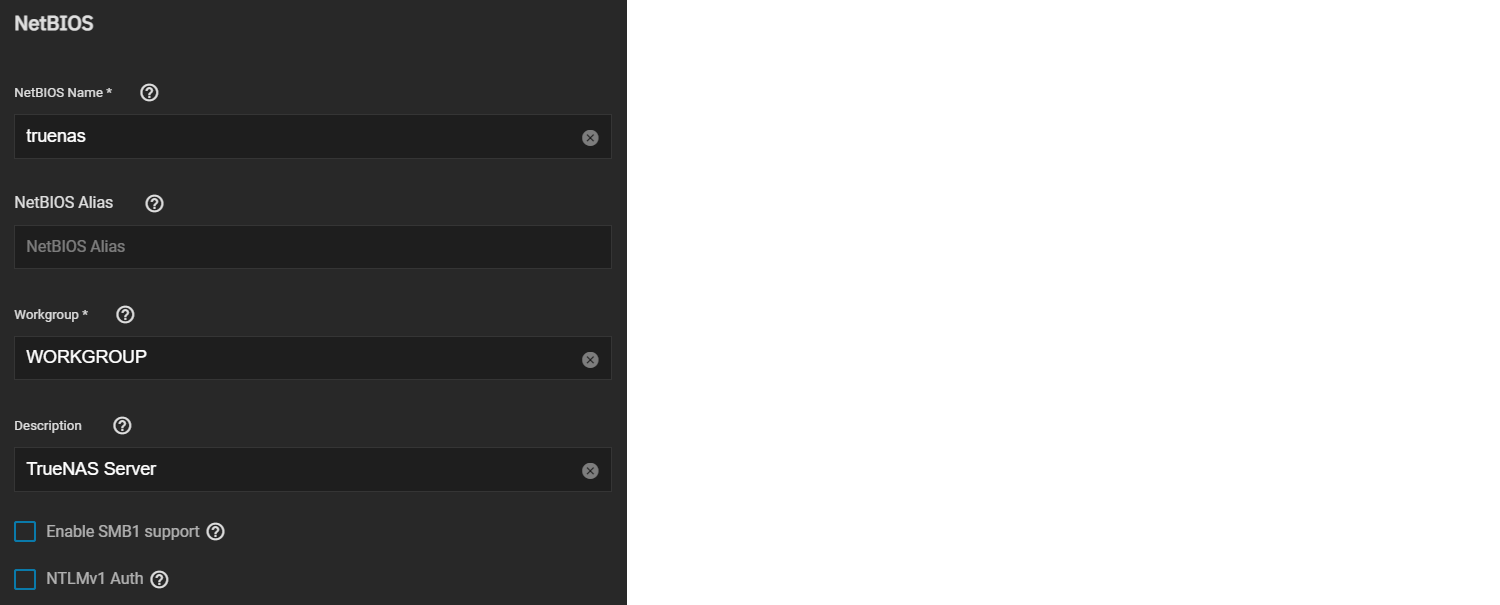
Enter the name of the TrueNAS host system if not the default displayed in NetBIOS Name. This name is limited to 15 characters and cannot be the Workgroup name.
Enter any alias name or names that do not exceed 15 characters in NetBIOS Alias. Separate alias names with a space between them.
Enter a name that matches the Windows workgroup name in Workgroup. When unconfigured and Active Directory or LDAP is active, TrueNAS detects and sets the correct workgroup from these services.
If using SMB1 clients, select Enable SMB1 support to allow legacy SMB1 clients to connect to the server. Note: SMB1 is being deprecated. We advise you to upgrade clients to operating system versions that support modern SMB protocol versions.
If you plan to use the insecure and vulnerable NTLMv1 encryption, select NTLMv1 Auth to allow smbd attempts to authenticate users. This setting allows backward compatibility with older versions of Windows, but is not recommended. Do not use on untrusted networks.
Enter any notes about the service configuration in Description
For more advanced setting see SMB Services Screen.
Use Auxiliary Parameters to enter additional smb.conf options, or to log more details when a client attempts to authenticate to the share, add log level = 1, auth_audit:5. Refer to the [Samba Guide]9http://www.oreilly.com/openbook/samba/book/appb_02.html) for more information on these settings.
Click Save.
Start the SMB service.

