Configuring OpenVPN Service
5 minute read.
Last Modified 2022-09-21 16:09 -0400A virtual private network (VPN) is an extension of a private network over public resources. It lets clients securely connect to a private network even when remotely using a public network. TrueNAS provides OpenVPN as a system-level service to provide VPN server or client functionality. TrueNAS can act as a primary VPN server that allows remote clients to access system data using a single TCP or UDP port. Alternatively, TrueNAS can integrate into a private network, even when the system is in a separate physical location or only has access to publicly visible networks.
Before configuring TrueNAS as either an OpenVPN server or client, you need an existing public key infrastructure (PKI) with Certificates and Certificate Authorities created in or imported to TrueNAS.
In general, configuring TrueNAS OpenVPN (server or client) includes selecting networking credentials, setting connection details, and choosing additional security or protocol options.
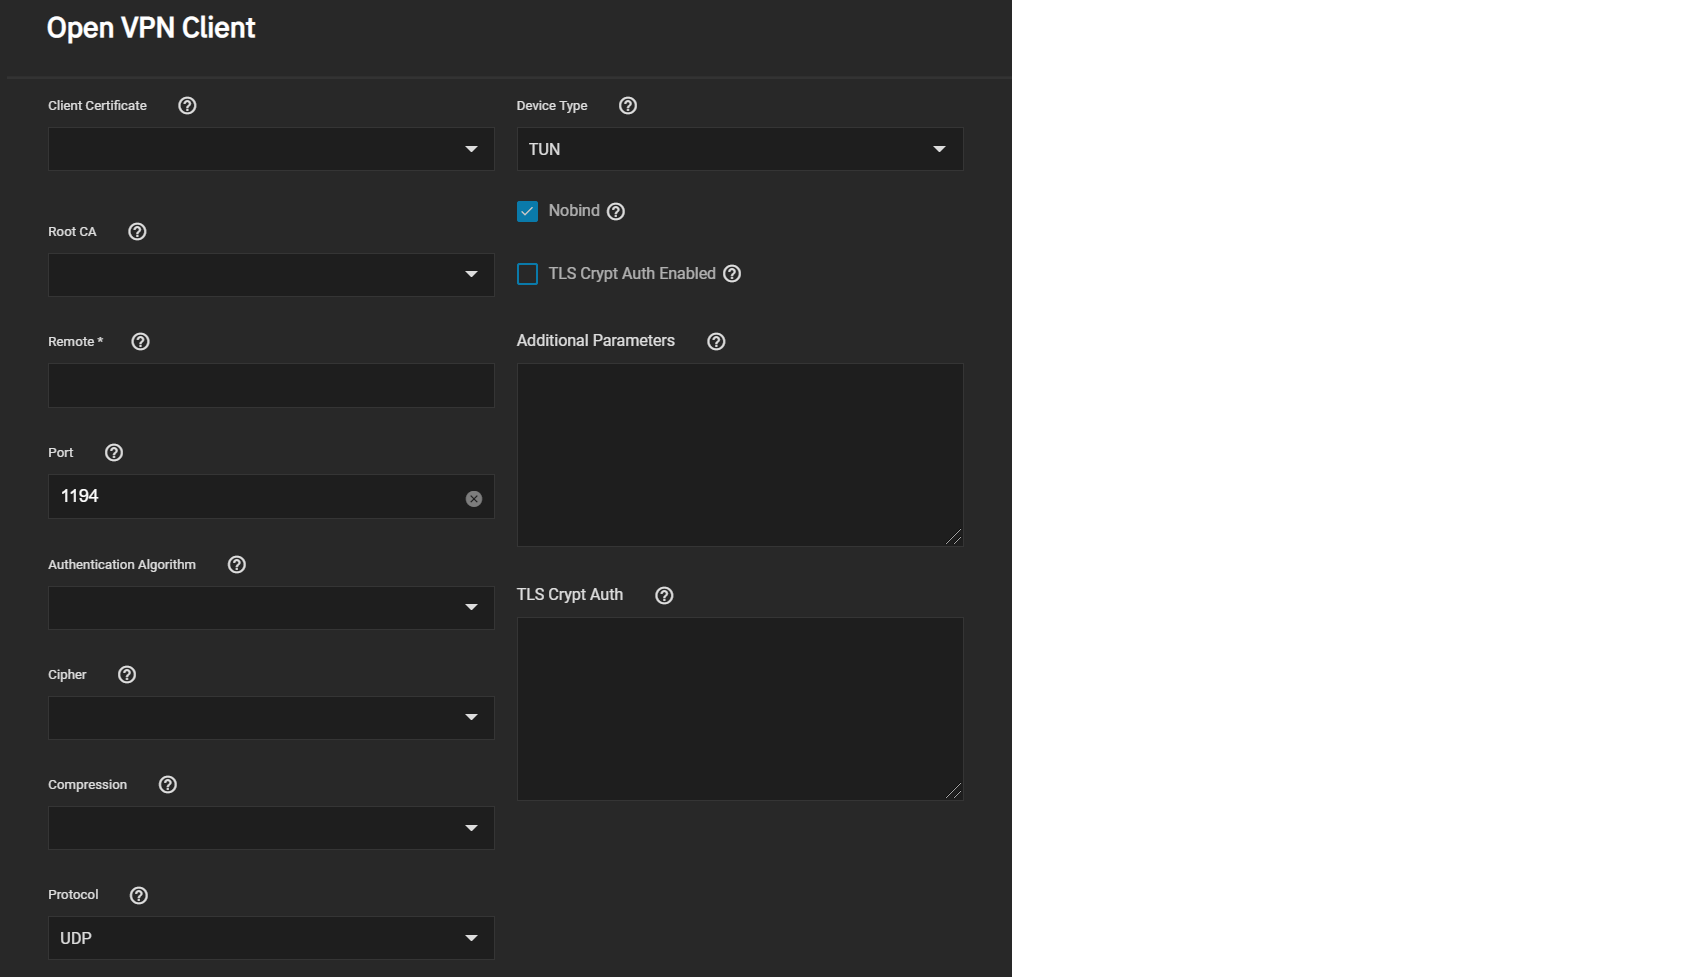
Go to System Settings > Services and find OpenVPN Client. Click the edit to configure the service.

Choose the certificate to use as an OpenVPN client. The certificate must exist in TrueNAS and be active (unrevoked). Enter the Remote OpenVPN server’s hostname or IP address.
Continue to review and choose any other Connection Settings that fit your network environment and performance requirements. The Device Type must match the OpenVPN server Device Type. Nobind prevents using a fixed port for the client and is enabled by default so the OpenVPN client and server run concurrently.
Finally, review the Security Options and ensure they meet your network security requirements. If the OpenVPN server uses TLS Encryption, copy the static TLS encryption key and paste it into the TLS Crypt Auth field.
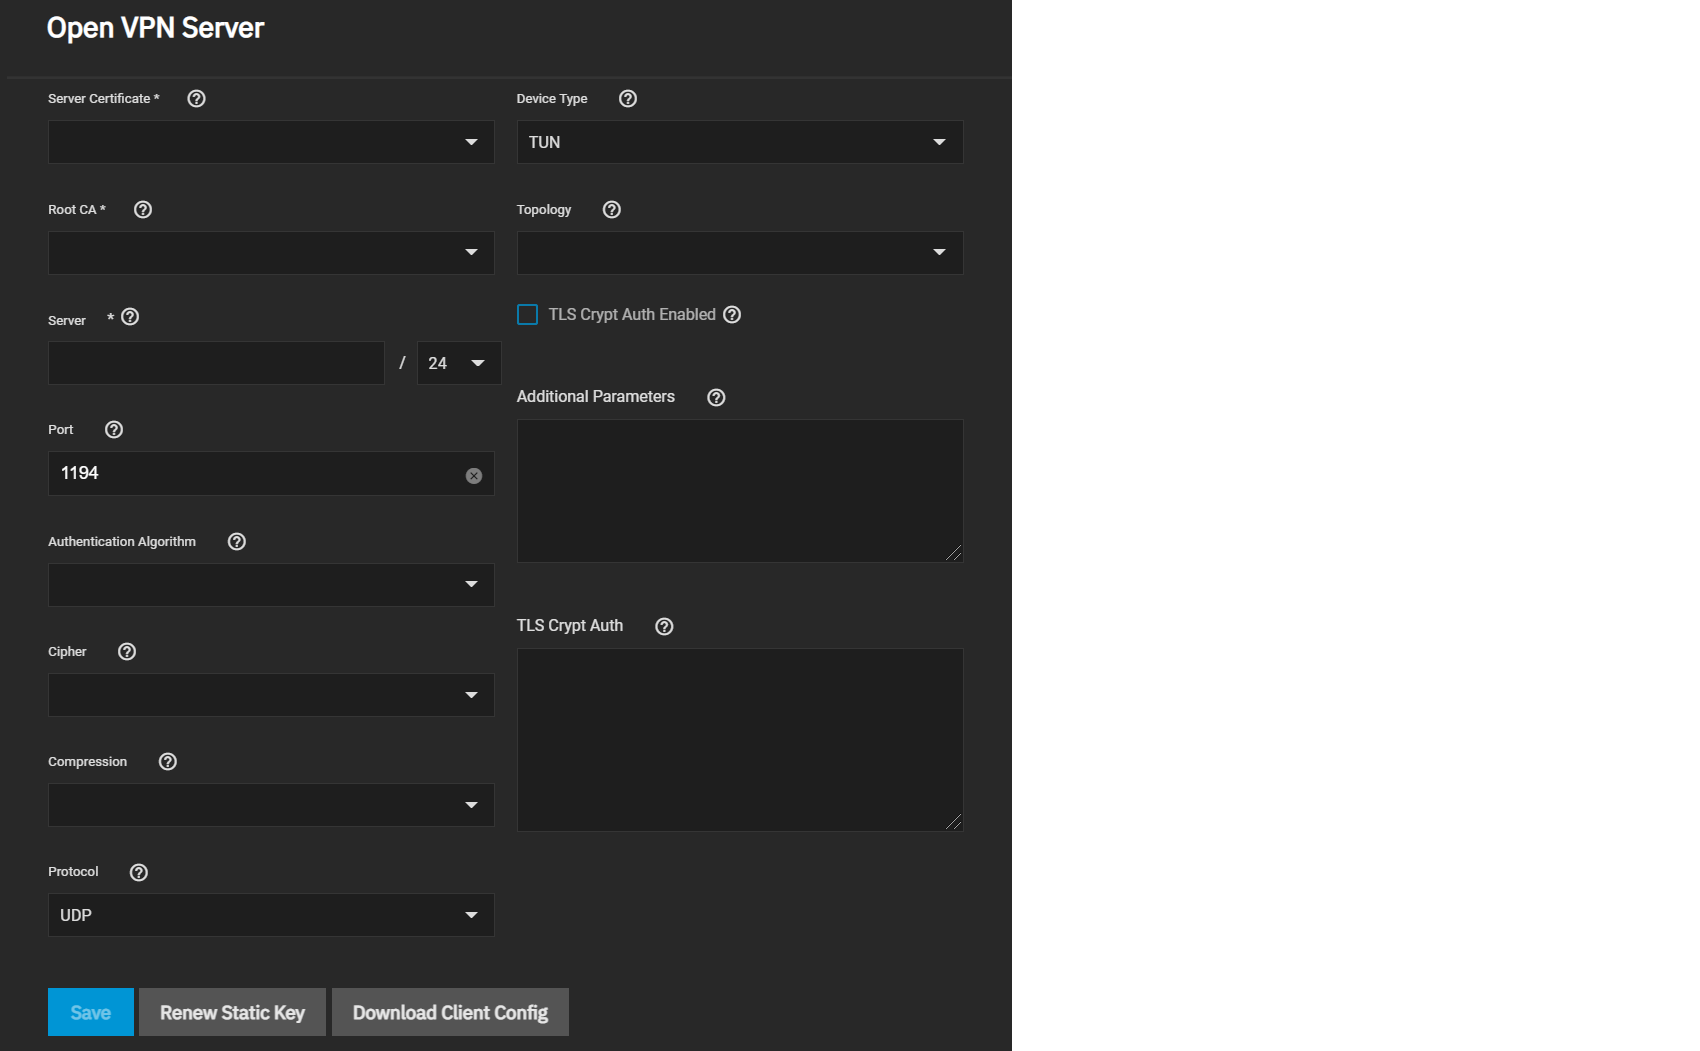
Go to System Settings > Services and find OpenVPN Server. Click the edit to configure the service.

Choose a Server Certificate for the OpenVPN server. The certificate must exist in TrueNAS and be active (unrevoked).
Now define an IP address and netmask for the OpenVPN Server. Select the remaining Connection Settings that fit your network environment and performance requirements. If using a TUN Device Type, you can choose a virtual addressing topology for the server in Topology:
- NET30: Use one /30 subnet per client in a point-to-point topology. Use when connecting clients are Windows systems.
- P2P: Point-to-point topology that points the local server and remote client endpoints to each other. Each client gets one IP address. Use when none of the clients are Windows systems.
- SUBNET: The interface uses an IP address and subnet. Each client gets one IP address. Windows clients require the TAP-Win32 driver version 8.2 or newer. TAP devices always use the SUBNET Topology.
TrueNAS applies the Topology selection to any connected clients.
When TLS Crypt Auth Enabled is selected, TrueNAS generates a static key for the TLS Crypt Auth field after saving the options. To change this key, click Renew Static Key. Clients connecting to the server require the key. TrueNAS stores keys in the system database and includes them in client config files. We recommend always backing up keys in a secure location.
Finally, review the Security Options and choose settings that meet your network security requirements.
After configuring and saving your OpenVPN Server, generate client configuration files to import to any OpenVPN client systems connecting to this server. You need the certificate from the client system already imported into TrueNAS. To generate the configuration file, click Download Client Config and select the Client Certificate.
Many OpenVPN server or client configuration fields are identical. This section covers these fields and lists specific configuration options in the Server and Client sections.
The Additional Parameters field manually sets any core OpenVPN config file options. See the OpenVPN Reference Manual for descriptions of each option.
| Setting | Description |
|---|---|
| Root CA | The Certificate Authority (CA) must be the root CA you used to sign the client and server certificates. |
| Port | The port that the OpenVPN connection is to use. |
| Compression | Choose a compression algorithm for traffic. Leave empty to send data uncompressed. LZO is a standard compression algorithm that is backward compatible with previous (pre-2.4) versions of OpenVPN. LZ4 is newer and typically faster and requires fewer system resources. |
| Protocol | Choose between UDP or TCP OpenVPN protocols. UDP sends packets in a continuous stream. TCP sends packets sequentially. UDP is usually faster and less strict about dropped packets than TCP. To force the connection to be IPv4 or IPv6, choose one of the 4 or 6 UDP or TCP options. |
| Device Type | Use a TUN or TAP virtual networking device and layer with OpenVPN. The device must be identical between the OpenVPN server and clients. |
OpenVPN includes several security options since using a VPN involves connecting to a private network while sending data over less secure public resources. Security options are not required, but they help protect data users send over the private network.
| Setting | Description |
|---|---|
| Authentication Algorithm | Validates packets sent over the network connection. Your network environment might require a specific algorithm. If not, SHA1 HMAC is a reliable algorithm to use. |
| Cipher | Encrypts data packets sent through the connection. Ciphers aren’t required but can increase connection security. You might need to verify which ciphers your networking environment requires. If there are no specific cipher requirements, AES-256-GCM is a good default choice. |
| TLS Encryption | When TLS Crypt Auth Enabled is selected, OpenVPN adds another layer of security by encrypting all TLS handshake messages. This setting requires sharing a static key between the OpenVPN server and clients. |
Click Save after configuring the server or client service. Start the service by clicking the related toggle in System Settings > Services. Hover over the toggle to check the service current state.
Selecting Start Automatically starts the service whenever TrueNAS completes booting.

