Configuring Dynamic DNS Service
2 minute read.
Last Modified 2022-09-21 09:35 -0400Dynamic Domain Name Service (DDNS) is useful when you connect TrueNAS to an Internet service provider (ISP) that periodically changes the system’s IP address. With Dynamic DNS, the system automatically associates its current IP address with a domain name and continues to provide access to TrueNAS even if the system IP address changes.
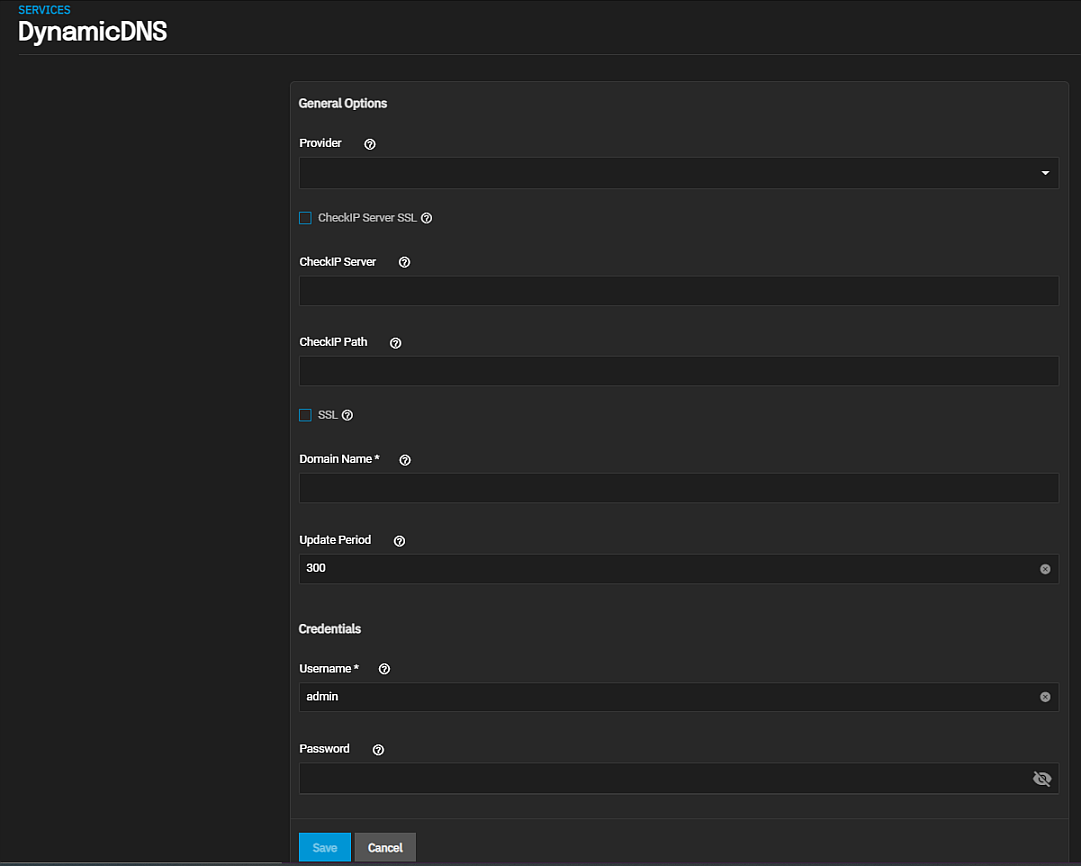
DDNS requires registration with a DDNS service such as DynDNS before configuring TrueNAS. Have the DDNS service settings available or open in another browser tab when configuring TrueNAS. Log in to the TrueNAS web interface and go to System Settings > Services > Dynamic DNS.

Select the provider from the dropdown list, or if not listed, select Custom Provider. If you select Custom Provider also enter the DynmicDNS server name in Custom Server and the path to the server obtained from that provider in Custom Path.
Select CheckIP Server SSL if you want to use HTTPS to connect to the CheckIP server, and then enter the name and port number of the server that reports the external IP addresses and the path to the CheckIP server.
Select SSL if you want to use HTTPS to connect o the server that updates the DNS record.
Enter the fully qualified domain name of the host with the dynamic IP address in Domain Name.
Enter the number of seconds for how often you want to check the IP address in Update Period.
Click Save.
Start the DDNS service after choosing your Provider options and saving the settings.

