Managing Pools
5 minute read.
Last Modified 2022-12-09 09:08 -0500Use the Storage Dashboard widgets to manage a pool, and the Dataset screen to manage dataset functions.
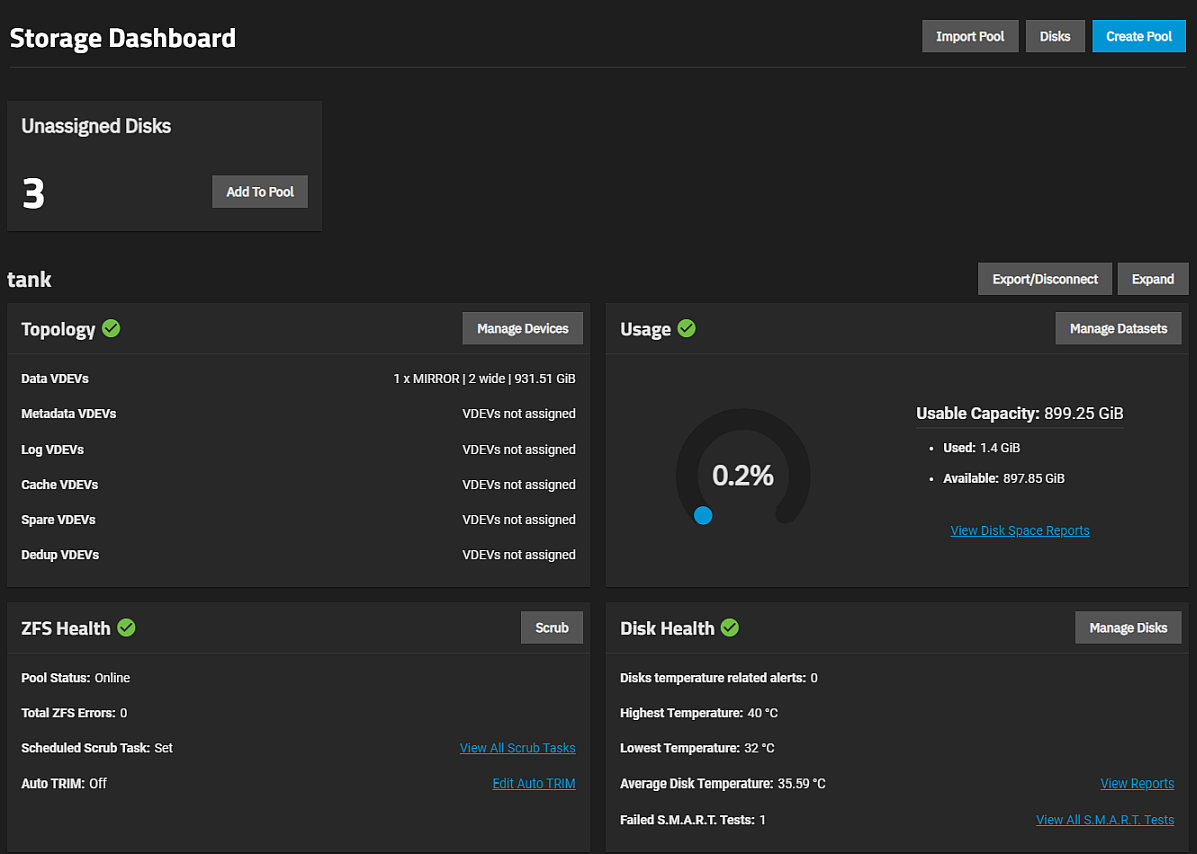
Select Storage on the main navigation panel and then click the Edit Auto TRIM on the ZFS Health widget for the selected pool to open the Pool Options for poolname dialog.
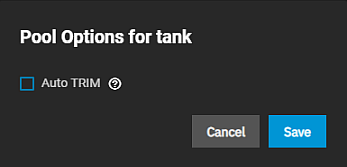
Select Auto TRIM.
Click Save.
With Auto TRIM selected and active, TrueNAS periodically checks the pool disks for storage blocks it can reclaim. Auto TRIM can impact pool performance, so the default setting is disabled.
For more details about TRIM in ZFS, see the autotrim property description in zpool.8.
The Export/Disconnect option allows you to disconnect a pool and transfer drives to a new system where you can import the pool. It also lets you completely delete the pool and any data stored on it.
Select Export/Disconnect on the Storage Dashboard.
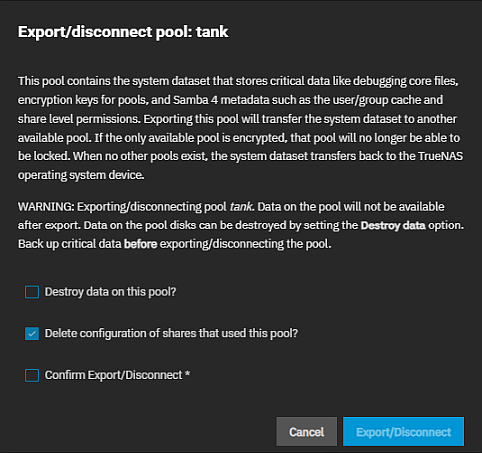
A dialog box displays with any system services affected by exporting the pool listed in the dialog.
To delete the pool and erase all the data on the pool, select Destroy data on this pool. The pool name field displays at the bottom of the window. Type the pool name into this field. To export the pool, do not select this option.
Select Delete configuration of shares that used this pool? to delete shares connected to the pool.
Select Confirm Export/Disconnect
Click Export/Disconnect. A confirmation dialog displays when the export/disconnect completes.
ZFS supports adding VDEVs to an existing ZFS pool to increase the capacity of the pool.
You cannot change the original encryption or data VDEV configuration.
To add a VDEV to a pool: Click Manage Devices on the Topology widget to open the Devices screen. Click Add VDEV on the Devices screen. The Add Vdevs to Pool version of the Pool Manager screen opens.
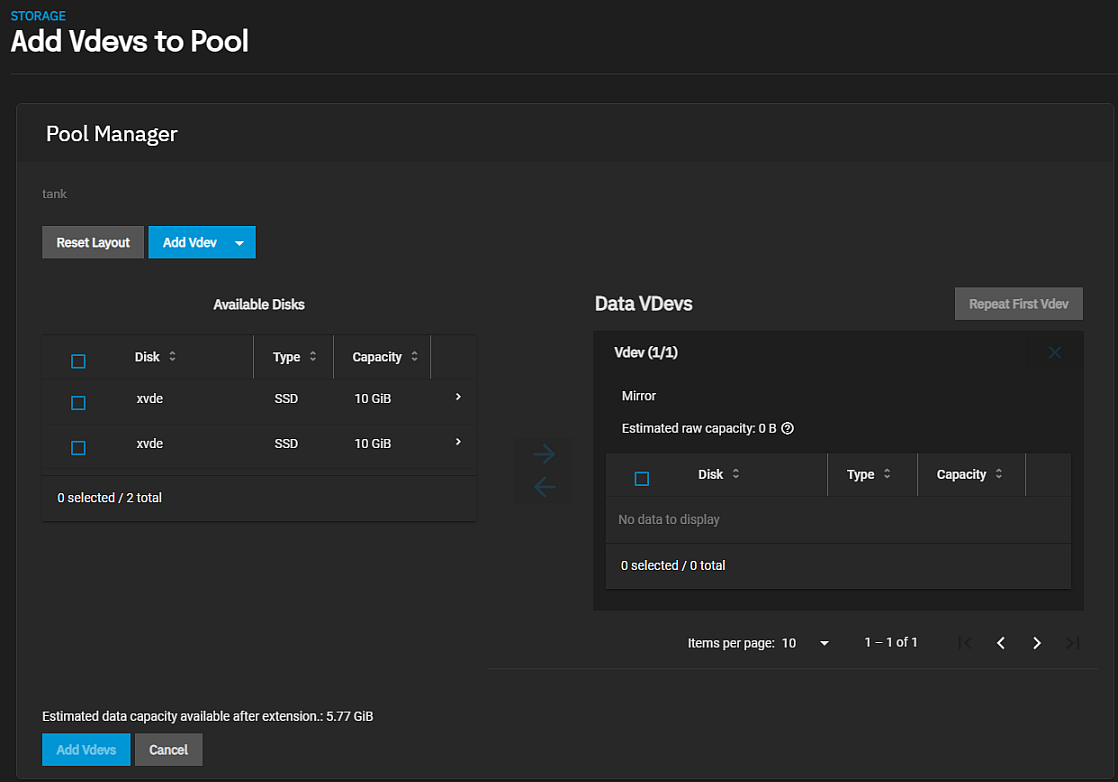
Click Add Vdev and select the type of VDEV you want to add.
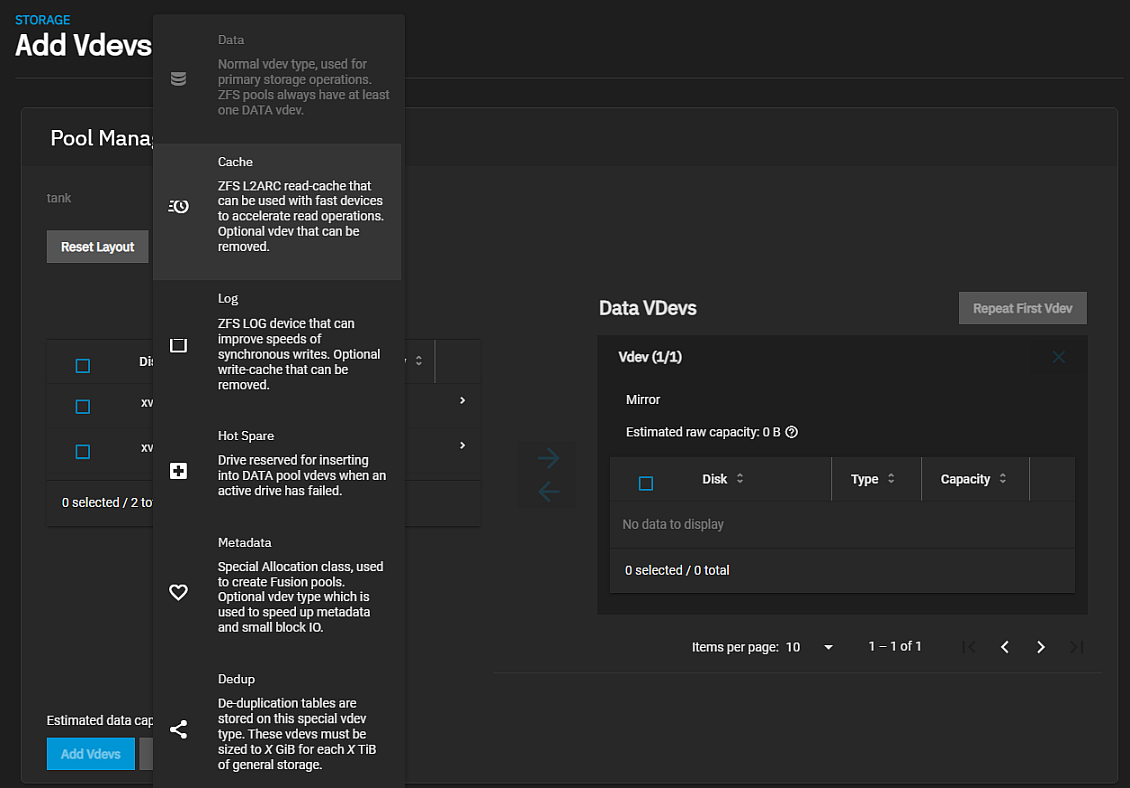
Select the disk(s) you want to move to that VDEV and then click the to the left of the VDEV you just added to them to that VDEV.
Repeat for each type of VDEV you want to add to this pool.
Click Add Vdevs at the bottom of the screen to save the changes and close the Pool Manager screen. The Topology widget displays the newly added VDEVs.
You cannot add more drives to an existing data VDEV but you can stripe a new VDEV of the same type to increase the overall pool size. To extend a pool, you must add a data VDEV that is the same type as existing VDEVs.
To make a hot spare for a VDEV, click Add VDev and select Hot Spare. Move the disk you want to use to that Spare VDev before you click Add VDevs to save the changes to the pool.
- To make a striped mirror, add the same number of drives to extend a ZFS mirror. For example, you start with ten available drives. Begin by creating a mirror of two drives, and then extending the mirror by adding another mirror of two drives. Repeat this three more times until you add all ten drives.
- To make a stripe of two RAIDZ1 VDEVs (similar to RAID 50 on a hardware controller), add another three drives to extend the three-drive RAIDZ1.
- To make a stripe of RAIDZ2 VDEVs (similar to RAID 60 on a hardware controller), add another four drives to extend the four-drive RAIDZ2.
Use Scrub on the ZFS Health pool widget to start a pool data integrity check.
Click Scrub to open the Scrub Pool dialog. Select Confirm, then click Start Scrub.
If TrueNAS detects problems during the scrub operation, it either corrects them or generates an alert in the web interface.
By default, TrueNAS automatically checks every pool on a reoccurring scrub schedule.
The ZFS Health widget displays the state of the last scrub or disks in the pool. To view scheduled scrub tasks, click View all Scrub Tasks on the ZFS Health widget.
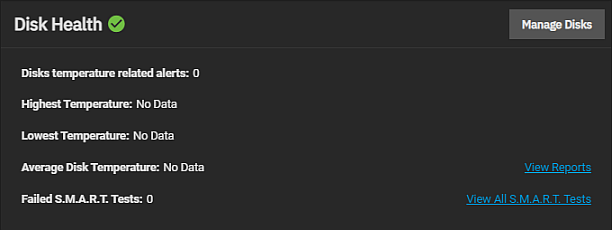
The Storage Dashboard screen Disks button and the Manage Disks button on the Disk Health widget both open the Disks screen.
The Manage Devices button on the Topology widget opens the Devices screen. To manage disks in a pool, click on the VDEV to expand it and show the disks in that VDEV. Click on a disk to see the devices widgets for that disk. You can take a disk offline, detach it, replace it, manage the SED encryption password, and perform other disk management tasks from this screen.
See Replacing Disks for more information on the Offline, Replace and Online options.
Click Expand on the Storage Dashboard to increase the pool size to match all available disk space. An example is expanding a pool when resizing virtual disks apart from TrueNAS.
Related Content
- Main Dashboard
- Creating Storage Pools
- Disks Screens
- Managing Advanced Settings
- Importing Data
- Pool Manager Screen
- Advanced Settings Screen
- Fusion Pools
- Storage Dashboard Screen
- SLOG Over-Provisioning
Related VDEV Articles
Related Disk Articles
- Disks Screens
- Managing Disks
- Importing Disks
- Replacing Disks
- Import Data Screen
- Pool Manager Screen
- Wiping a Disk
- Advanced Settings Screen
- Devices Screens
- SLOG Over-Provisioning

