Get a Quote     (408) 943-4100               TrueNAS Discord      VendOp_Icon_15x15px   Commercial Support Toggle between Light and Dark mode

Adding iSCSI Block Shares

  9 minute read.

Last Modified 2022-12-09 11:01 -0500

To get started with iSCSI shares, make sure you have already created a zvol or a dataset with at least one file to share.

Go to Shares and click Configure in the Block (iSCSI) Shares Targets window. You can either use the creation wizard or set one up manually.

Configuring an iSCSI Share Tutorial Video

This short tutorial video demonstrates basic steps to set up an iSCSI share configuration.

(Video URL: https://www.truenas.com/docs/files/scaleangelfishiscsi.mp4)

Adding an iSCSI Block Share

TrueNAS SCALE offers two methods to add an iSCSI block share: the setup wizard or the manual steps using the screen tabs. Both methods cover the same basic steps but have some differences.

The setup wizard requires you to enter some settings before you can move on to the next screen or step in the setup process. It is designed to ensure you configure the iSCSI share completely so it can be used immediately.

The manual process has more configuration screens over the wizard and allows you to configure the block share in any order. Use this process to customize your share for special uses cases. It is designed to give you additional flexibility to build or tune a share to your exact requirements.

Before you Begin

Have the following ready before you begin adding your iSCSI block share:

  • Storage pool and dataset.
  • A path to a Device (zvol or file) that doesn’t use capital letters or spaces.

iSCSI Wizard

This section walks you through the setup process using the wizard screens.

To use the setup wizard,

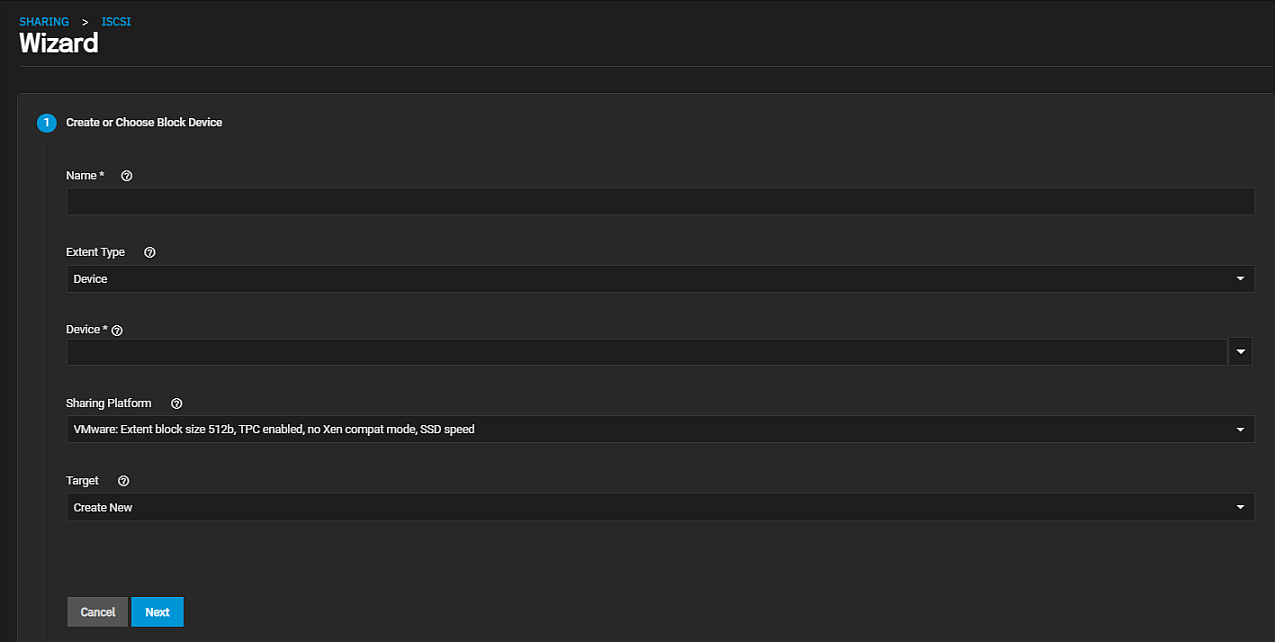
  1. Add the block device.

    a. Enter a name using all lowercase alphanumeric characters plus a dot (.), dash (-), or colon (:). We recommend keeping it short or at most 63 characters.
    iSCSIWizardCreateBlockDeviceScreen

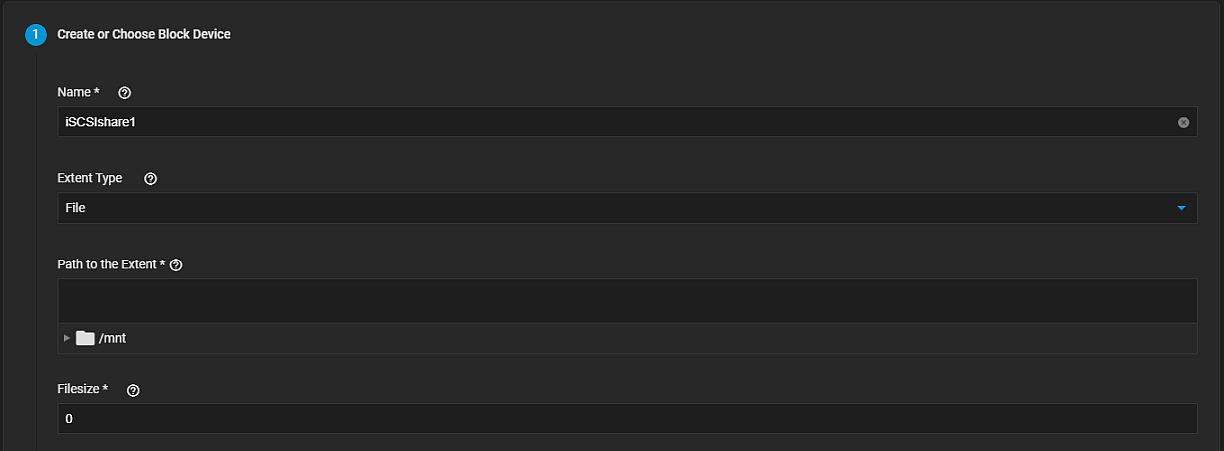
    b. Choose the Extent Type. You can select either Device or File.

    If you select Device, select the zvol to share from the Device dropdown list.

    If you select File, file settings display. Browse to the location of the file to populate the path, and then enter the size in Filesize.
    iSCSIWizardCreateBlockDeviceAddFileType

    c. Select the type of platform using the share. For example, if you use an updated Linux OS, choose Modern OS.

    d. Click Next.

  2. Add the portal

    Now you either create a new portal or select an existing one from the dropdown list.

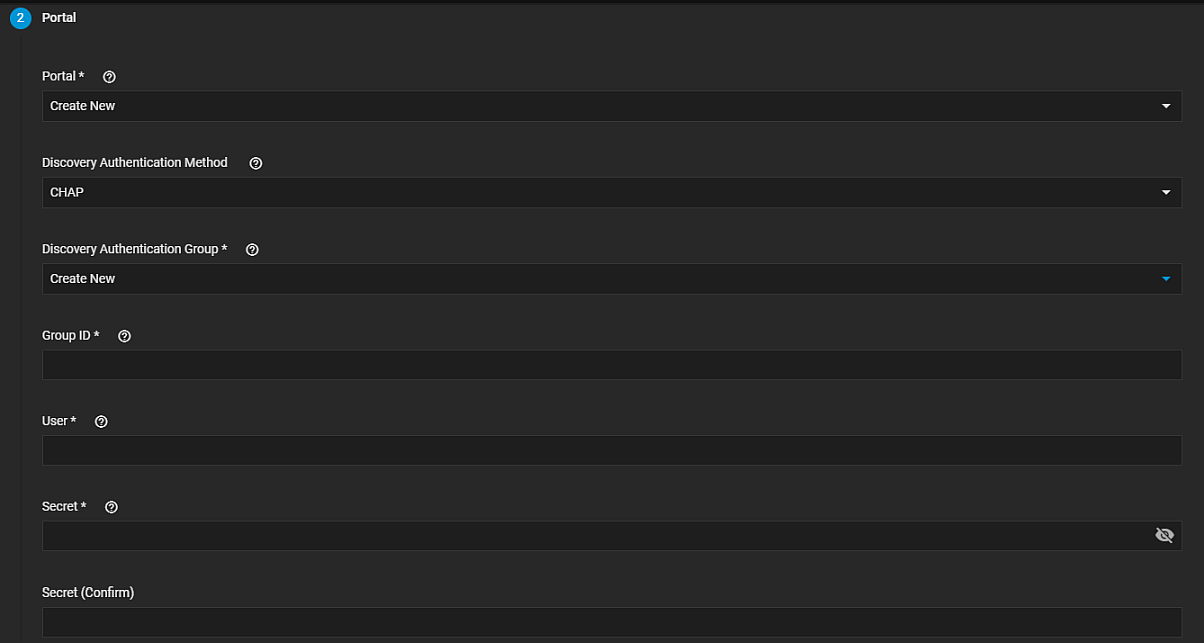
    If you create a new portal, select a Discovery Authentication Method from the dropdown list.

    If you select None, you can leave Discovery Authentication Group empty.

    If you select either CHAP or MUTUAL CHAP, you must also to select a Discovery Authentication Group from the dropdown list. If no group exists, click Create New and enter a value in Group ID, User, and Secret.
    iSCSIWizardPortalCreateNewDiscoveryAuthenticationGroup

    Select 0.0.0.0 or :: from the IP Address dropdown list. 0.0.0.0 listens on all IPv4 addresses and :: listens on all IPv6 addresses.

    Click NEXT

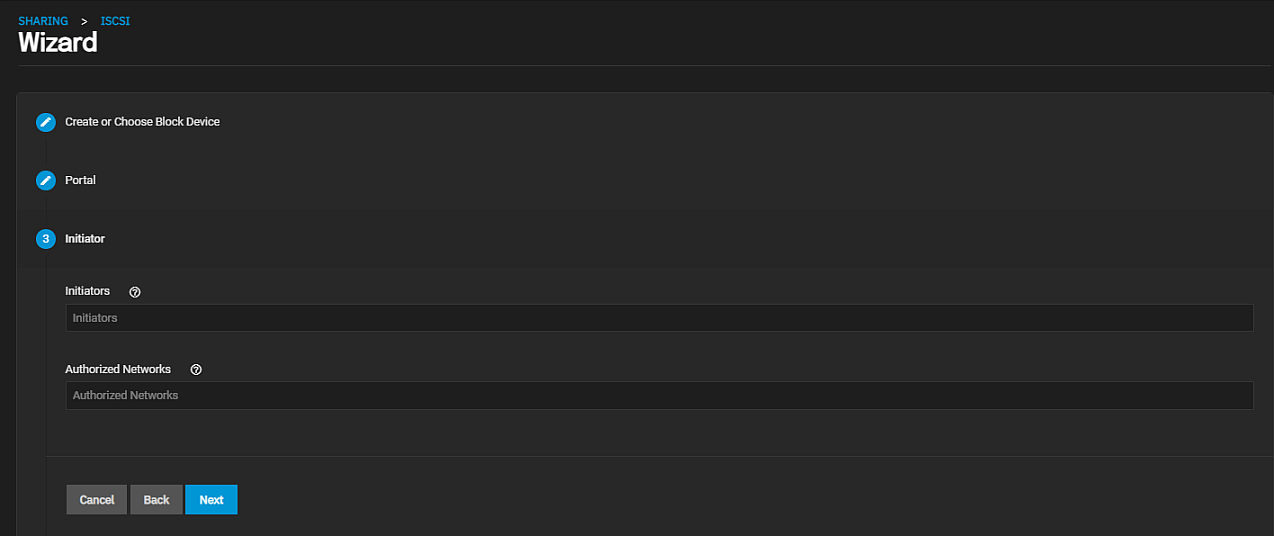
  3. Add the Initiator. After adding the portal set up the initiator or networks that use the iSCSI share.

    Decide which initiators or networks can use the iSCSI share. Leave the list empty to allow all initiators or networks, or add entries to the list to limit access to those systems.
    iSCSIWizardInitiatorScreen

  4. Confirm the iSCSI setup. Review your settings. If you need or want to change any setting click Back until you reach the wizard screen with the setting.

  5. click Save.

iSCSI Manual Setup

This procedure walks you through adding each configuration setting on the seven configuration tab screens. While the procedure places each tab screen in order, you can select the tab screen to add settings in any order.

  1. Configure share settings that apply to all iSCSI shares.

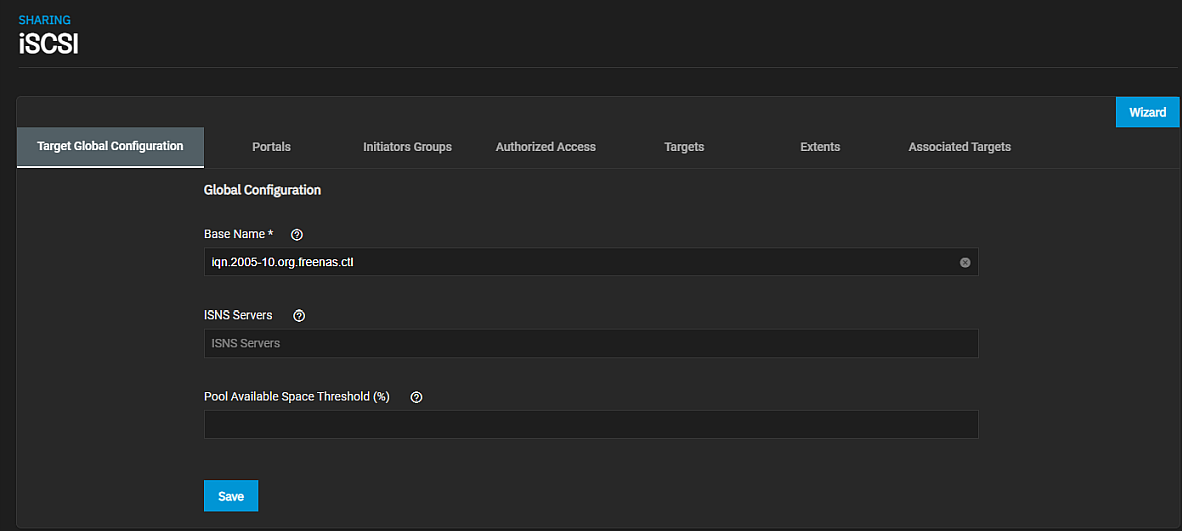
    a. Click Configure on the main Block (iSCSI) Share Targets widget. The Target Global Configuration tab screen opens.

    SharingiSCSITargetGlobalConfigurationScreen

    b. Enter a name using lowercase alphanumeric characters plus dot (.), dash (-), and colon (:) in Base Name. Use the iqn.format for the name. See the “Constructing iSCSI names using the iqn.format” section of RFC3721.

    c. Enter the host names or IP address of the ISNS servers to register with the iSCSI targets and portals of the system. Separate entries by pressing Enter.

    d. Click Save.

  2. Add portals. Click Portals to open the screen.

    SharingiSCSIPortalsScreen

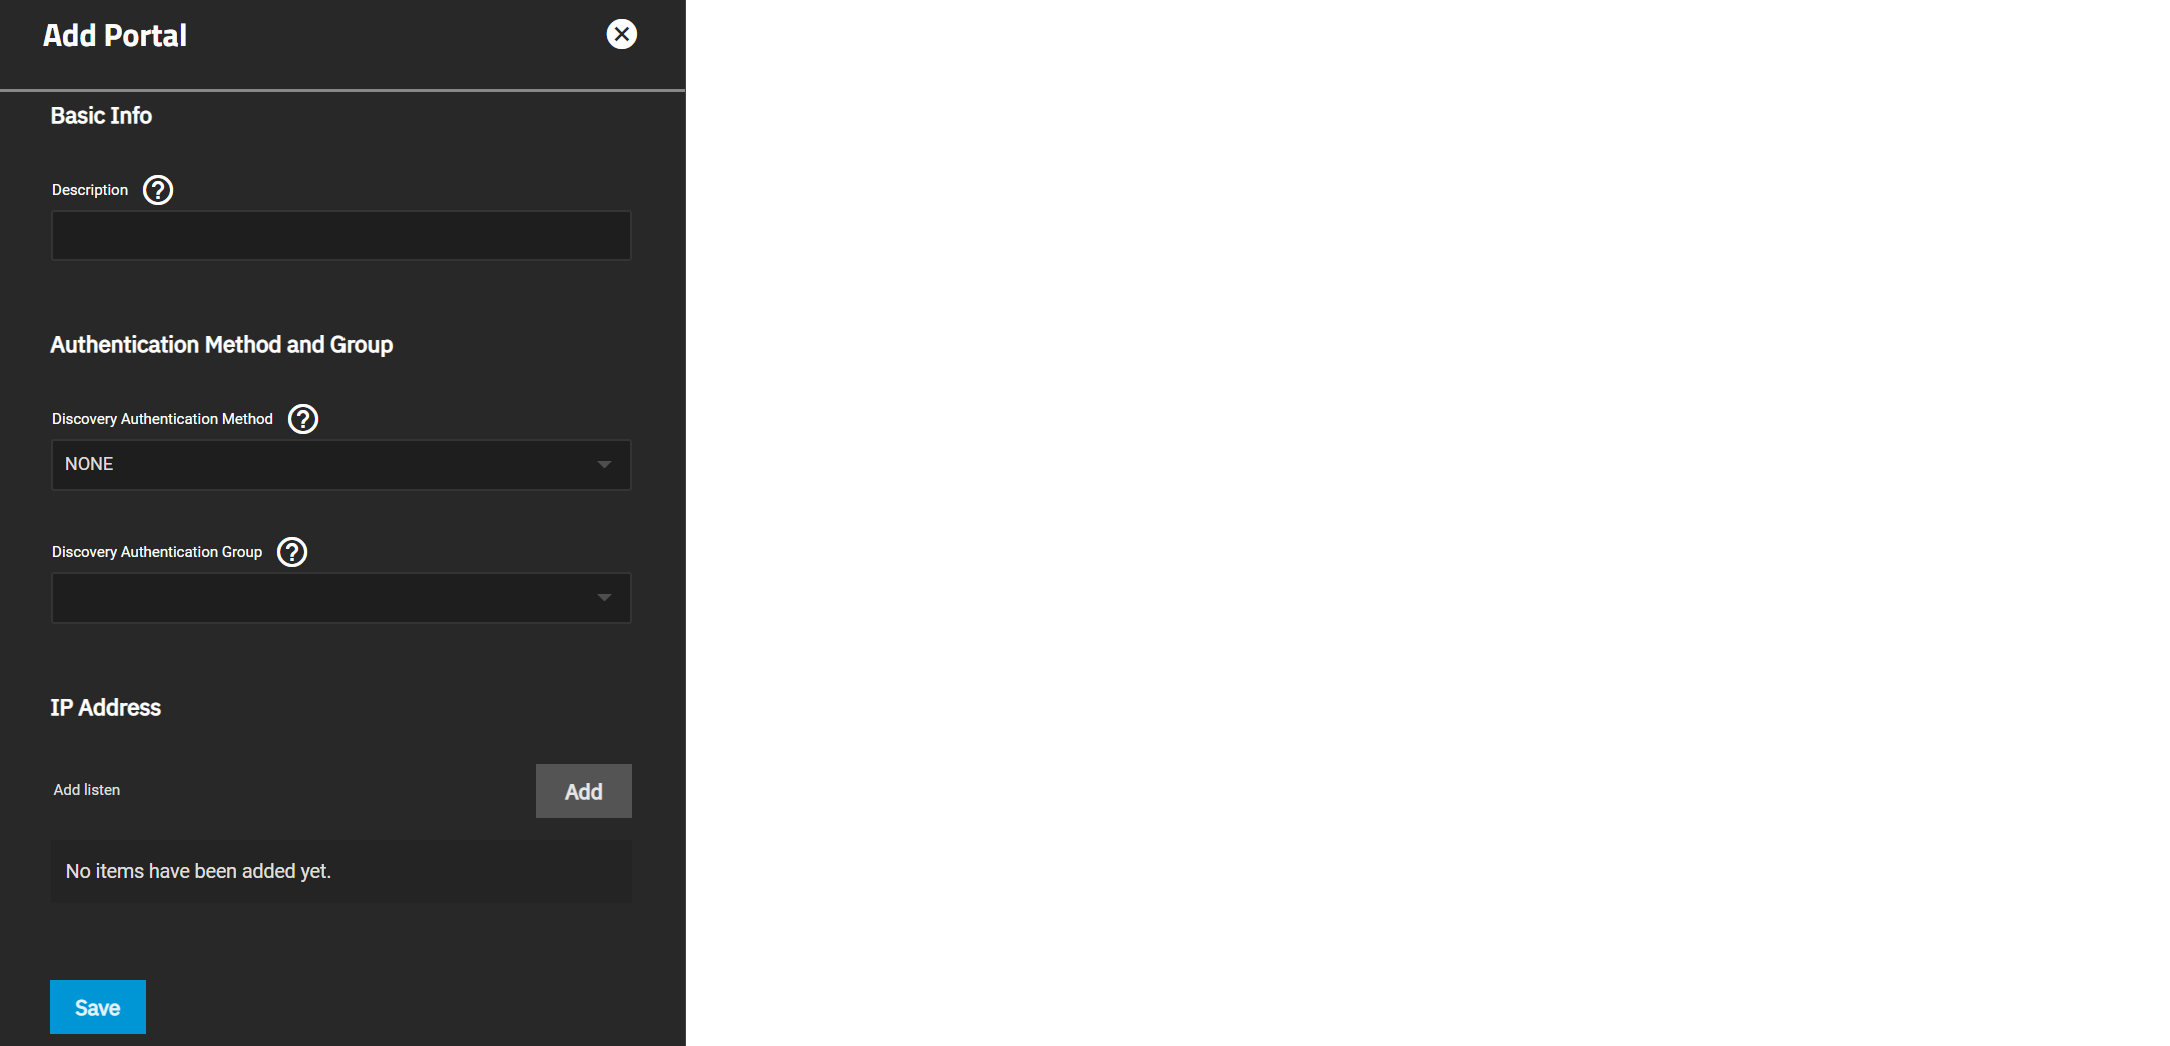
    a. Click Add at the top of the screen to open the Sharing > iSCSI > Portals > Add screen.

    SharingiSCSIPortalsAddScreen

    b. (Optional) Enter a description. Portals are automatically assigned a numeric group.

    c. Select the Discovery Authentication Method from the dropdown list.

    None alows anonymous discovery and does not require you to select a Discovery Authentication Group.

    CHAP and Mutual CHAP require authentication and you to select a group ID in Discovery Authentication Group.

    d. (Optional) Based on your Discovery Authentication Method, select a group in Discovery Authentication Group.

    e. Click Add to display the IP Address and Port fields. Click Add for each network IP address and port.

    Add the IP address. 0.0.0.0 listens on all IPv4 addresses and :: listens on all IPv6 addresses.

    Add the TCP port used to access the iSCSI target. Default is 3260.

    f. Click Save.

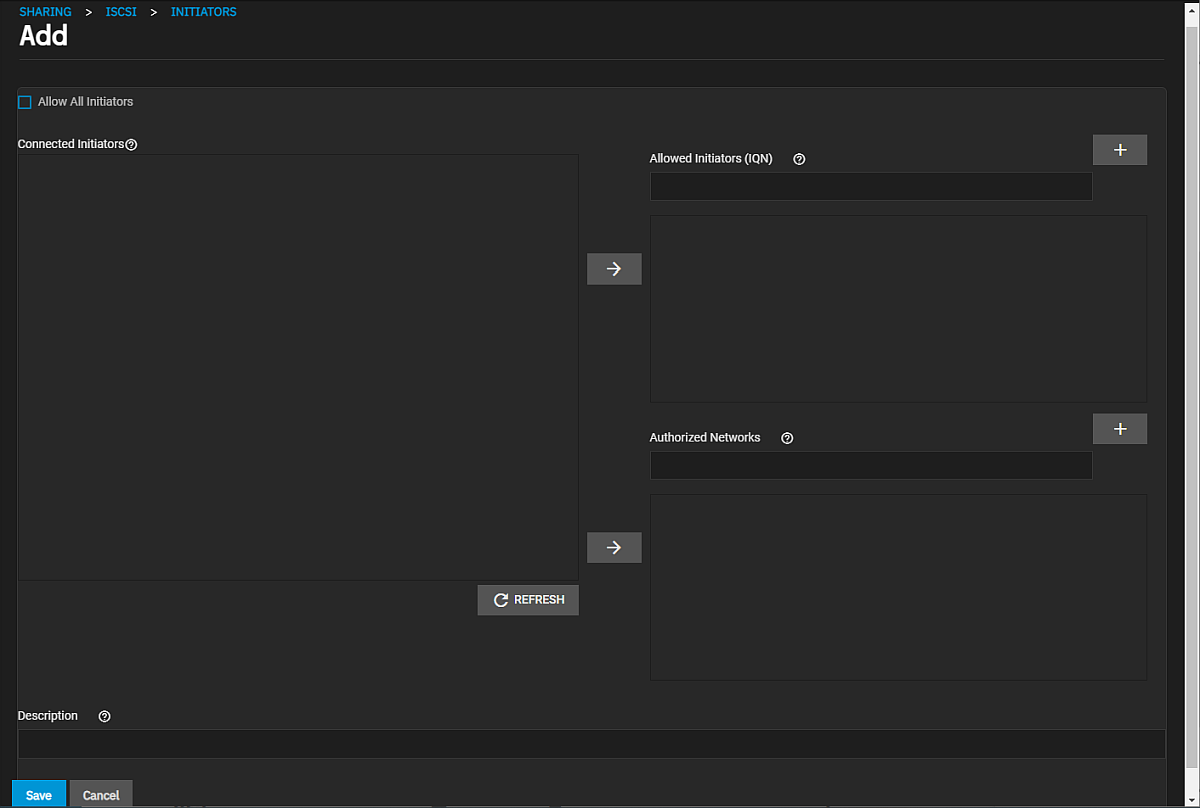
  3. Add initiators groups to create authorized access client groups. Click on the Initiators Groups tab to open the screen.

    SharingISCSIInitiatorsAddScreen

    a. Click Add to open the Sharing > iSCSI > Initiators > Add screen.

    b. Select Allow All Initiators or configure your own allowed initiators and authorized networks.

    Enter the iSCSI Qualified Name (IQN) in Allowed Initiators (IQN) and click + to add it to the list. Example: iqn.1994-09.org.freebsd:freenas.local.

    Enter network addresses allowed to use this initiator in Authorized Networks and click + to add it to the list. Each address can include an optional CIDR netmask. Click + to add the network address to the list. Example: 192.168.2.0/24. |

    c. Click Save.

  4. Add network authorized access. Click on the Authorized Access tab to open the screen.

    If this is the first iSCSI share, the No Authorized Access screen opens.

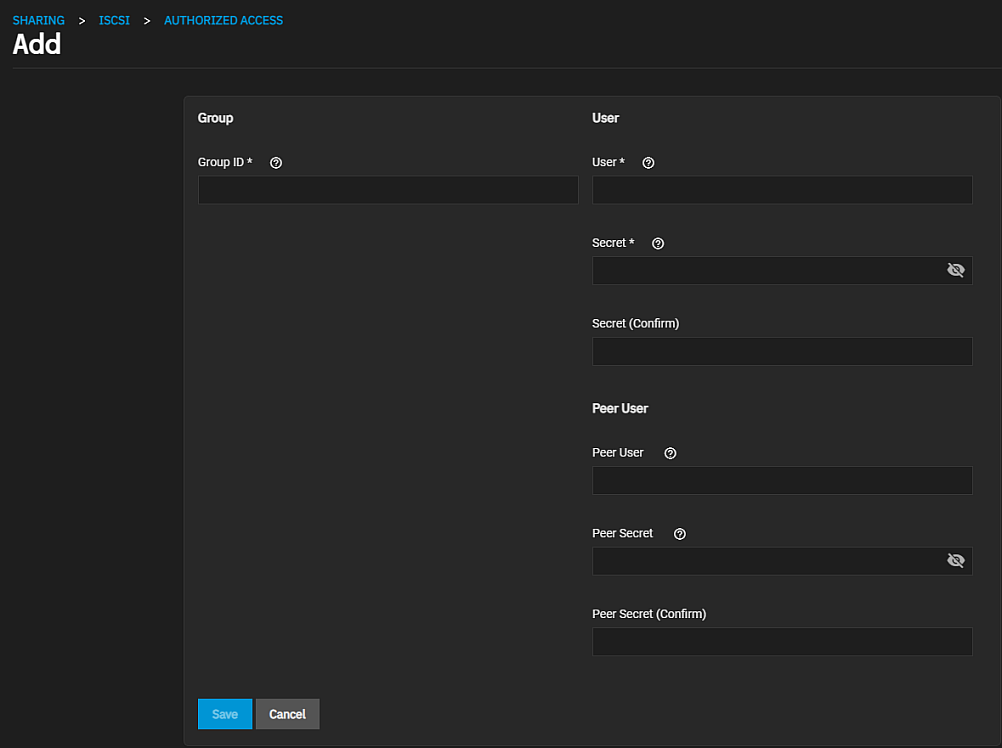
    a. Click Add Authorized Access in the center of the screen. To add another network click Add at the top of the screen to open the Sharing > iSCSI > Authorized Access > Add screen.

    SharingiSCSIAuthAccessAddScreen

    b. Enter a number in Group ID. Each group ID allows configuring different groups with different authentication profiles. Example: all users with a group ID of 1 inherits the authentication profile associated with Group 1.

    c. Enter a user around to create for CHAP authentication with the user on the remote system. Consider using the initiator name as the user name.

    d. Enter the user password of at least 12 to no more than 16 characters long in Secret and Secret (Confirm).

    e. (Optional) Enter peer user details in Peer User and Peer Secret and Peer Secret (Confirm). Peer user is only entered when configuring mutual CHAP and is usually the same value as User. The password must be different from the one entered in Secret.

    f. Click Save.

  5. Create storage resources. Click Targets tab to open the screen.

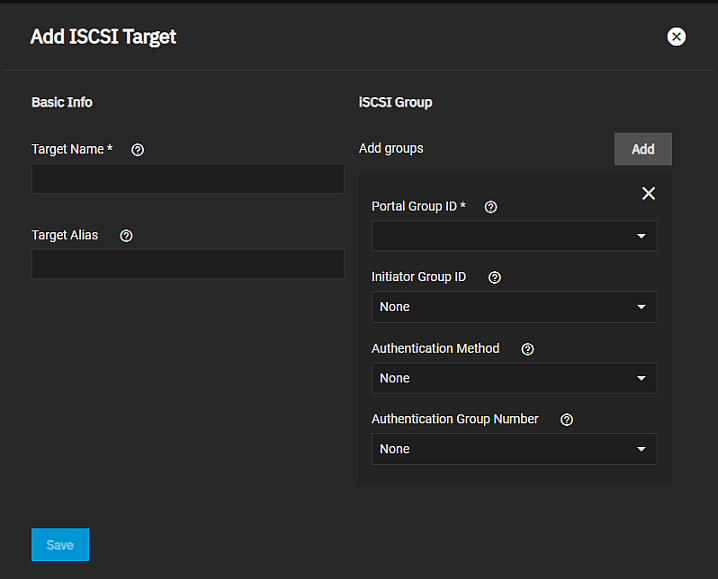
    AddiSCSITargetScreen

    a. Click Add at the top of the screen to open the Add iSCSI Target screen.

    b. Enter a name using lowercase alphanumeric characters plus dot (.), dash (-), and colon (:) in the iqn.format. See the “Constructing iSCSI names using the iqn.format” section of RFC3721.

    c. (Optional) Enter a user-friendly name.

    d. Click Add under iSCSI Group to display the group settings.

    e. Select the group ID from the Portal Group ID dropdown.

    f. (Optional) Slect the group ID in Initiator Group ID or leave it set to None.

    g. (Optional) Select the Authentication Method from the dropdown list of options.

    h. (Optional) Select the Authentication Group Number from the dropdown list. Leave at None or enter an integer to represent the number of existing authorized access.

    i. Click Save.

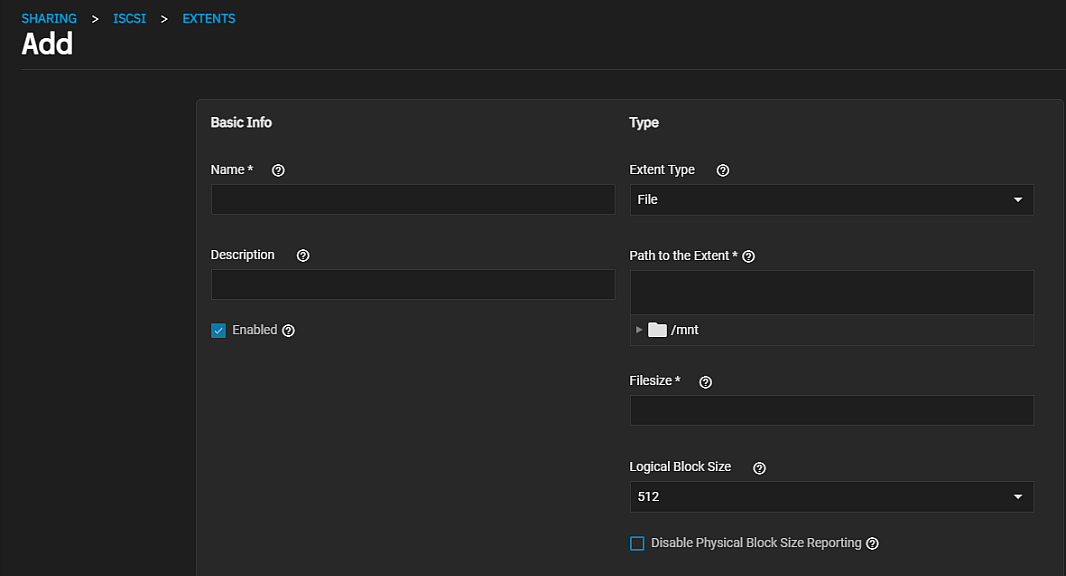
  6. Add new share storage units (extents). Click Extents to open the Sharing > iSCSI > Extents > Add screen.

    SharingISCSIExtentsAddScreentop

    a. Enter a name for the extent. If the extent size is not 0, it cannot be an existing file within the pool or dataset.

    b. Leave Enable selected.

    c. Select the extent type from the Extent Type dropdown. Device provides virtual storage access to zvols, zvol snapshots, or physical devices. File provides virtual storage access to a single file.

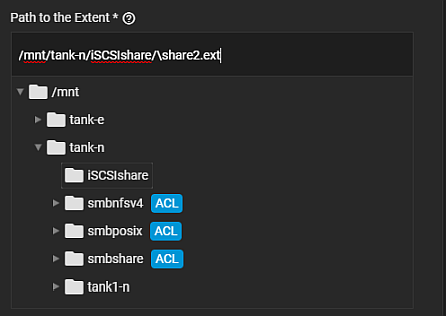
    d. (Optional) Select the option from the Device dropdown. This field only displays when Extent Type is set to Device. Select the path when Extent Type is set to File. Browse to the location. Create a new file by browsing to a dataset and appending /{filename.ext} to the path. And Enter the size in Filesize.

    SharingiSCSIExtentAddFilename

    e. Select Disable Physical Block Size Reporting if the initiator does not support physical block size values over 4K (MS SQL).

    f. (Optional) Select the compatibility settings that apply to your extent. See iSCSI Share Screens for more information.

    g. Click Save.

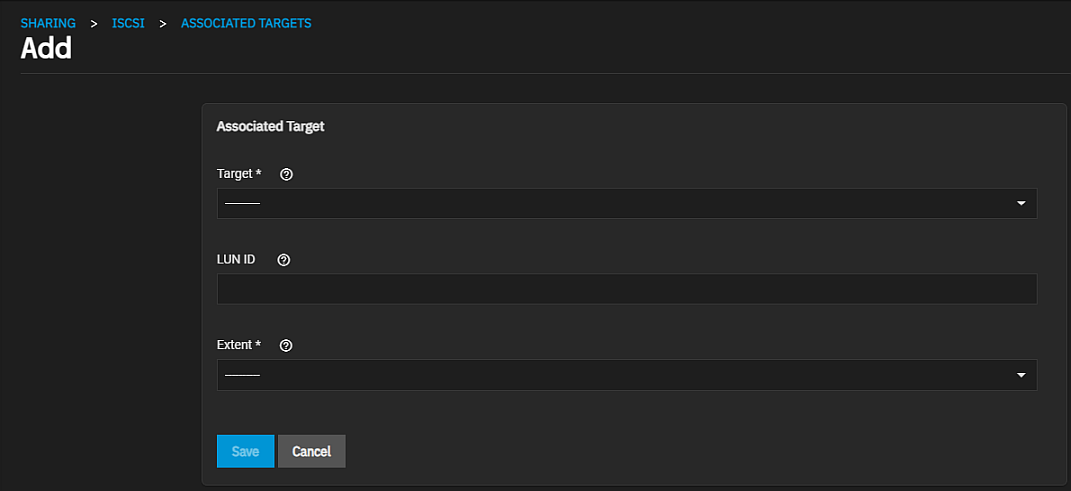
  7. Add associated storage resources. Click Associate Targets tab to open the screen.

    a. Click Add to open the Sharing > iSCSI > Associated Targets > Add screen.

    SharingISCSIAssociatedTargetsAdd

    b. Select the target from the Target dropdown list.

    c. Select the value or enter a value 0 and 1023. Some initiators expect a value below 256. Leave blank to automatically assign the next available ID.

    d. Select the option from the Extent dropdown.

    e. Click Save

Creating a Quick iSCSI Target

TrueNAS SCALE allows users to add iSCSI targets without having to set up another share.

Go to Shares and click Add in the Block (iSCSI) Shares Targets widget.

AddiSCSITargetScreen

  1. Enter a name using lowercase alphanumeric characters plus dot (.), dash (-), and colon (:) in the iqn.format. See the “Constructing iSCSI names using the iqn.format” section of RFC3721.

  2. (Optional) Enter a user-friendly name in Target Alias.

  3. Click Add under iSCSI Group to display the group settings.

  4. Select the group ID from the Portal Group ID dropdown.

  5. (Optional) Select the group ID in Initiator Group ID or leave it set to None.

  6. (Optional) Select the Authentication Method from the dropdown list of options.

  7. (Optional) Select the Authentication Group Number from the dropdown list. Leave at None or enter an integer to represent the number of existing authorized access.

  8. Click Save.

Starting the iSCSI Service

To turn on the iSCSI service, from the Block (iSCSI) Shares Targets widget click the more_vert and select Turn On Service. You can also go to System Settings > Services and locate iSCSI on the list and click the Running toggle to start the service.

Set iSCSI to start when TrueNAS boots up, go to System Settings > Services and locate iSCSI on the list. Select Start Automatically.

ServicesISCSIEnableSCALE

Clicking the returns to the options in Shares > Block (iSCSI) Shares Targets.

Related Content