Backing Up Google Drive to TrueNAS SCALE
5 minute read.
Last Modified 2022-12-09 16:32 -0500Google Drive and G Suite are widely used tools for creating and sharing documents, spreadsheets, and presentations with team members. While cloud-based tools have inherent backups and replications included by the cloud provider, certain users might require additional backup or archive capabilities. For example, companies using G Suite for important work might be required to keep records for years, potentially beyond the scope of the G Suite subscription. TrueNAS offers the ability to easily back up Google Drive by using the built-in cloud sync.
You can add Google Drive credentials using the Add Cloud Credentials screen accessed from the Credentials > Backup Credentials > Cloud Credentials screen, or you can add them when you create a cloud sync task using the Add Cloud Sync Task screen accessed from the Data Protection > Cloud Sycn Task screen.
To set up a cloud credential, go to Credentials > Backup Credentials and click Add in the Cloud Credentials widget.
- Enter a credential name.
-
Select Google Drive on the Provider dropdown list. The Google Drive authentication settings display on the screen.
-
Enter the Google Drive authentication settings.
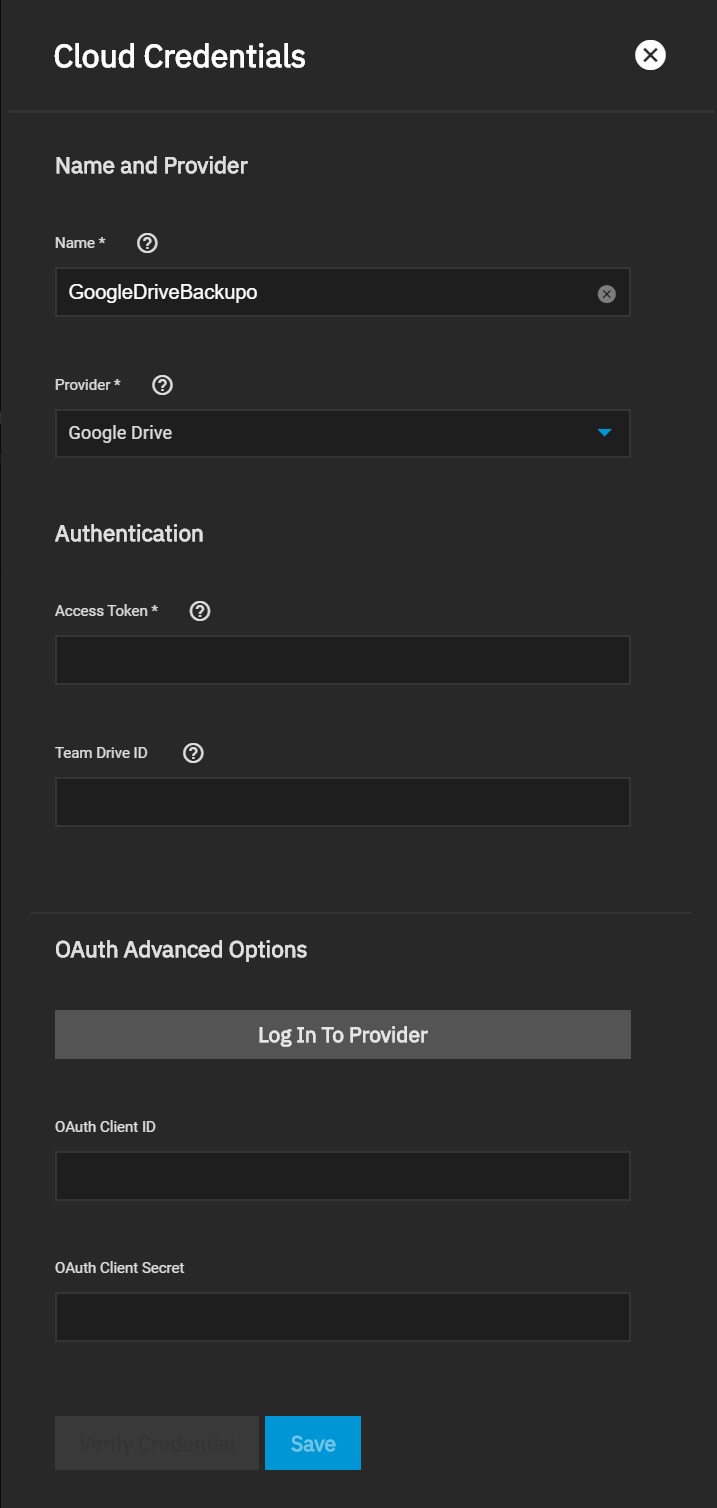
a. Enter the Google Drive user name and password.
b. Click Log In To Provider. The Google Authentication window opens.

c. Click Proceed to open the Choose an Account window.
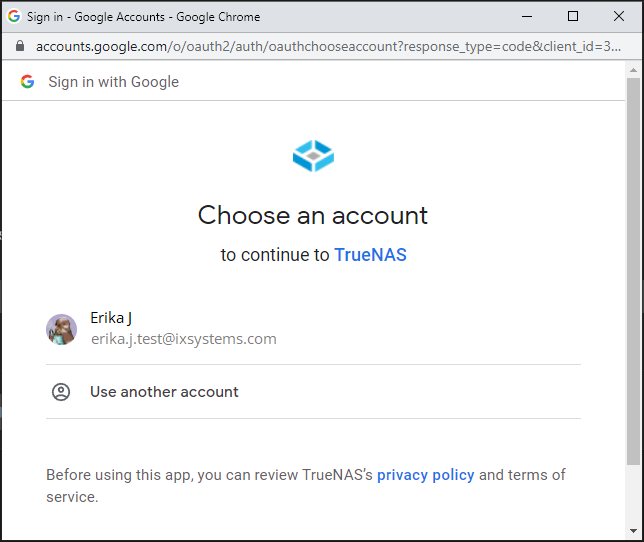
d. Select the email account to use. Google displays the Sign In window. Enter the password and click Next to enter the password. Click Next again. Google might display a Verify it’s you window. Enter a phone number where Google can text an verification code, or you can click Try another way.
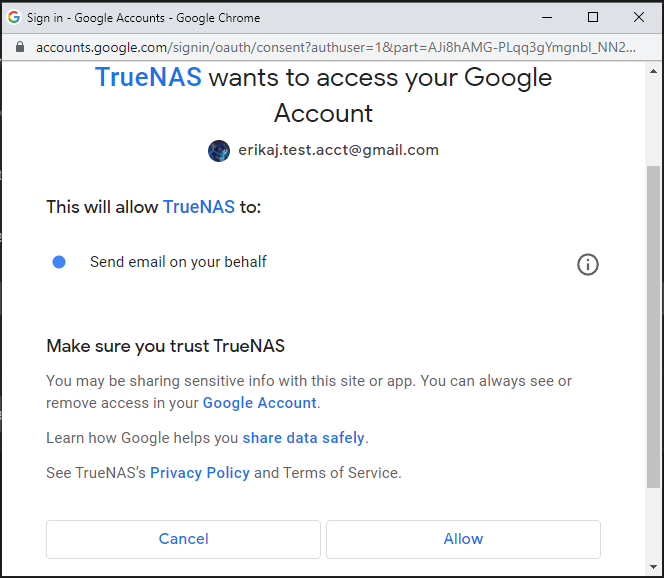
e. Click Allow on the TrueNAS wants to access your Google Account window. TrueNAS populates Access Token with the token Google provides.
-
Click Verify Credentials and wait for TrueNAS to display the verification dialog with verified status. Close the dialog.
-
Click Save. The Cloud Credentials widget displays the new credentials. These are also available for cloud sync tasks to use.
You must add the cloud credential on the Backup Credentials screen before you create the cloud sync task.
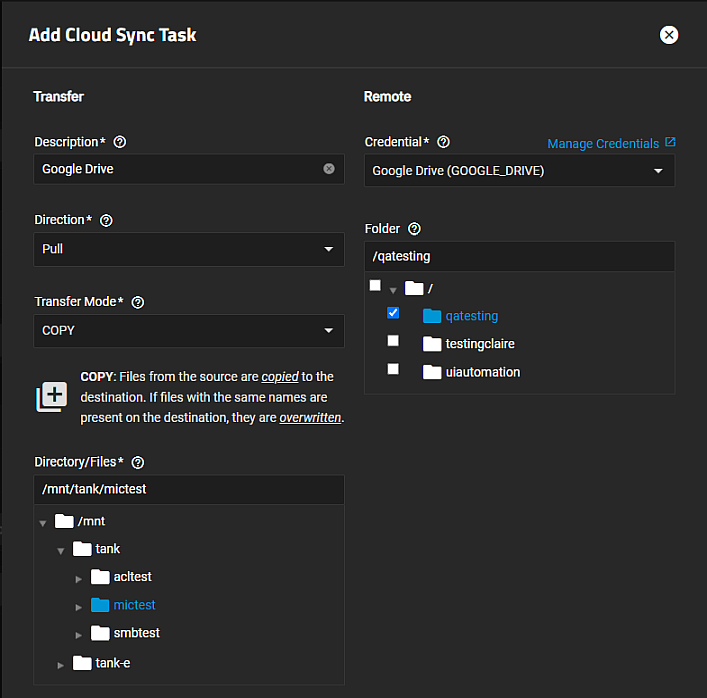
To add a cloud sync task, go to Data Protection > Cloud Sync Tasks and click Add. The Add Cloud Sync Task configuration screen opens.
-
(Required) Type a memorable task description in Description. For example, googledrivepush to represent the provider name and transfer direction.
-
Select your Google Drive credential on the Credential dropdown list to add a new backup credential.
-
Select the direction for the sync task. PULL brings files from the cloud storage provider to the location specified in Directory/Files (this is the location on TrueNAS SCALE). PUSH sends files from the location in Directory/Files to the cloud storage provider location you specify in Folder.
-
Select the transfer method from the Transfer Mode dropdown list. Sync keeps files identical on both TrueNAS SCALE and the remote cloud provider server. If the sync encounters an error, destination server files are not deleted. Copy duplicates files on both the TrueNAS SCALE and remote cloud provider server. Move transfer the files to the destination server and then deleted the copy on server that transferred the files. It also overwrites files with the same names on the destination.
-
Enter or browse to the dataset or folder directory using the arrow to the left of / under the Directory/Files and Folder fields. Select the TrueNAS SCALE dataset path in Directory/Files and the Google Drive path in Folder. If PUSH is the selected Direction, this is where on TrueNAS SCALE the files you want to copy, sync or move transfer to the provider. If Direction is set to PULL this is the location where on TrueNAS SCALE you want to copy, sync or move files to.
Click the to the left of / to collapse the folder tree.
-
Select the preset from the Schedule dropdown that defines when the task runs. For a specific schedule, select Custom and use the Advanced Scheduler. Clear the Enable checkbox to make the configuration available without allowing the specified schedule to run the task.
To manually activate a saved task, go to Data Protection > Cloud Sync Tasks, click for the cloud sync task you want to run. Click CONTINUE or CANCEL for the Run Now operation.
-
(Optional) Set any advanced option you want or need for your use case or define environment variables in either the Pre-script or Post-script fields. These fields are for advanced users.
-
Click then click Dry Run to test your settings before you click Save. TrueNAS connects to the cloud storage provider and simulates a file transfer but does not send or receive data.
The new cloud sync task displays on the Cloud Sync Tasks widget with the status of PENDING until it completes. If the task completes without issue the status becomes SUCCESS.

See Using Scripting and Environment Variables for more information on environment variables.
One caveat is that Google Docs and other files created with Google tools have their own proprietary set of permissions and their read/write characteristics unknown to the system over a standard file share. Files are unreadable as a result.

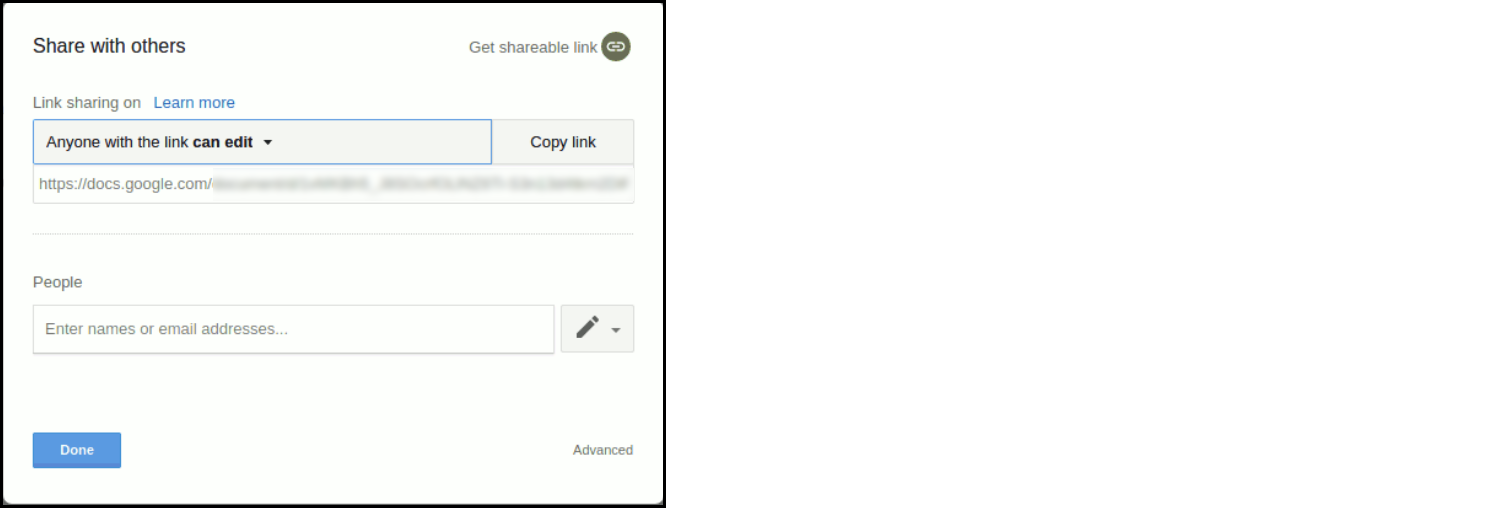
To allow Google-created files to become readable, allow link sharing to access the files before the backup. Doing so ensures that other users can open the files with read access, make changes, and then save them as another file if further edits are needed. Note that this is only necessary if the file was created using Google Docs, Google Sheets, or Google Slides; other files should not require modification of their share settings.
TrueNAS is perfect for storing content, including cloud-based content, for the long term. Not only is it simple to sync and backup from the cloud, but users can rest assured that their data is safe, with snapshots, copy-on-write, and built-in replication functionality.

