Setting Up Storage
3 minute read.
Last Modified 2022-07-14 16:34 -0400Now that you are logged in to the web interface, it is time to set up TrueNAS storage. These instructions describe a simple mirrored pool setup, where one disk is for storage and the other for data protection. However, there are a vast number of configuration possibilities for your storage environment! You can read more about these options in the in-depth Creating Storage Pools.
At minimum, the system needs at least two disks of identical size to create a mirrored storage pool. While a single-disk pool is technically allowed, it is not recommended. The disk used for the TrueNAS installation does not count toward this limit.
You can configure data backups in several ways and have different requirements. Backing data up in the cloud requires a 3rd party cloud storage provider account. Backing up with replication requires you to have additional storage on the TrueNAS system or (ideally) another TrueNAS system in a different location.
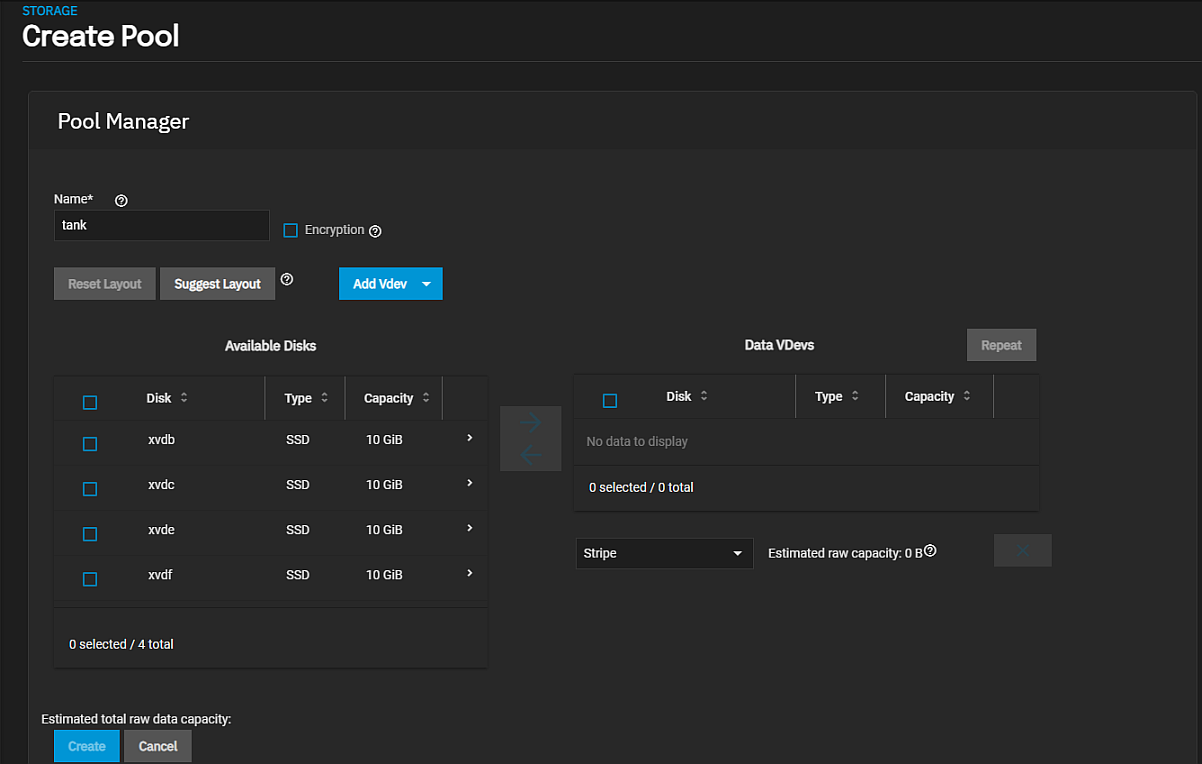
Go to Storage > Pools and click Add. Select Create a new pool and click Create Pool

Enter a name for your first storage pool in Name. For example, tank or any other preferred name. Select two disks listed under the Available Disks section and then click the to move them to the Data VDevs area.
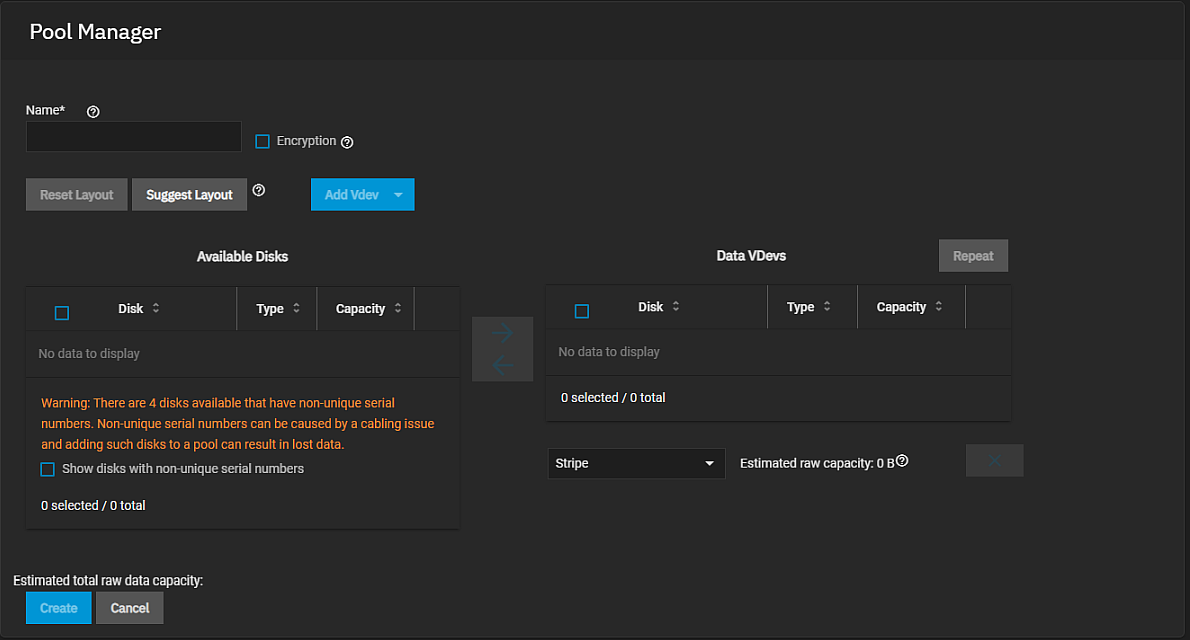
If the disks used have non-unique serial numbers a warning message displays. To populate the Available Disks section with these disk, select the Show disk with non-unique serial numbers checkbox.

TrueNAS automatically suggests Mirror as the ideal layout for maximized data storage and protection.
Review the Estimated raw capacity to the right of the Data Vdev type dropdown list to make sure you have the storage capacity you need, and then click Create.
A warning dialog displays. Click Confirm to activate the CREATE POOL button.
After you click CREATE POOL the system displays a fetching-data dialog and then a status dialog.
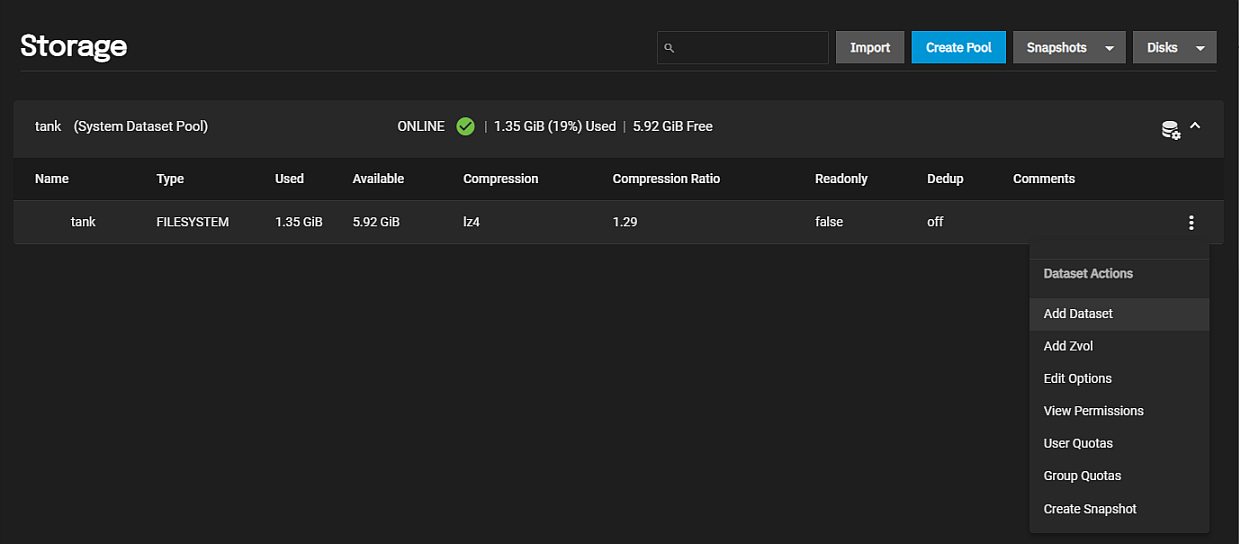
TrueNAS wipes the disks and adds your pool (tank is the example used) to the Storage > Pools list.

New pools have a root dataset that allows further division into new datasets or zvols. A dataset is a file system that stores data and has specific permissions. A zvol is a virtual block device that has a predefined storage size. To create either one, go to Storage > Pools, click , and select Add Dataset or Add Zvol.

The two fields that you cannot change after you click Save are the dataset Name and Share Type. Name is a required field but Share Type is optional. The default setting for Share Type is Generic which works for any share type you create or you can select SMB if you know you want to create an SMB share. A dataset with a Share Type set to SMB optimizes that dataset for the Windows sharing protocol.
Organize the pool with as many datasets or zvols you need according to your access and data sharing requirements before moving any data into the pool.
If you want to create additional pools with other disks not assigned to a pool, you can do that now or as you have a need for them.
When you finish building and organizing your TrueNAS pools, move on to configuring how the system shares data
Related Content
- Creating Storage Pools
- Adding Network Settings
- Installing SCALE
- Console Setup Menu Configuration
- Migrating from TrueNAS CORE
- Importing Data
- First Time Login
- Setting Up Data Sharing
- Backing Up TrueNAS

