Backing Up TrueNAS
6 minute read.
Last Modified 2022-07-14 16:34 -0400After configuration your TrueNAS storage and data sharing, it is time to ensure effective back up of your data using the backup options TrueNAS provides. You should also download and save your system configuration file to protect your system configuration information.
TrueNAS provides for data backup through cloud sync or replication.
Cloud sync requires an account with a cloud storage provider and a storage location created with that provider, like Amazon S3 bucket. SCALE support major providers like Amazon S3, Google Cloud, Box and Microsoft Azure, along with a variety of other vendors. These providers can charge fees for data transfer and storage, so please review the polices of your cloud storage provider before transferring your data.
You can configure TrueNAS to send, receive, or synchronize data with a cloud storage provider. To set up cloud sync:
-
Add your cloud storage credentials to TrueNAS.
Go to Credentials > Backup Credentials and click Add. The Cloud Credentials configuration panel displays.
Some cloud storage providers, like Amazon S3, require you log into your cloud account to generate additional information like an access key. TrueNAS requires you to enter the Amazon S3 credentials you generate on their Security Credentials > Access Keys page before you can save and add the cloud credentials. Check with your cloud storage provider to see what credentials they require TrueNAS to provide to complete data transfers.
Some cloud storage providers, like Box, can automatically populate the required Authentication fields if you log into your account.
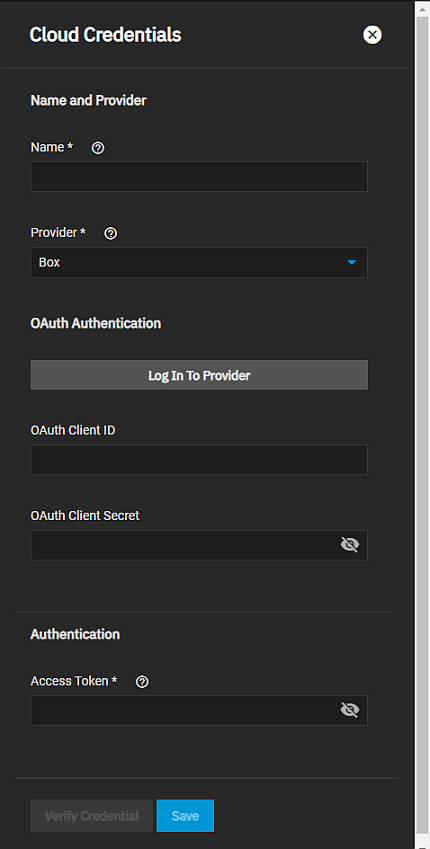
To automatically configure this credential, click Log In To Provider. An Authorization screen displays where you click Proceed to continue to the login screen for that service.
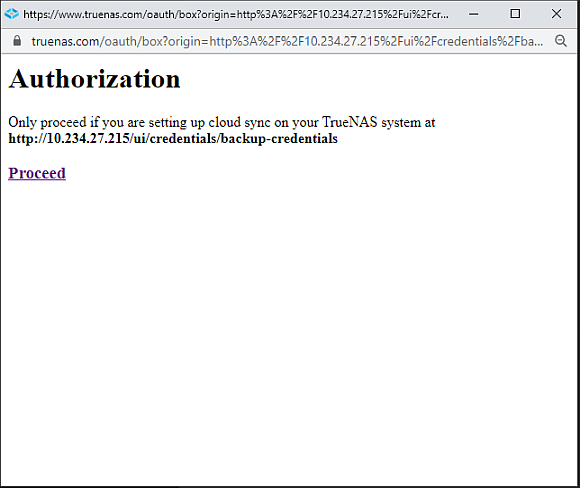
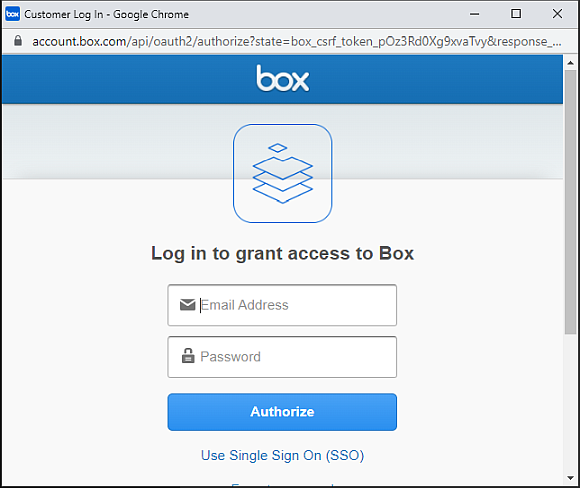
After you enter your cloud account login and password, the TrueNAS Cloud Credential authentication fields auto-populate with the required information. Click Save to complete the process of adding your cloud credentials.
We recommend you verify the credential before saving it if you do not log into your cloud storage provider as part of the process.
-
Create a data transfer task.
Go to Data Protection > Cloud Sync Tasks and click Add. The Add Cloud Sync Task configuration panel displays.
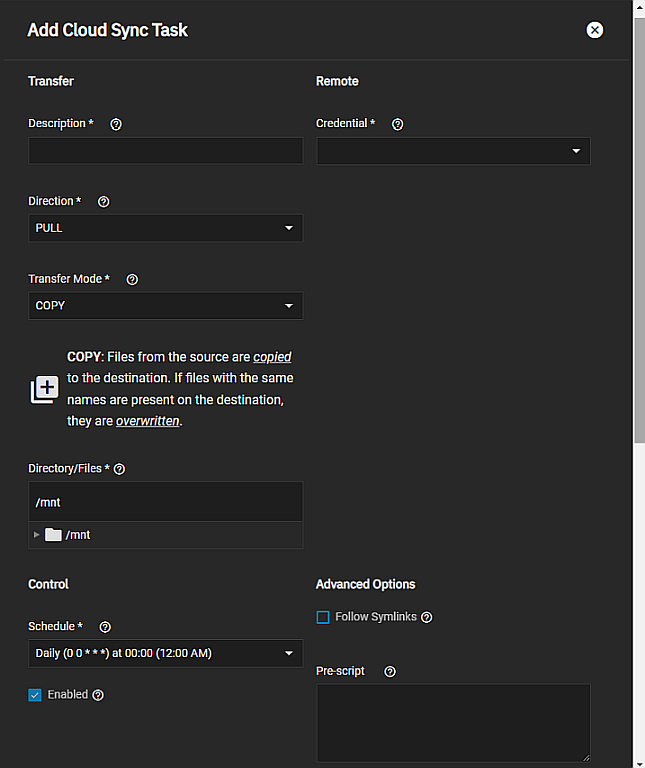
Type a memorable name for this in Name, select the Direction as either Push to send data to the cloud service or Pull to get data from the cloud service. You can set up a cloud sync task to send data to and another task to get data from the cloud storage provider. Select the Transfer Mode as Copy, Move or Sync.
Click in the Credential dropdown field to select Add a backup credential. This displays a new form where you select and configure your cloud storage provider credentials. Amazon S3 is the default provider when the form opens. The example shown uses box send data as the name and Box as the Provider.
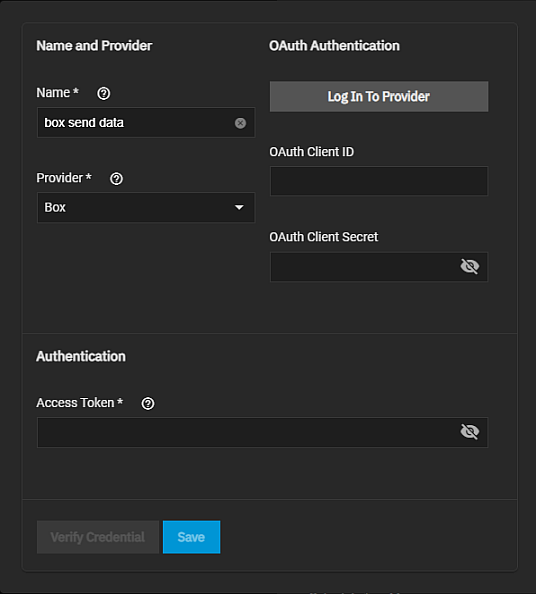
Box provides a way to auto-populate the authentication credentials when you click Log In To Provider. An Authorization window displays. Click Proceed and then the Box login window displays. Enter your Box cloud credentials. After the TrueNAS cloud storage provider authentication details populate the form, click Verify Credential and after verified, click Save. This form closes and returns you to the Add Cloud Sync Task configuration panel to complete the set up.
Either type the path into the Directory/Files field or click on the to the left of mnt, and then at the pool to expand the dataset options, and then click on the dataset, and then file if you want to narrow backup down that far, to populate the field with the full path.
Next when you want this task to run using the Schedule dropdown list to select the frequency.
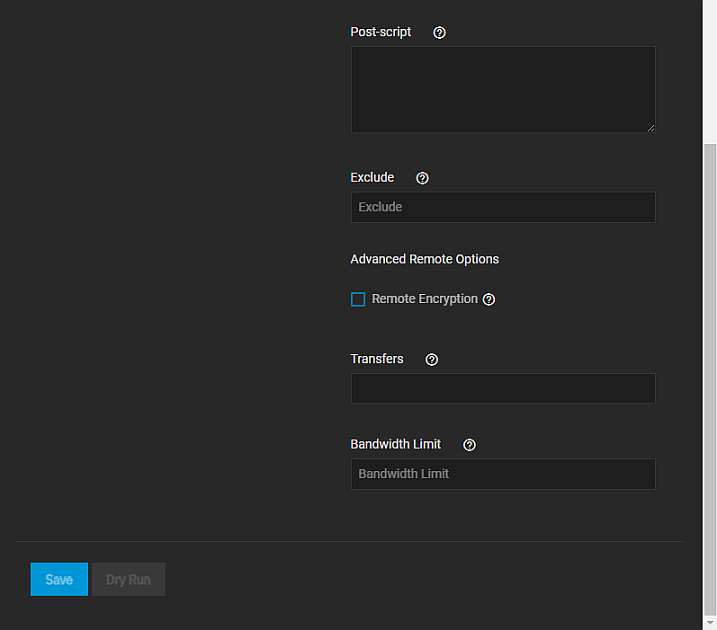
Clear the Enable checkmark to make the configuration available without allowing the specified schedule to run the task.
To test the sync task, click Dry Run.
To manually activate a saved task, go to Data Protection > Cloud Synch Tasks click the for the cloud sync task you want to run. Select Run Now to start the cloud sync operation.
Replication is the process of taking a moment-in-time snapshot of the data and copying that snapshot to another location. Snapshots typically use less storage than full file backups and have more management options. This instruction shows using the TrueNAS replication wizard to create a simple replication task.
-
Create the replication task.
Go to Data Protection > Replication and click Add. The Replication Task Wizard displays the What and Where configuration screen. Select both the Source Location and Destination Location using the dropdown list options. You can back up your data on the same system or a different system. If you select A different system you must have SSH connection, destination and source information ready.
Next enter the Source and Destination paths. You can either type the full path to the data you want to back up or click on the to the left of mnt, and then at the pool to expand the dataset options, and then click on the dataset, and then file if you want to narrow backup down that far, to populate the field with the full path.
The task a name populates from the values in Source and Destination. Click Next.
-
Define when you want this task to occur.
Select the radio button for Run On a Schedule and select the schedule you want to use. Or select Run Once to run the task manually.
Select the radio button to specify how long the destination snapshot lifetime.
-
Click START REPLICATION
To confirm replication created your snapshot, go to Storage > Snapshots.
Now that you configured your system network, storage and any data shares you wanted, and you have set up your data back up solution it is time to back up your system configuration.
If you plan to set up a cluster that includes this TrueNAS scale, wait to download your system configuration file until the cluster is set up and working.
Go to System Settings > General and click on Manage Configuration. Select Download File.

The Save Configuration dialog displays.
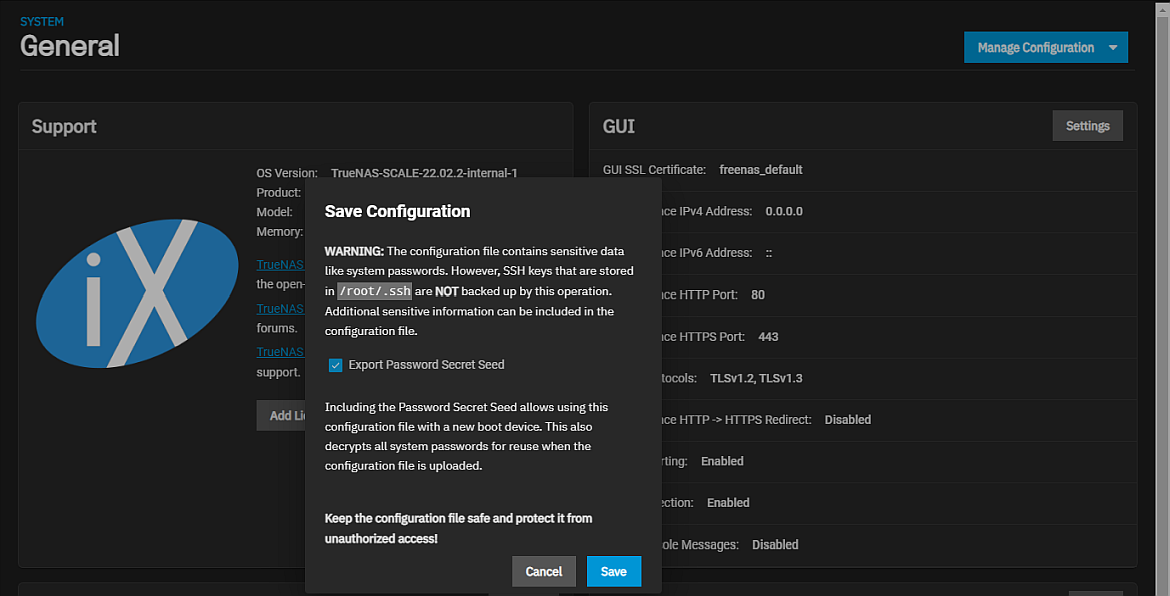
Click Export Password Secret Seed and then click Save. The system downloads the system configuration. Save this file in a safe location on your network where files are regularly backed up.
Anytime you change your system configuration, download the system configuration file again and keep it safe.
Related Content
- Creating Storage Pools
- Adding Network Settings
- Installing SCALE
- Console Setup Menu Configuration
- Migrating from TrueNAS CORE
- Importing Data
- Setting Up Storage
- First Time Login
- Setting Up Data Sharing
Related Backup Articles
- Adding Cloud Credentials
- Adding Cloud Sync Tasks
- Adding Replication Tasks
- Backing Up Google Drive to TrueNAS SCALE
- Cloud Credentials Screens
- Managing the System Configuration
- Cloud Sync Tasks Screens
- Setting Up a Local Replication Task
- Adding a Storj Cloud Sync Task
- Setting Up Advanced Replication Tasks

