Data Backups
4 minute read.
Last Modified 2022-09-15 14:52 -0400With storage created and shared, it’s time to ensure TrueNAS data is effectively backed up. TrueNAS offers several options for backing up data.
This option requires an account with the Cloud Storage provider and a storage location created with the provider, like an Amazon S3 bucket. Major providers like Amazon S3, Google Cloud, Box and Microsoft Azure are supported, along with a variety of other vendors. These can charge fees for data transfers and storage, so please review your cloud storage provider’s policies before transferring any data.
You can configure TrueNAS to send, receive, or synchronize data with a Cloud Storage provider. Configuring a Cloud Sync task allows you to transfer data a single time or set up a recurring schedule to periodically transfer data.
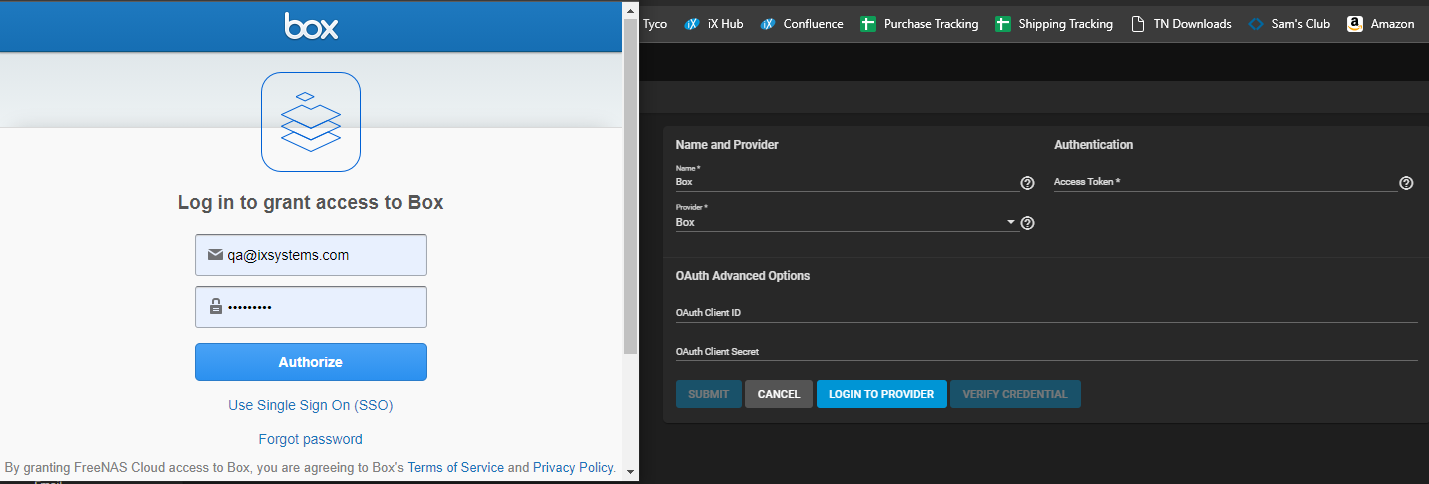
Go to System > Cloud Credentials > ADD. Enter a Name and choose the Provider from the dropdown menu. The authentication options change depending on the selected Provider. Credentials either must be entered manually or a single provider login is required and the credentials add automatically.

After entering the Provider credentials, click VERIFY CREDENTIAL. When verification is confirmed, click SUBMIT.
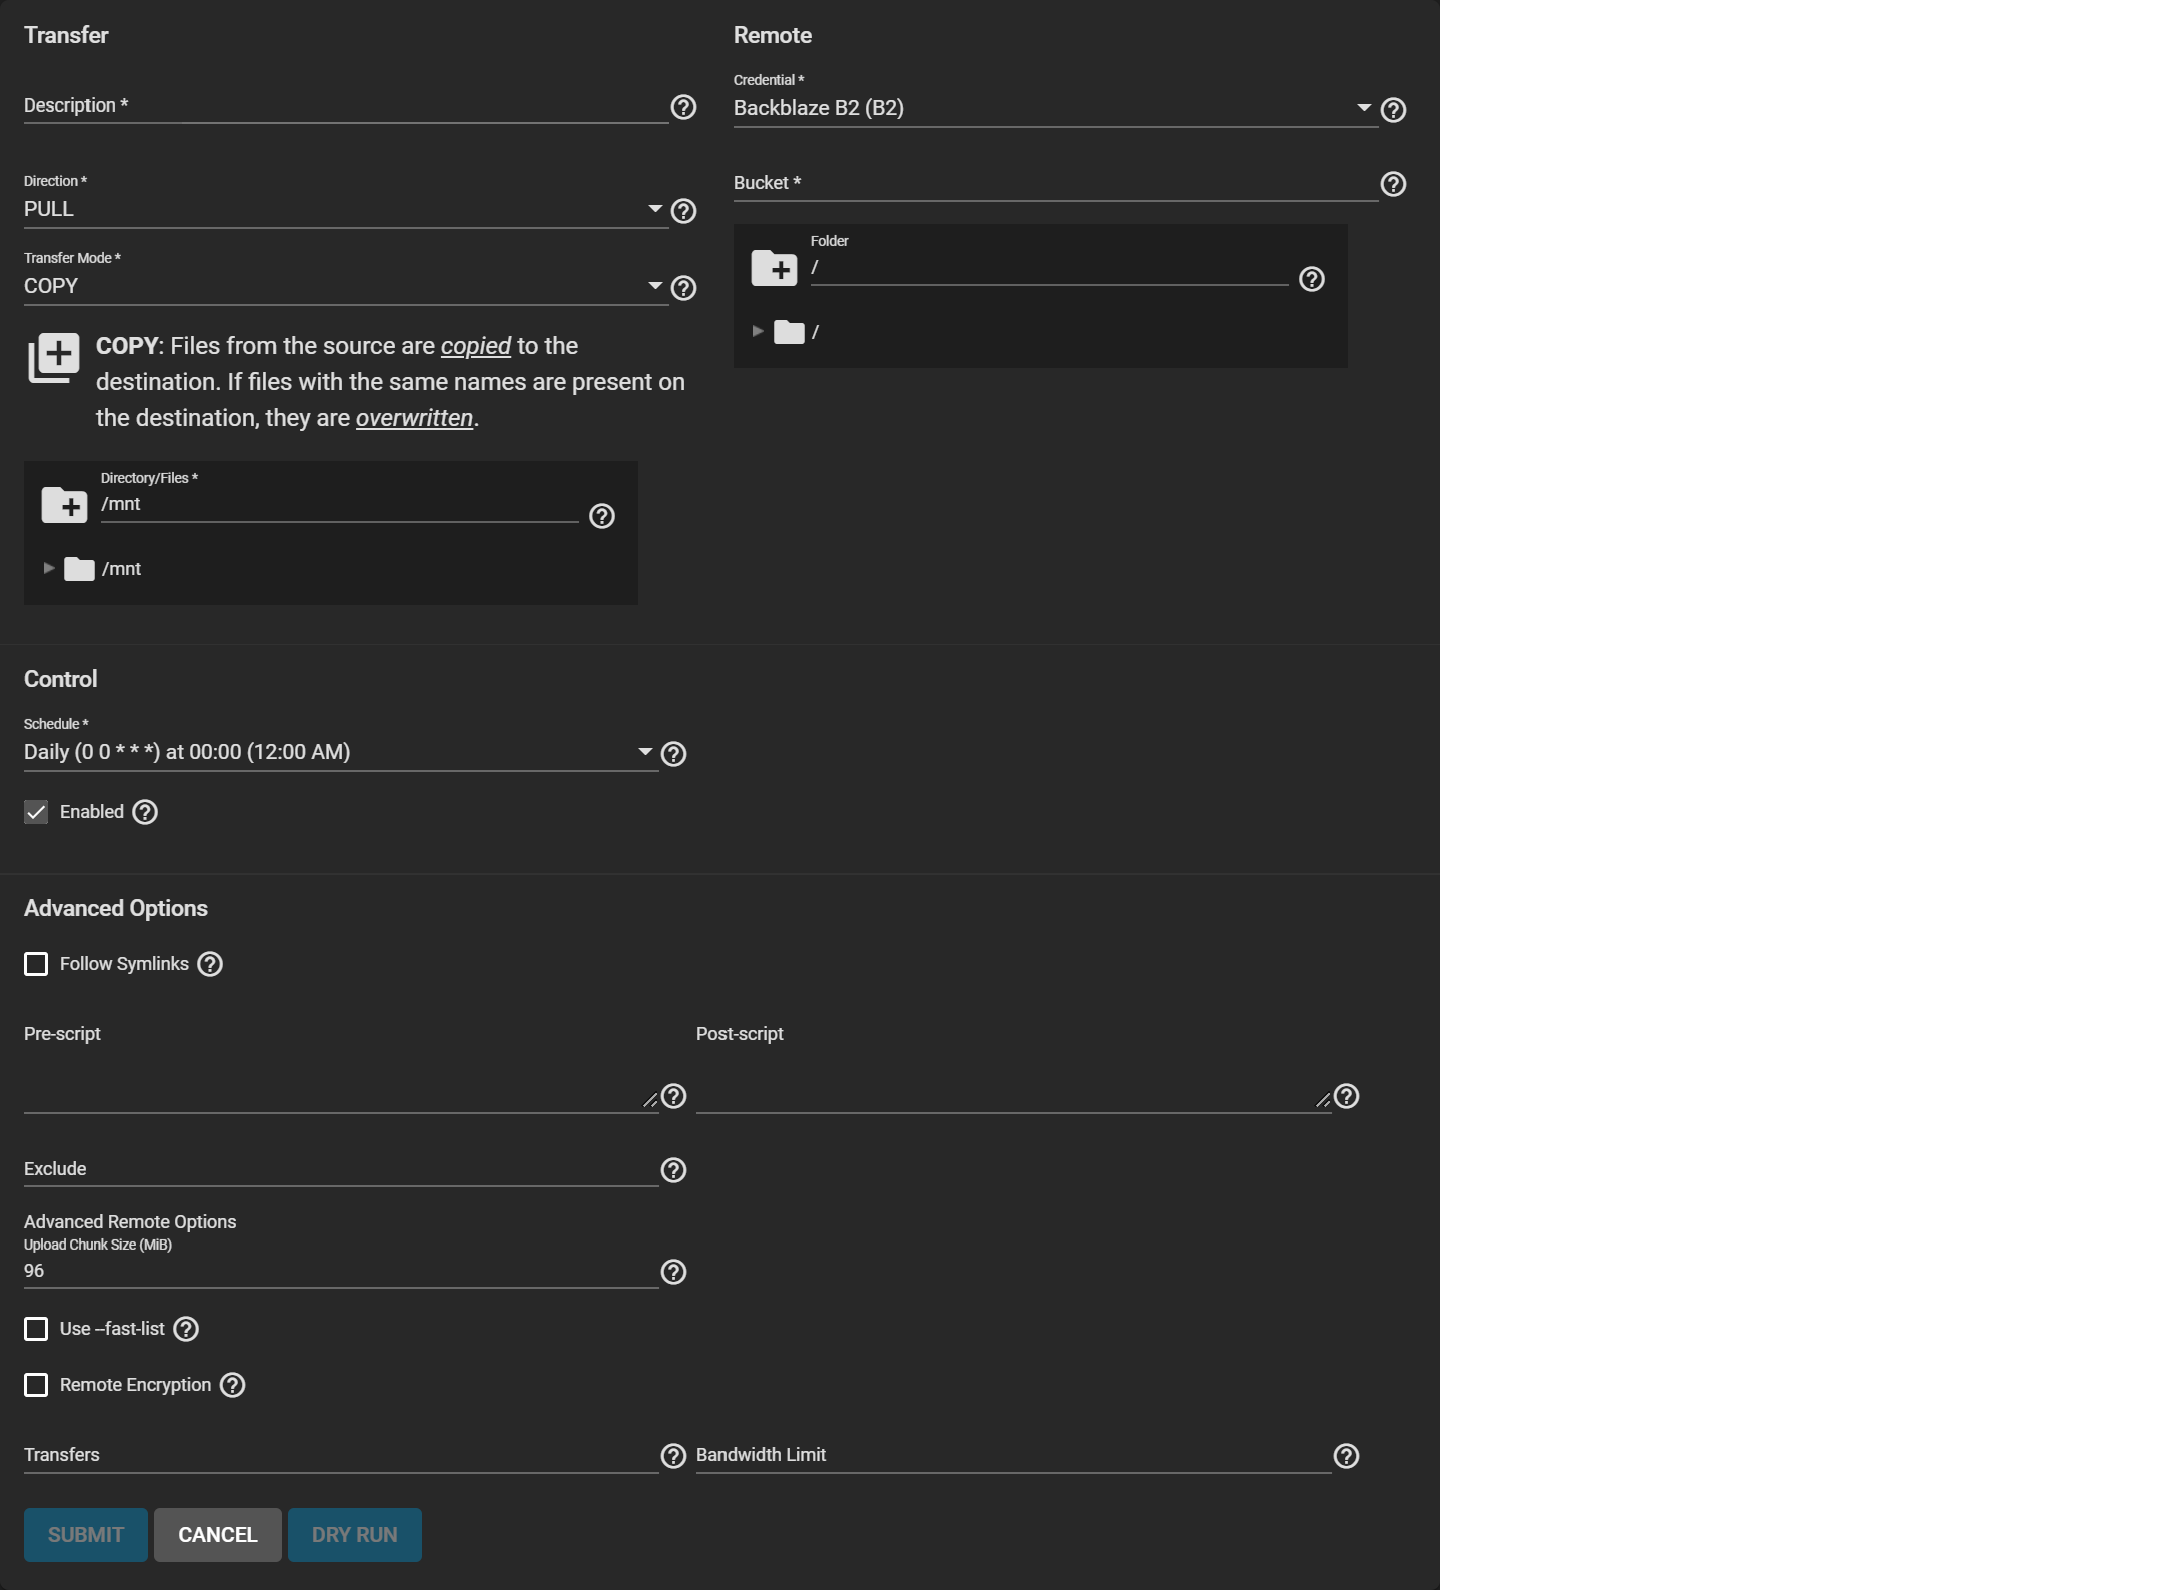
Go to Tasks > Cloud Sync Tasks and click ADD.

Select the previously saved Credential to populate the Remote section.
Add a Description for the task, select PUSH or PULL as the Direction and COPY as the Transfer Mode. Under Directory/Files, choose the tank dataset previously created.
Now, use the Control options to define how often this task runs. Open the Schedule drop down and choose a preset time when running the task is least intrusive to your network. When the task only needs to run once, unset Enabled. The task can then be triggered a single time from the Tasks > Cloud Sync Tasks list to do the initial migration or backup.
To test your task, click DRY RUN. When the test run is successful, click SUBMIT to save the task and add it to Tasks > Cloud Sync Tasks.
To manually run the task, go to Tasks > Cloud Sync Tasks, click > to expand the new task, and click RUN NOW.

The Status shows success or failure. Click the status entry to see a detailed log of the action.
Replication is the process of taking a moment in time “snapshot” of the data and copying that snapshot to another location. Snapshots typically use less storage than full file backups and have more management options. This instruction shows using the TrueNAS Wizard to create a simple replication.
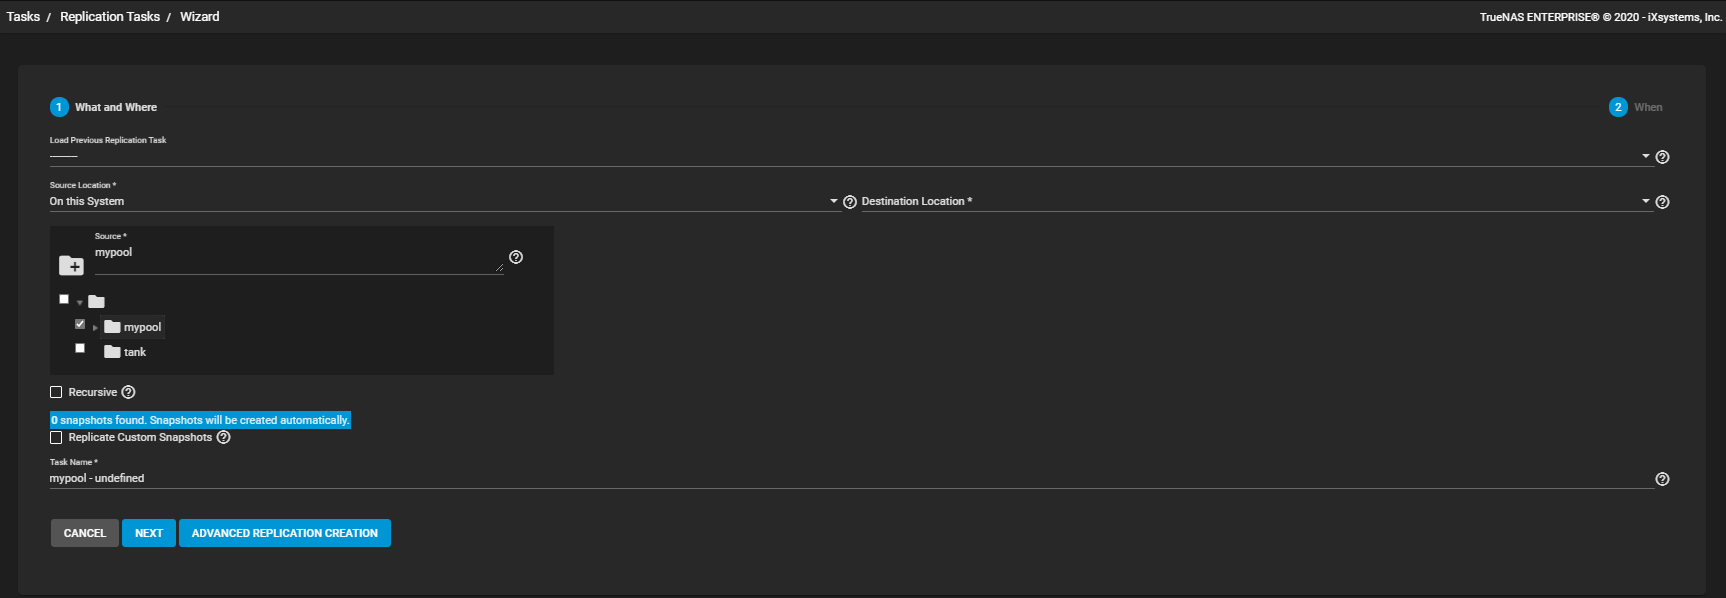
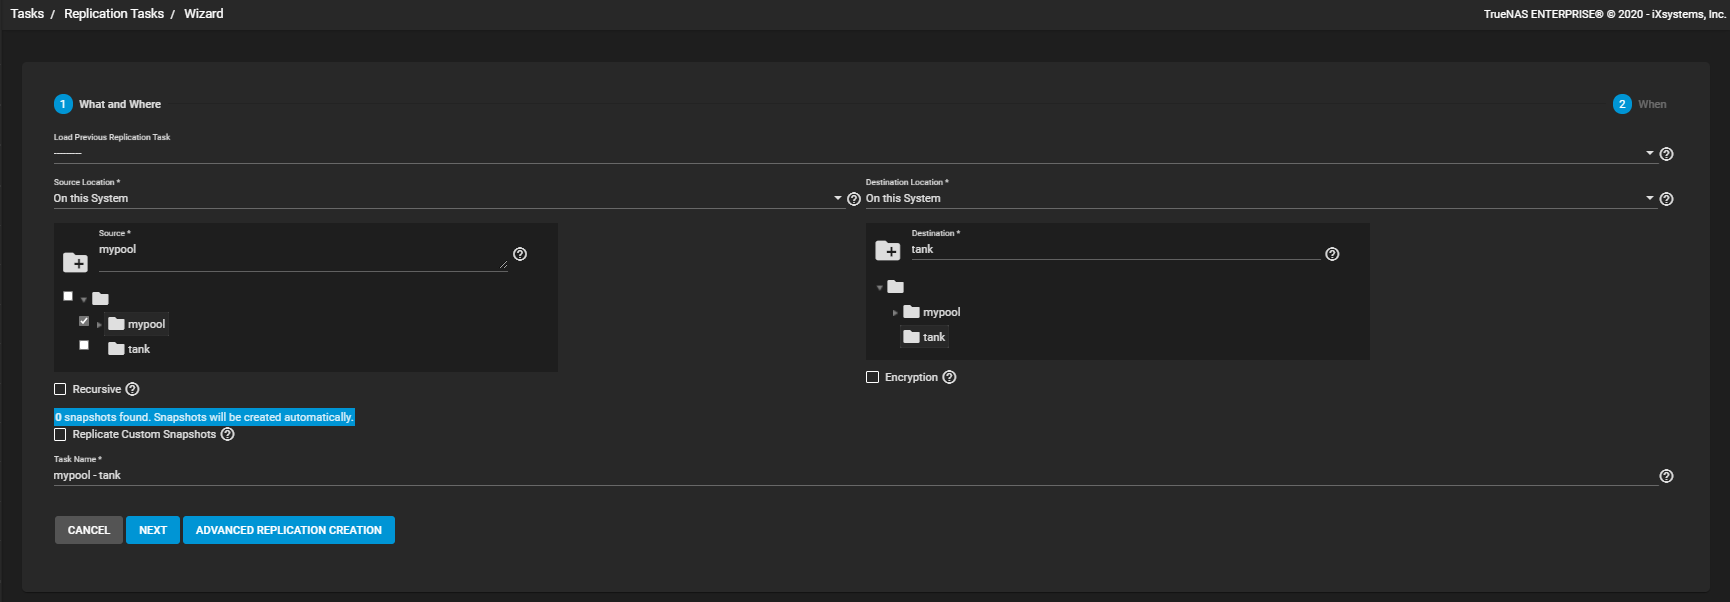
Go to Tasks > Replication Tasks and click ADD. Set the source location to the local system and pick which datasets to snapshot. The wizard takes new snapshots of the sources when no existing source snapshots are found.

Set the destination to the local system and define the path to the storage location for replicated snapshots. When manually defining the destination, be sure to type the full path to the destination location.

You can define a specific schedule for this replication or choose to run it immediately after saving the new task. Unscheduled tasks are still saved in the replication task list and can be run manually or edited later to add a schedule.

Clicking START REPLICATION saves the new task and immediately attempts to replicate snapshots to the destination.

To confirm that snapshots have been replicated, go to Storage > Snapshots and verify the destination dataset has new snapshots with correct timestamps.

TrueNAS is now accessible and configured to store, share, and back up your data!
If you need to expand the system capabilities, see the remaining article about additional Applications. When you’re ready to fine-tune the system configuration or learn more about the advanced features, see the remaining sections in the TrueNAS CORE and Enterprise section. These sections are organized in order of appearance in the TrueNAS interface, with additional topics for 3rd party solutions, API reference guide, and community recommendations.

