Updating Software for a Major Version
6 minute read.
Last Modified 2022-12-09 16:26 -0500TrueNAS provides flexibility for keeping the operating system up-to-date:
- You can upgrade to major releases (ex. 9.3 to 9.10) using either an ISO or the web interface unless the Release Notes for the new major release indicate that the current version requires an ISO upgrade.
- Minor releases are replaced with signed updates, meaning you do not need to wait for a minor release to update with a system update or newer versions of drivers and features. It is also no longer necessary to manually download an upgrade file and its associated checksum to update the system.
- The updater automatically creates a boot environment, making updates a low-risk operation. Boot environments provide the option to return to the previous version of the operating system by rebooting the system and selecting the previous boot environment from the System > Boot menu.
The upgrade instructions instructions describe how to use an
The upgrade path for major versions of FreeNAS/TrueNAS is 9.3 > 9.10 > 11.1 > 11.3 > 12.0. We always recommend upgrading to a supported version of the software.
Be aware of these caveats before attempting a major version upgrade:
- Upgrading a data storage pool can make it impossible to go back to a previous version. For this reason, the update process does not automatically upgrade storage pools, though the system shows an alert when a pool is upgradable. Unless new ZFS feature flags are needed, you can safely leave the pool at the current version. If you upgrade the pool, you cannot boot into a previous TrueNAS version that does not support the newer feature flags.
- Upgrading the firmware of Broadcom SAS HBAs to the latest version is recommended.
- When upgrading from 9.3.x to 9.10, read this 9.3 to 9.10 FAQ first.
- Upgrades from FreeNAS 0.7x are not supported. The system cannot import configuration settings from FreeNAS 0.7x versions. You must manually recreate the configuration. If supported, you must manually import the FreeNAS 0.7x pools or disks.
- Upgrades on 32-bit hardware are not supported. However, if the system is currently running a 32-bit version of FreeNAS/TrueNAS and the hardware supports 64-bit, you can upgrade the system. Any archived reporting graphs delete during upgrades.
- UFS is not supported.
If the data resides on one UFS-formatted disk, create a ZFS pool using other disks after upgrading, then use the instructions in Importing a Disk to mount the UFS-formatted disk and copy the data to the ZFS pool.
With only one disk, back up its data to another system or media before the upgrade, format the disk as
ZFSafter the upgrade, then restore the backup. If the data resides on a UFS RAID of disks, you cannot directly import that data to the ZFS pool. Instead, back up the data before the upgrade, create a ZFS pool after upgrading, then restore the data from the backup. - If you have GELI-encrypted pools and are upgrading to TrueNAS 12.0 or newer, you might want to migrate data from the GELI-encrypted pools into ZFS-encrypted pools. You CANNOT CONVERT the GELI pools. You must migrate the data to a new ZFS pool. See the Encryption article for more details.
Before upgrading the operating system, follow these steps:
- Back up the TrueNAS configuration in System > General > Save Config.
- Back up any encrypted data keys or passphrases and have them available.
- Warn users that TrueNAS shared data is unavailable during the upgrade. We recommend scheduling the upgrade for a time that will least impact users.
- Stop all system Services.
All auxiliary parameters are subject to change between major versions of TrueNAS due to security and development issues. We recommend removing all auxiliary parameters from TrueNAS configurations before upgrading.
To upgrade TrueNAS using an

Burn the downloaded
Insert the prepared media into the system and boot from it.
The installer waits ten seconds in the installer boot menu before booting the default option.
If needed, press Spacebar to stop the timer and choose another boot option.
After the media finishes booting into the installation menu, press Enter to select the default option 1 Install/Upgrade.
The installer presents a screen showing all available drives.
All drives display, including boot drives and storage drives. Only choose boot drives when upgrading. Choosing the wrong drives to upgrade or install causes data loss. If you are unsure which drives contain the TrueNAS operating system, reboot and remove the install media. Log in to the TrueNAS web interface and go to System > Boot > ACTIONS > Boot Pool Status to identify the boot drives. More than one drive displays when using a mirror.
Highlight the drive where TrueNAS is installed and press Spacebar to mark it with a star. If using a mirror for the operating system, mark all the drives where the TrueNAS operating system is installed. Press Enter when done.
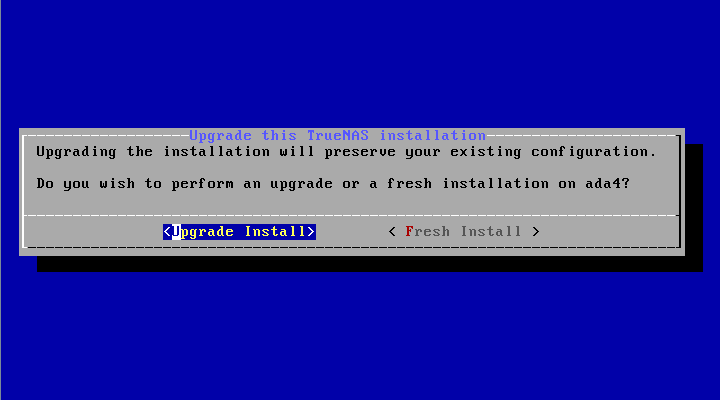
The installer recognizes earlier versions of FreeNAS/TrueNAS installed on the boot drives and asks to either upgrade or do a fresh install:

To perform an upgrade, press Enter to accept the default Upgrade Install. The installer displays another reminder that you should install the operating system on a disk you are not using for storage.

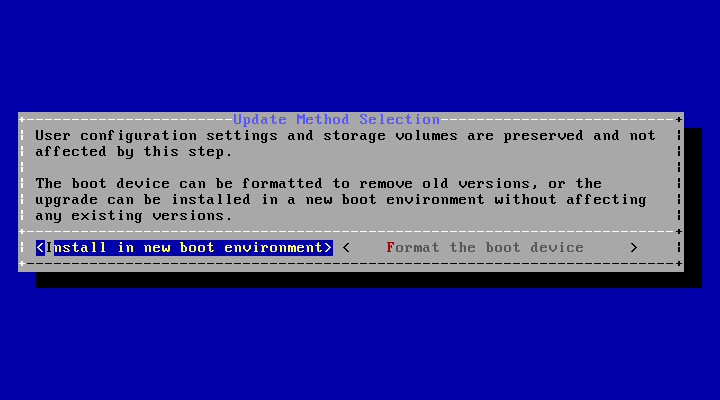
You can install the updated system in a new boot environment or format the entire operating system device to start fresh. Installing into a new boot environment preserves the old code, allowing a roll-back to previous versions if necessary. Formatting the boot device is usually not necessary but can reclaim space. TrueNAS preserves user data and settings when installing in a new boot environment and formatting the operating system device. Move the highlight to one of the options and press Enter to start the upgrade.
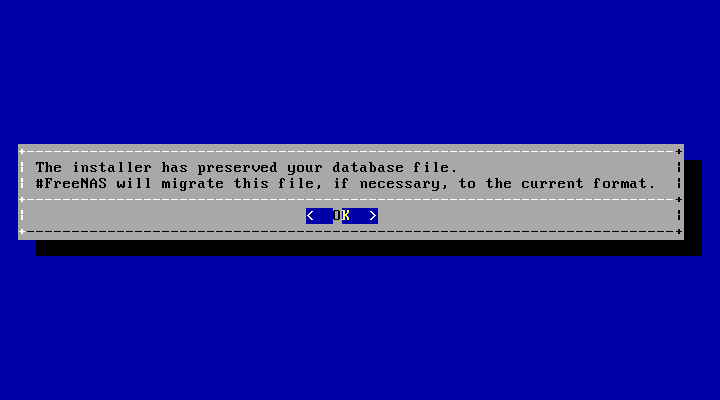
The installer unpacks the new image and checks for upgrades to the existing database file. The database file that is preserved and migrated contains your TrueNAS configuration settings.

Press Enter.
TrueNAS indicates that the upgrade is complete and a reboot is required.
Press OK, highlight 3 Reboot System, then press Enter to reboot the system.
If the upgrade installer was booted from CD, remove the CD.
During reboot, the previous configuration database can convert to the new version.
The conversion happens during the reboot Applying database schema changes line.
The conversion can take a long time to finish, sometimes fifteen minutes or more, and can cause the system to reboot again.
The system boots normally afterwards.
If database errors display but the web interface is accessible, log in, go to System > General, and use the UPLOAD CONFIG button to upload the configuration backup you downloaded before starting the upgrade.

