Wiping a Disk
2 minute read.
Last Modified 2022-09-29 14:20 -0400The wipe function deletes obsolete data off an unused disk.
This is a destructive action and results in permanent data loss! Back up any critical data off the disk to be wiped.
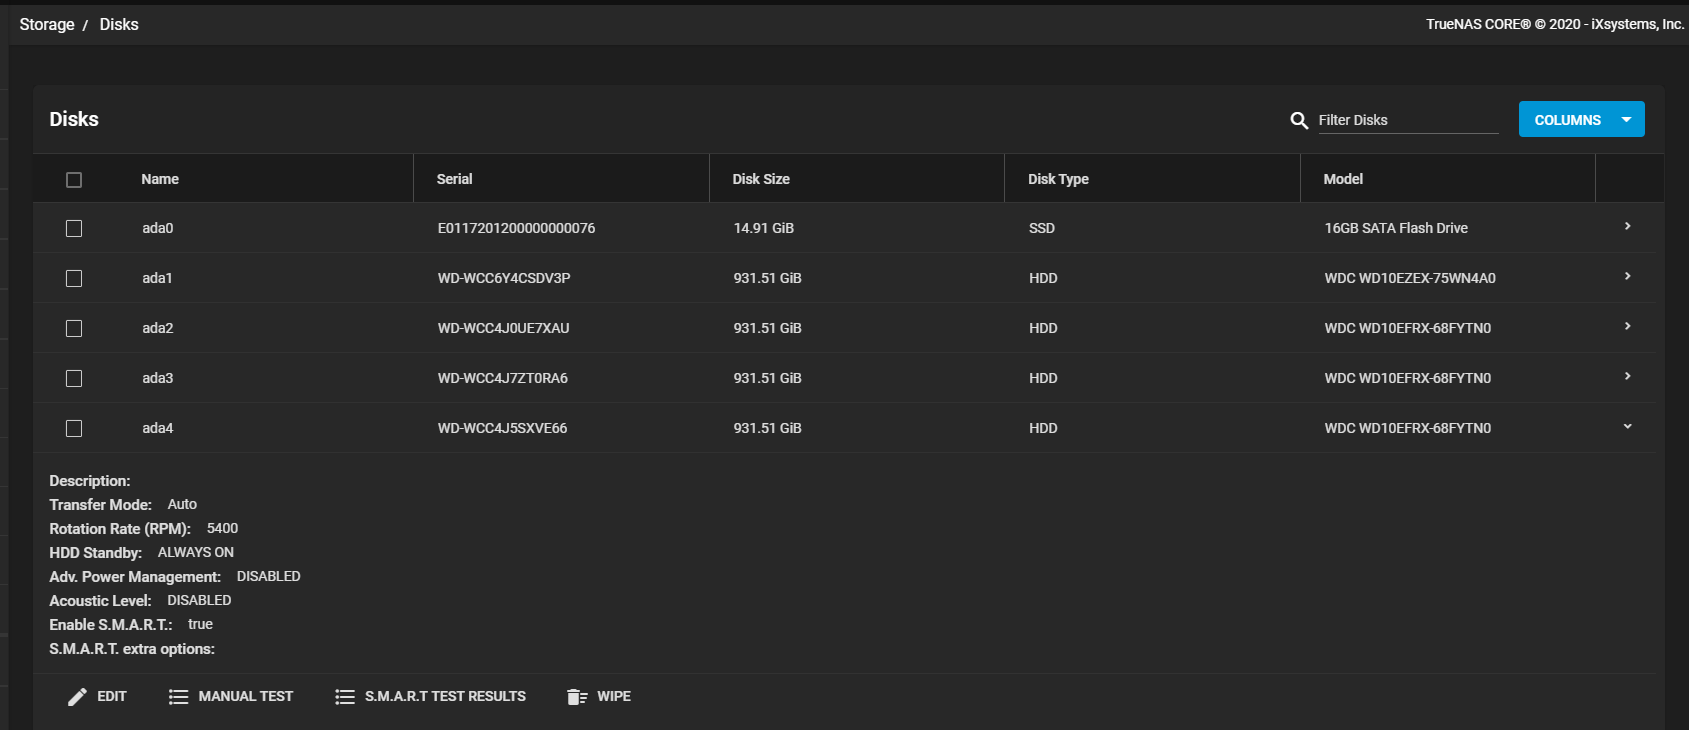
To wipe a disk, go to Storage > Disks. Click the chevron_right for a disk to see all the options.

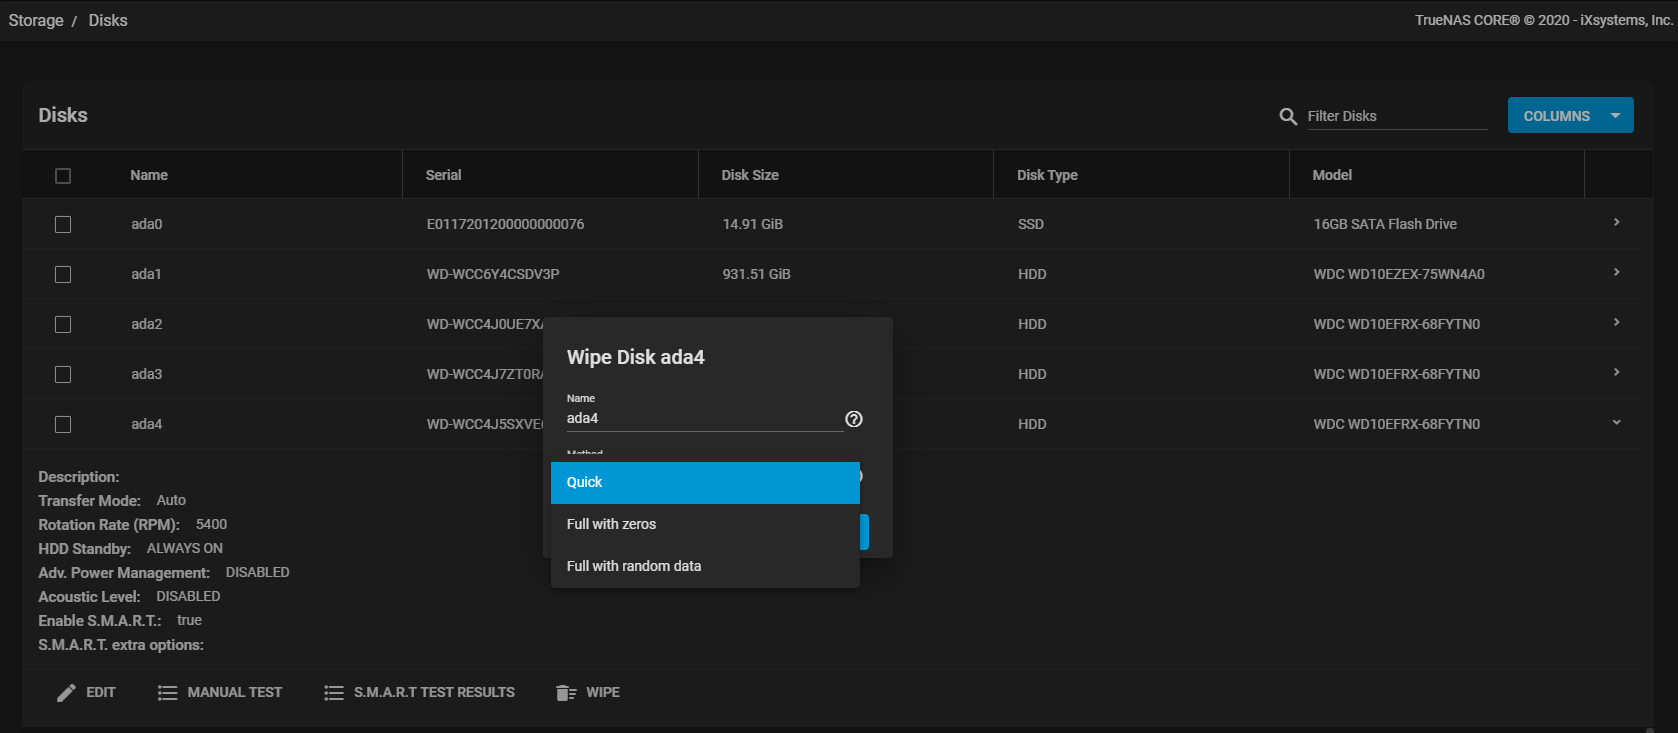
The wipe option is only available when the disk is not in use. Click WIPE to open a dialog with additional options:

The disk Name (da1, da2, ada4) helps confirm that you have selected the right disk to wipe
The Method dropdown list shows the different available wipe options available. Select Quick to erase only the partitioning information on a disk, making it easy to reuse but without clearing other old data. Quick wipes take only a few seconds. Select Full with zeros to overwrite the entire disk with zeros. This can take several hours to complete. Select Full with random to overwrite the entire disk with random binary code and takes even longer than Full with zeros to complete.
Ensure all data is backed up and the disk is no longer in use. Triple check that the correct disk is selected for the wipe. Recovering data from a wiped disk is usually impossible.
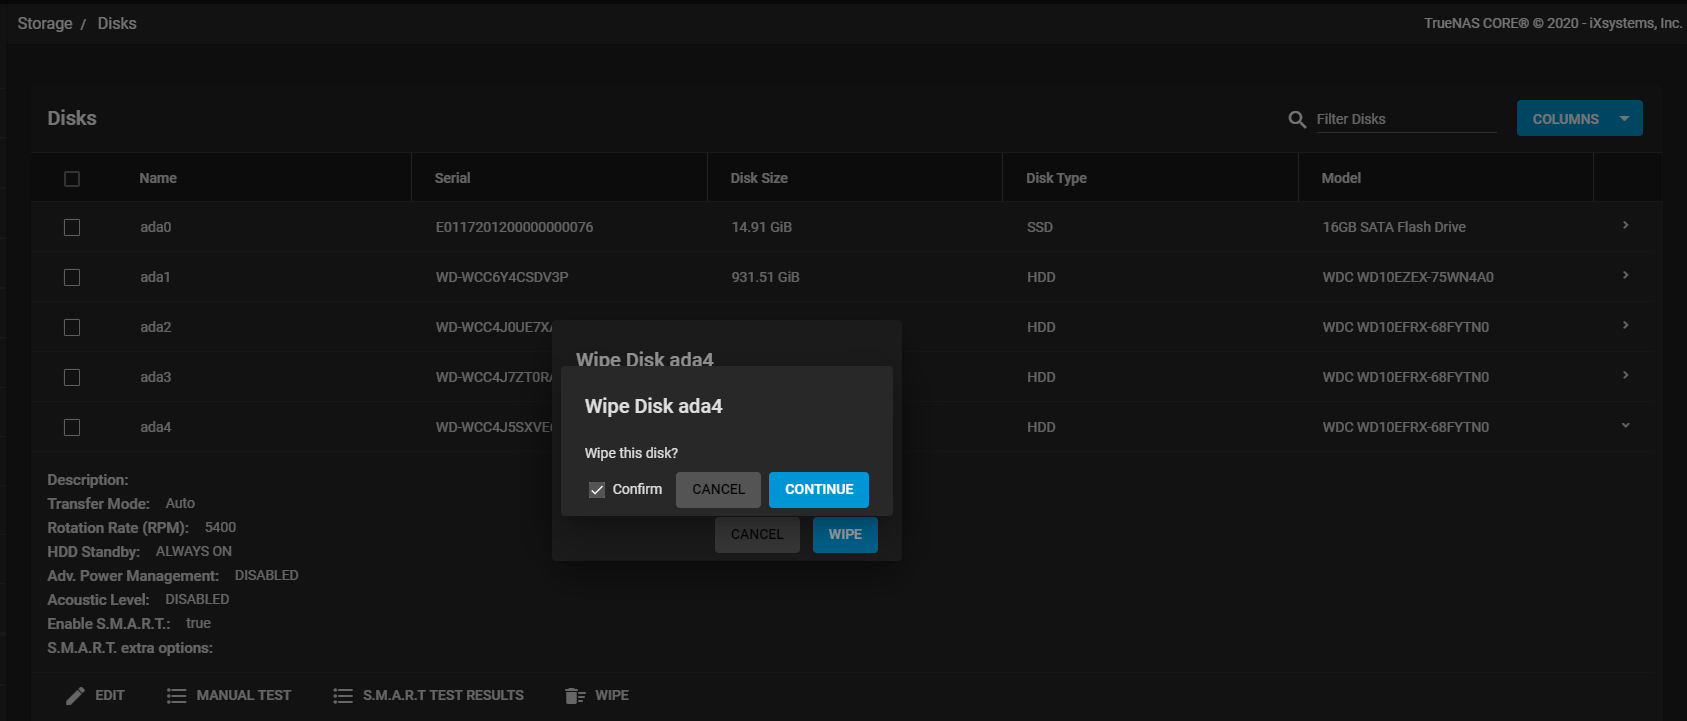
After selecting the appropriate method, click WIPE. A dialog asks for confirmation of the action.

Verify the name to ensure you have the correct disk chosen. When satisfied the disk can be wiped, select Confirm and click CONTINUE. A dialog shows the disk wipe progress.
See Disks Screens for more information on Disks screen settings.

