Setting Up a Network Bridge
2 minute read.
Last Modified 2022-10-10 10:42 -0400A bridge generally refers to various methods of combining (aggregating) many network connections. These form a single total network. TrueNAS uses bridge(4) to manage bridges.
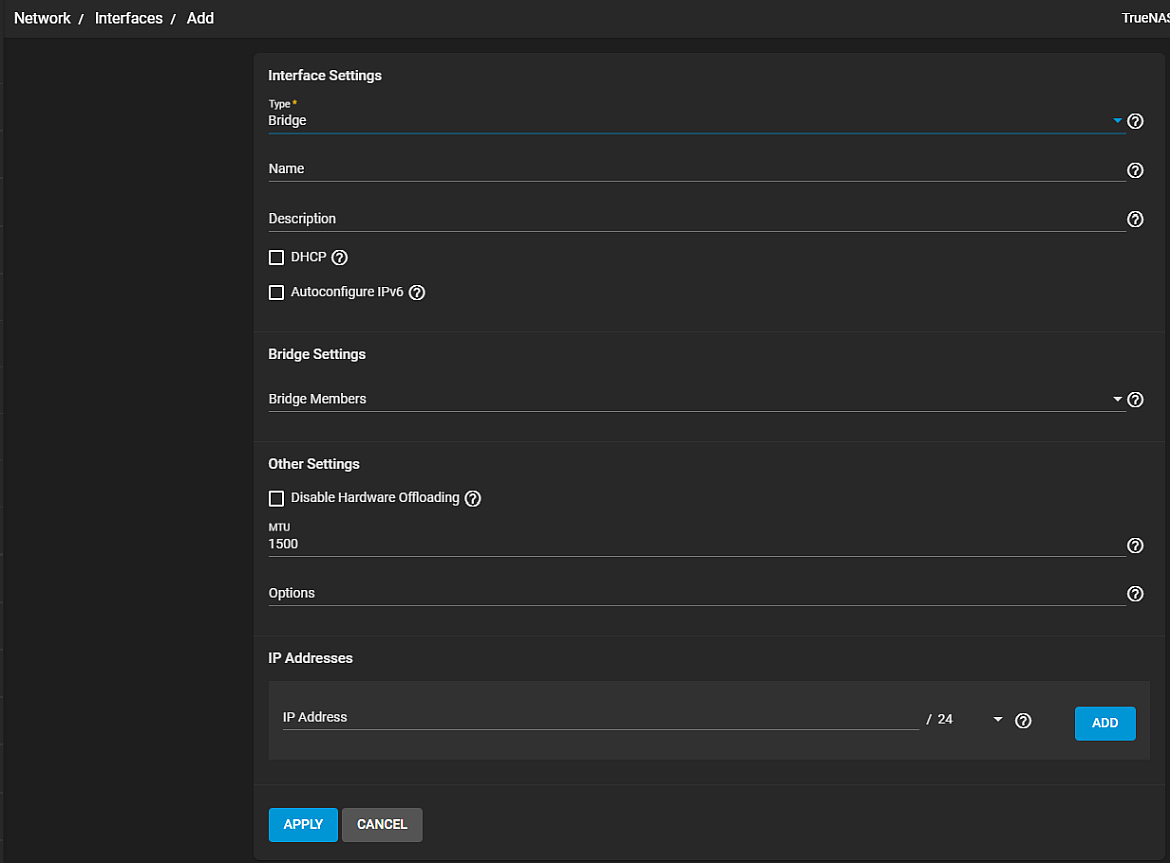
To set up a bridge interface, go to Network > Interface > Add.

Select Bridge as the Type and enter a name for the interface. The name must use the format bridgeX*, where *X* is a number representing a non-parent interface. It is also recommended to add any notes or reminders. Enter details about this particular bridge in **Description**.
The next section is Bridge Settings. Use the dropdown list next to Bridge Members to select the correct interfaces. Configure the remaining interface options to match your networking needs.
See Interfaces Screen for more information on settings.
Every kind of network interface has common settings:

Disabling Hardware Offloading can reduce network performance. It is not recommended.
Disabling this option is sometimes necessary. For example, when the interface is managing jails, plugins, or virtual machines.
MTU stands for maximum transmission unit. It is the largest protocol unit for transferring data. MTU size varies. Physical hardware and available network interfaces determine the largest workable MTU size. 1500 and 9000 are standard Ethernet MTU sizes. The recommendation is to use the default 1500. The permissible range of MTU values is 1492-9216. Leaving this field blank sets the default value of 1500.
You can enter more tuning ifconfig settings in the Options.
Additional aliases for the interface can also be defined:

It is possible to define either IPv4 or IPv6 addresses and subnets from 1-32. Clicking Add provides another field for defining an IP address.
Related Content
- Interfaces Screen
- Network Summary
- Network Summary Screen
- Setting Up Link Aggregations
- Setting Up a Network VLAN
- Setting a Static IP Address for the TrueNAS UI
- Static Routes Screen
- Editing a Physical Interface
- IPMI Screen

